How to Create Your First Webinar
Wish to make the maximum impression right from the word – Go? Here’s a step-by-step guide to help you create your first webinar using ProProfs WebinarNinja:
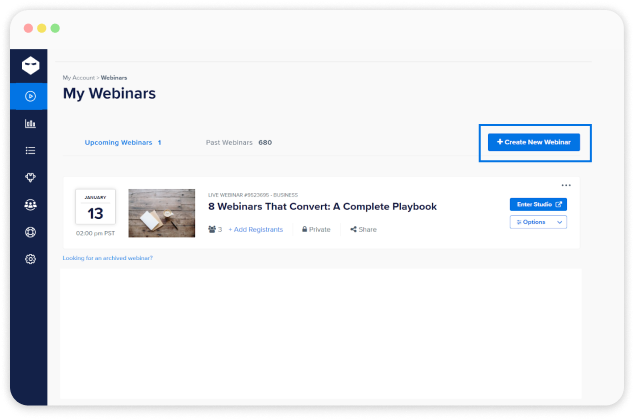
Once you’re on your WebinarNinja dashboard, click the “+ Create New Webinar” button. This will take you to the next screen, where you can begin designing your webinar.

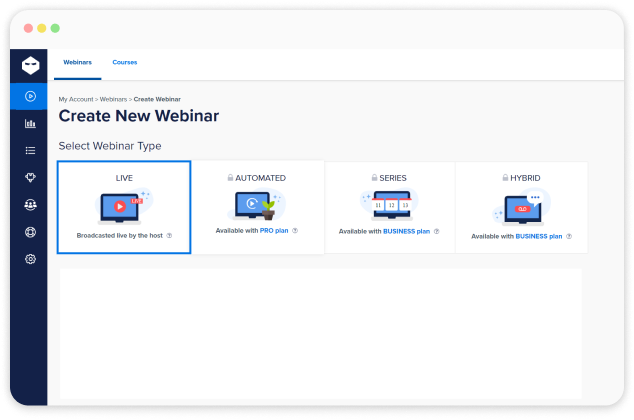
WebinarNinja provides different webinar options, such as:
Here, let’s create a Live webinar. For this, select “Live” to proceed.

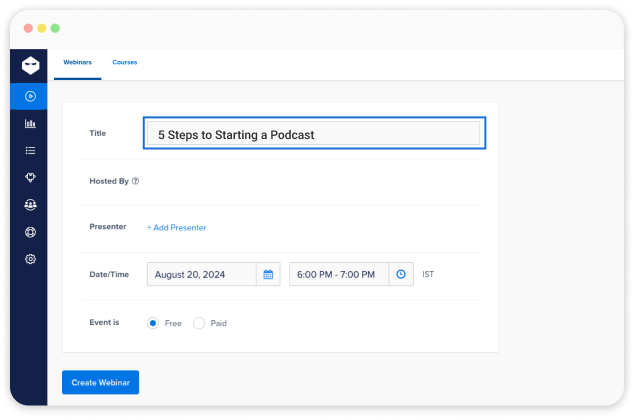
Now, it’s time to fill in the core details of your webinar. You’ll need to:
This page also allows you to configure other settings, like the timezone, to ensure everything runs smoothly for you and your attendees.

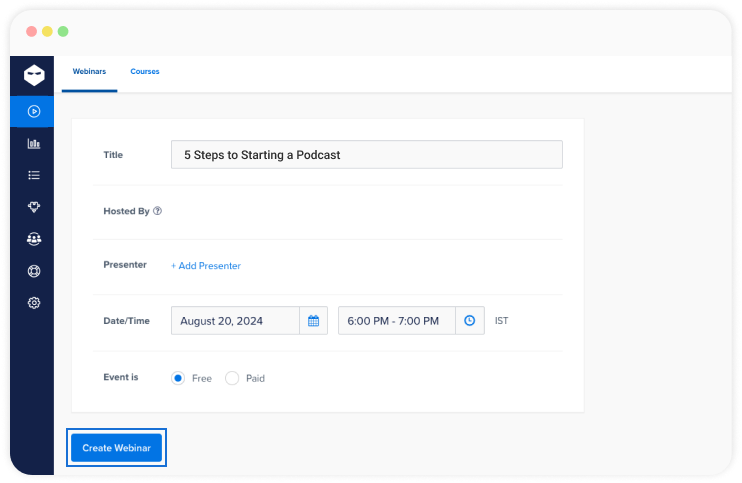
After setting up all the details, click on the “Create Webinar” button.

Initially, your webinar will be saved as a draft. You can still make edits to the content, registration settings, and other details up to 30 minutes before the webinar’s start time. Once done, publish your webinar to make it live. Ta-da! Here’s your first webinar with WebinarNinja. Do not forget to promote it well and get maximum response from your audience.


![Why Choose Webinars for Your Business [Webinar Blueprint - Part 1]](/courses/create-your-first-webinar/img/part-1.png)
![How to Plan & Conduct a Successful Webinar [Webinar Blueprint - Part 2]](/courses/create-your-first-webinar/img/part-2.png)
![How to Create Webinars That Drive Sales [Webinar Blueprint - Part 4]](/courses/create-your-first-webinar/img/part-4.png)