That’s the end of today’s webinar session.See you again. Goodbye.
Is that how webinars end regularly?
Well, I have been in the webinar industry for over a decade now, and believe me, using a good webinar thank you page can be the beginning of something fruitful for you.
Done right, it can transform even casual attendees into loyal customers while offering an opportunity to nurture leads and boost conversions.
Wish to know how this simple acknowledgment can deliver great returns?
Here’s a detailed guide on the thank you page for webinars, along with their benefits, examples, and steps to create them.
But before that, here’s a quick video to help you create automated webinars easily
What Is a Webinar Thank You Page?
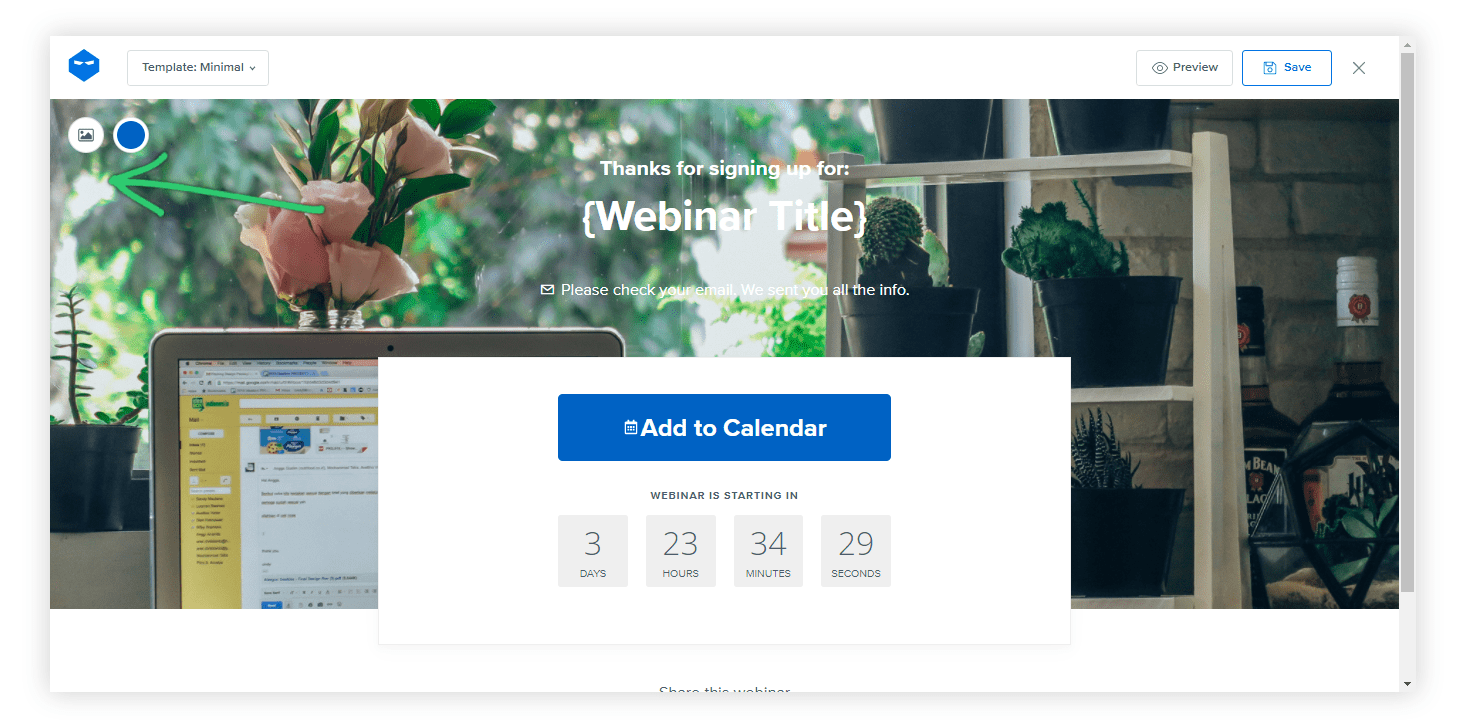
A webinar thank you page is a web page that attendees see right after they finish watching a webinar or sign up for a webinar. It’s a simple page that thanks them for attending or signing up and often includes useful information like a link to replay the webinar, a summary of key points, or a call to action like signing up for more events.
For instance, a survey found that 17% of attendees sign up on the day of the webinar.
No doubt, a good thank you page can increase conversions and also offer bonus materials or discounts to keep participants engaged in your content or products.
Why Do You Need a Webinar Thank You Page?
After a successful webinar or sign-up, the journey with your attendees doesn’t have to end—it’s the perfect moment to leave a lasting impression and set the stage for continued engagement. Here are a few reasons why you need a webinar thank you page:
- Make Attendees Feel Appreciated
Creating a thank-you page for your webinar shows your attendees that you value their time and participation.
- Provide Next Steps
This page can guide attendees on what to do next, whether it’s accessing a recording, downloading materials, or signing up for future events.
- Offer a Way to Stay Connected
A thank-you page can include links to your social media, newsletter, or website, allowing attendees to stay in touch and learn more about your offerings.
- Gather Feedback
Include a short survey or feedback form on the page to understand attendees’ thoughts and experiences.
- Share Additional Resources
You can use the thank-you page to share extra resources, like blog posts, guides, or other webinars that might interest your attendees.
What Are the Key Elements of a Webinar Thank You Page?
A well-crafted webinar thank you page is the perfect finishing touch that leaves a lasting impression, turning attendees into loyal fans.
Let’s understand the key elements of a good webinar thank you page:
- Confirmation Message:
The first and foremost feature is a warm, reassuring confirmation that acknowledges their action—be it registration or attendance. This message sets a positive tone, thanking them for their interest and making them feel valued right from the start.
- Next Steps or Instructions:
This section is crucial for guiding participants on what to do next. It might include clear instructions on how to join the upcoming webinar, such as links to calendar invites or details on how to access the replay if they’ve already attended. It ensures there’s no confusion, keeping everything smooth and hassle-free.
- Downloadable Resources:
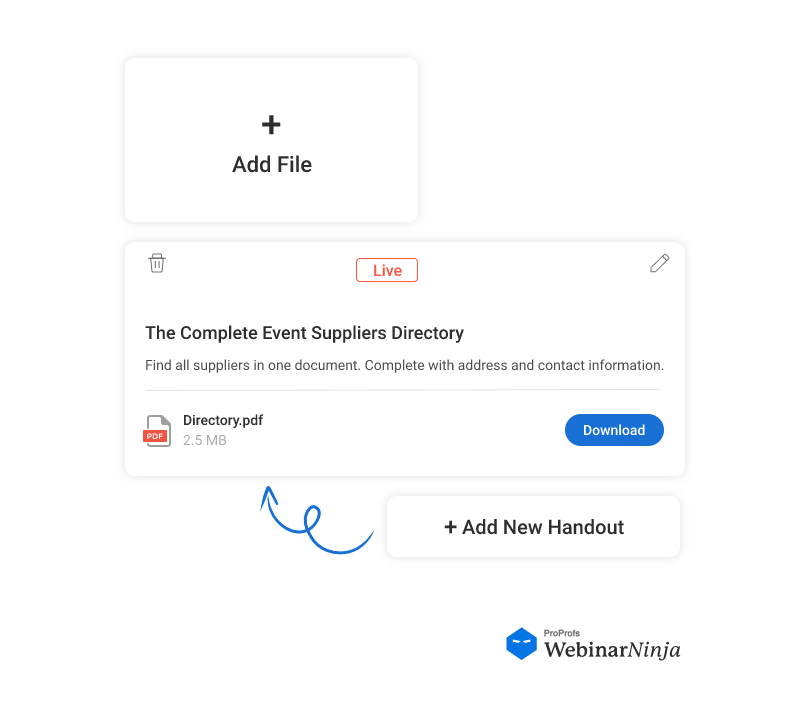
Additional materials like presentation slides, exclusive ebooks, or practical checklists can enhance the webinar’s value. These resources provide deeper insights into the topic and give attendees something tangible to take away, extending the learning experience beyond the session.
- Social Media Links:
Include easy-to-find social media buttons to encourage participants to share their excitement and spread the word. This will not only boost your event’s visibility but also create a community around your content as attendees engage with their networks.
- Call-to-Action (CTA):
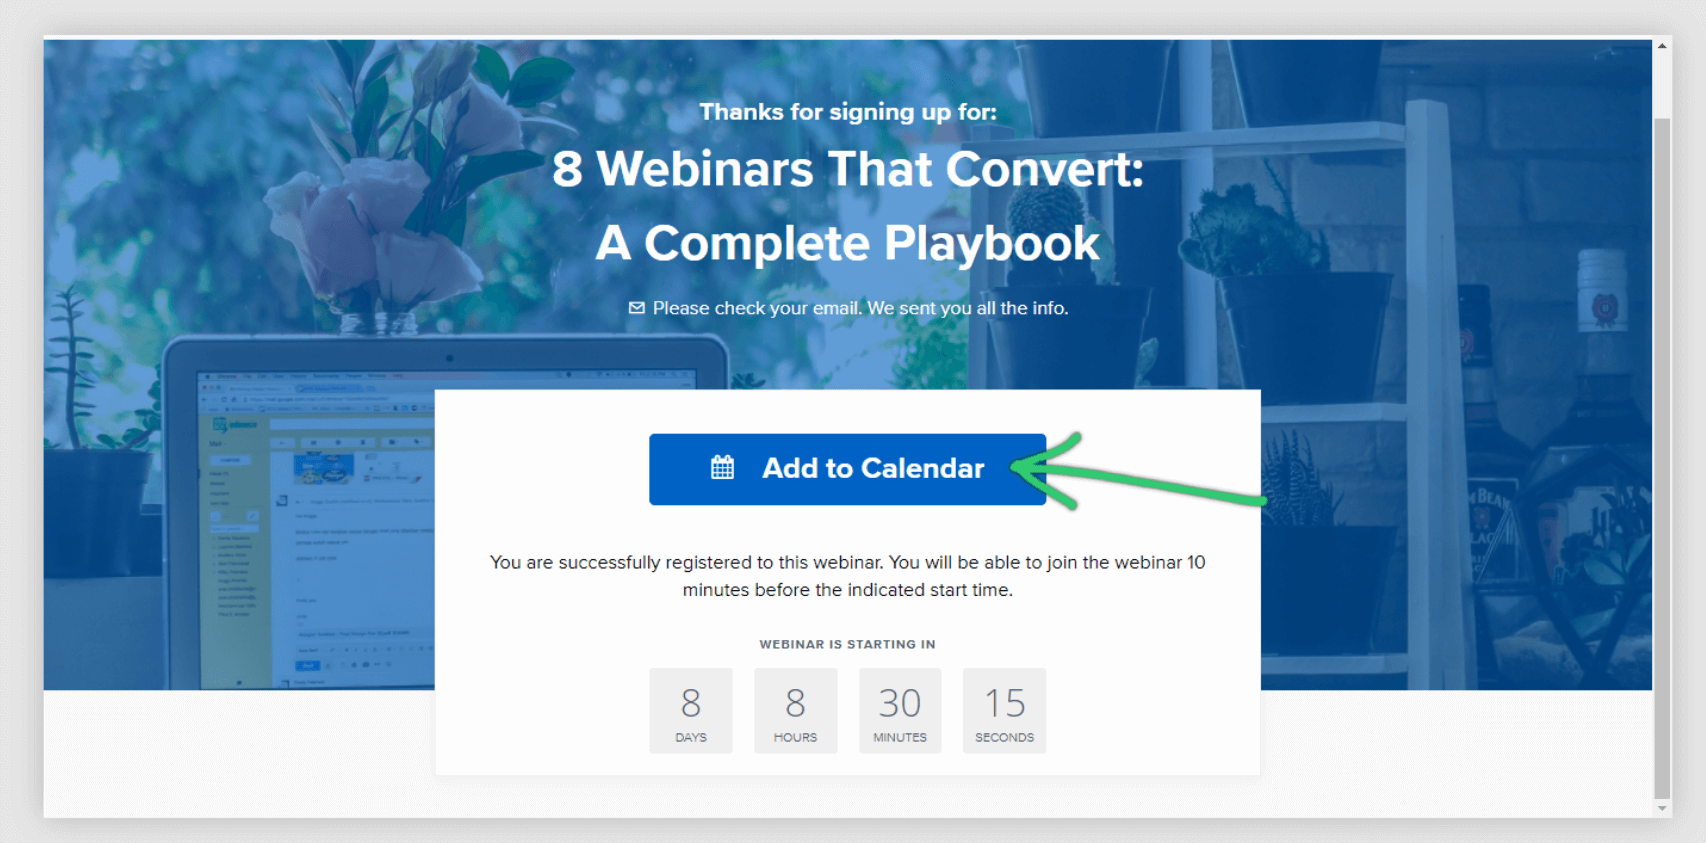
A strong CTA directs participants toward further engagement. Whether they sign up for your newsletter, explore upcoming events, or follow your social media channels, this element keeps the relationship going and helps build a loyal audience base.
- Contact Information:
Providing a way for attendees to reach out if they have questions or need support fosters trust and accessibility. Clear contact details or a direct link to a support page ensure attendees feel supported and can easily find answers if they encounter any issues.
- Feedback Form:
Gathering feedback through a short survey helps you understand what worked well and what could be improved. This invaluable insight can shape future webinars, show that you value your audience’s opinions, and continually strive to deliver the best experience possible.
Also Read: 11 Features Every Webinar Software Must Have
8 Types of Thank You Pages for Webinars
Let’s check out some webinar thank you page examples and types to help you get a better idea:
1. Standard Thank You Page
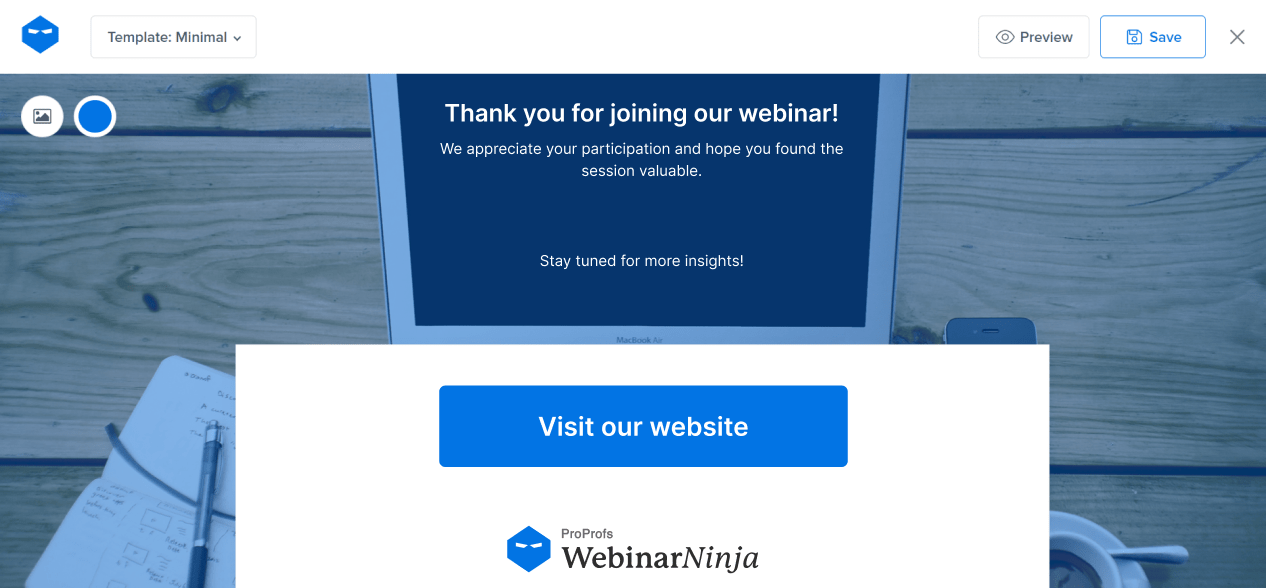
This is a simple page that thanks attendees for participating. It may include a brief message of appreciation and a reminder of any key takeaways.
2. Resource Page
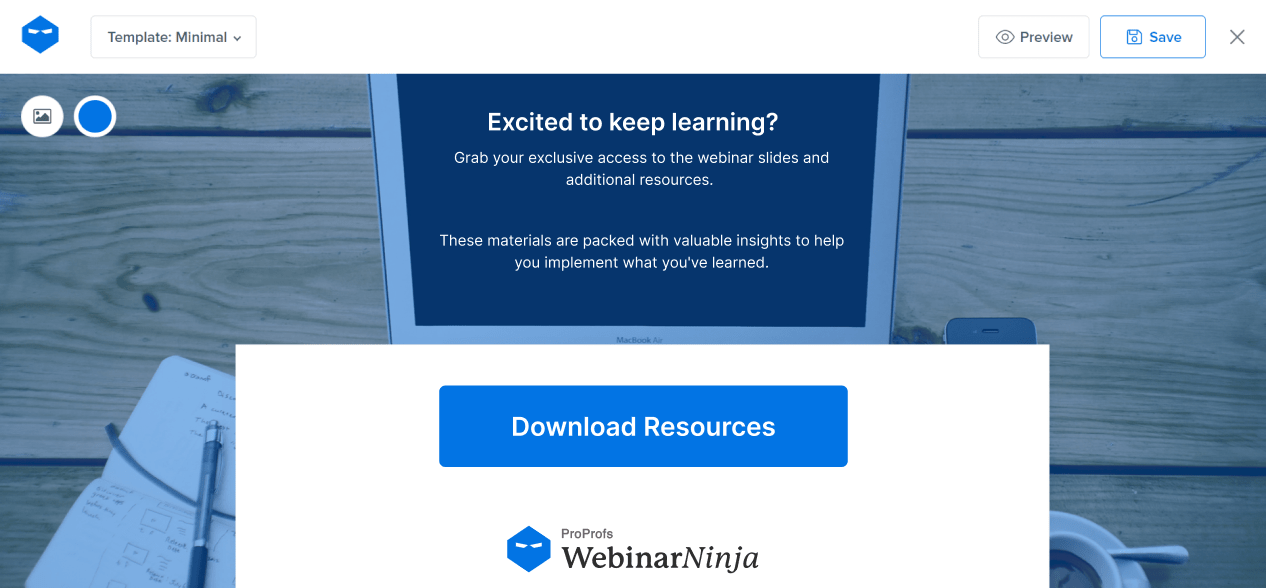
This type of thank you page provides additional resources such as presentation slides, related articles, eBooks, or other downloadable content that complements the webinar topic.
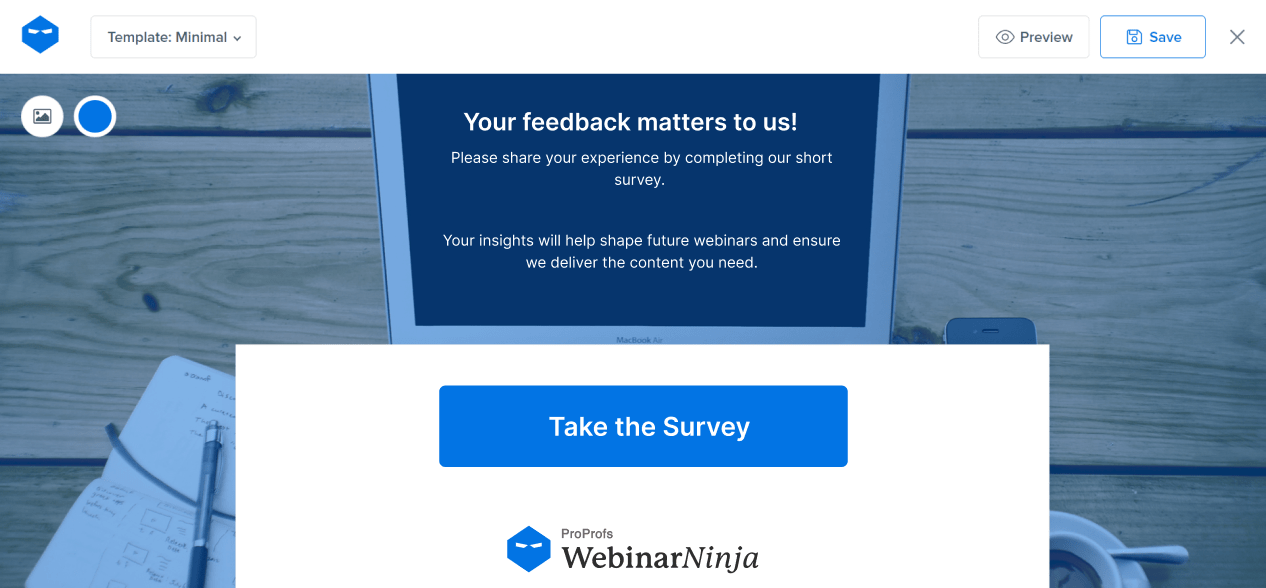
3. Feedback and Survey Page
A thank you page that includes a link to a post-webinar survey or feedback form. This helps gather attendees’ thoughts on the content, delivery, and overall experience.
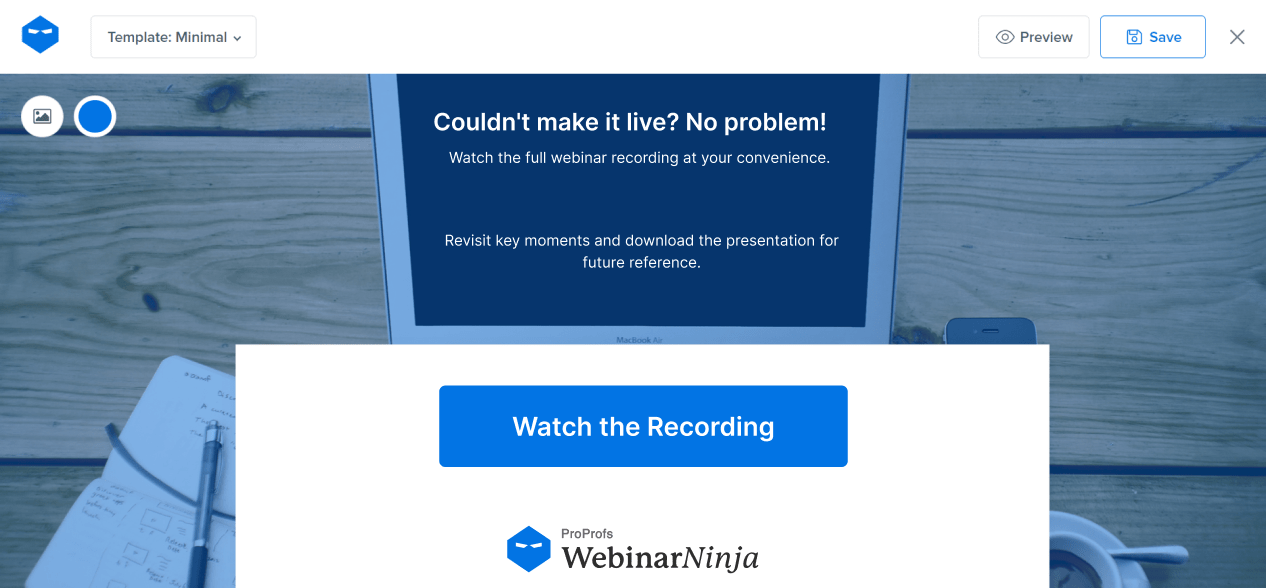
4. On-Demand Webinar Access Page
This page provides access to a recorded version of the webinar for attendees who want to rewatch it or for those who missed it. It can also include options for downloading the recording.
5. Call-to-Action (CTA) Page
This page encourages attendees to take further action, such as signing up for a related course, subscribing to a newsletter, or booking a consultation.
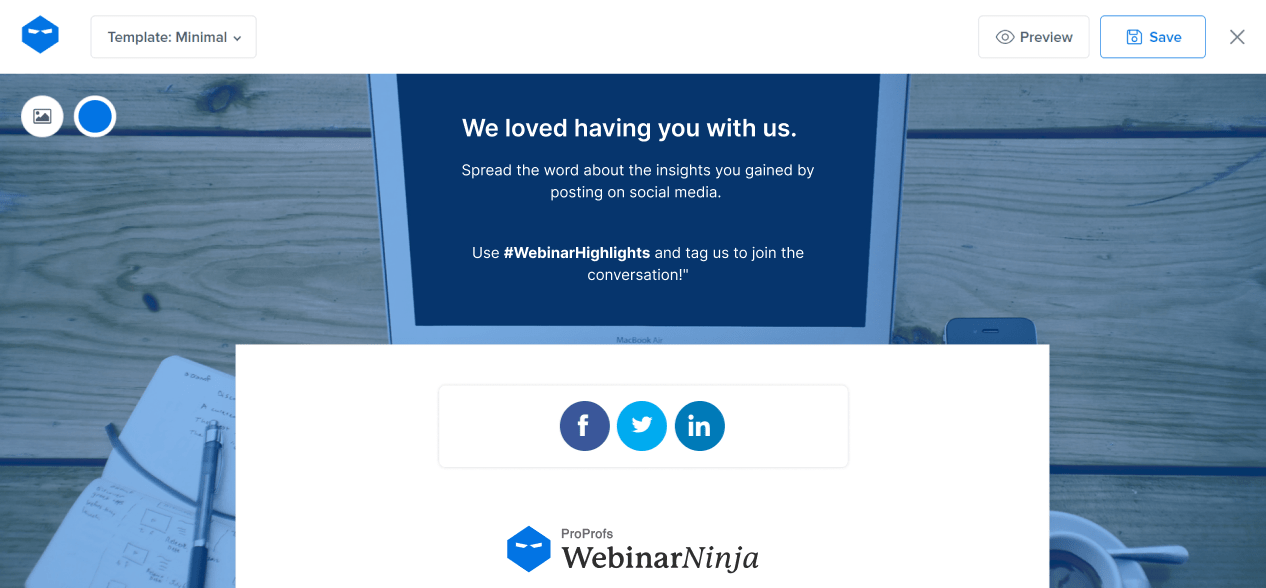
6. Social Sharing Page
Encourages attendees to share their experience on social media. It might include pre-written posts or hashtags related to the webinar topic.
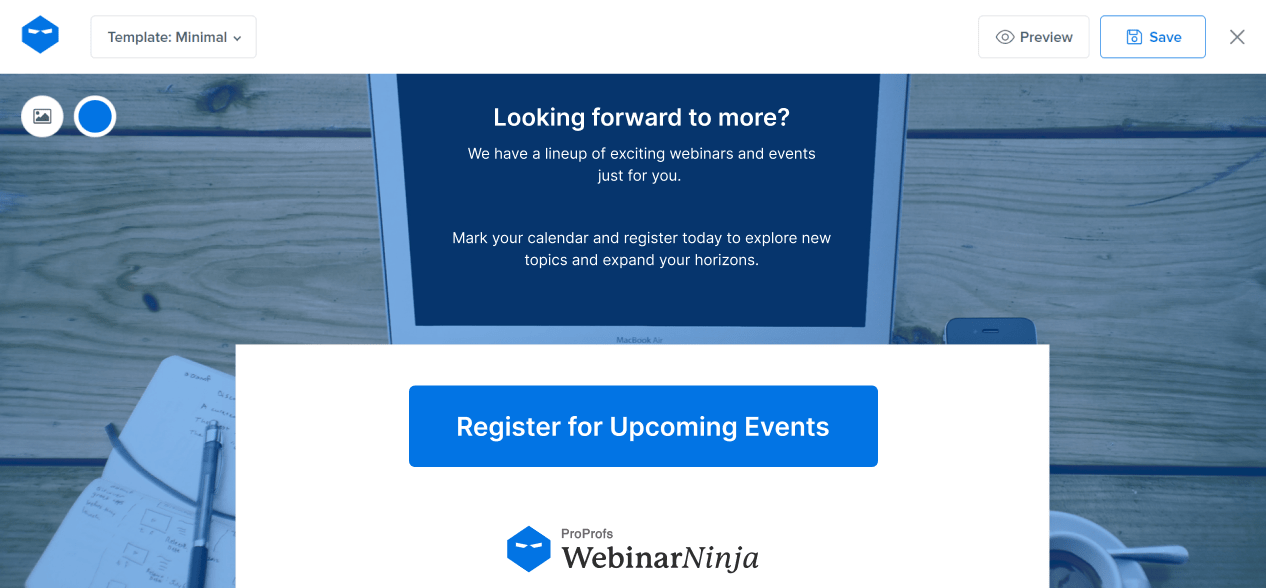
7. Upcoming Events Page
Highlights upcoming webinars, events, or courses, inviting attendees to register for more learning opportunities.
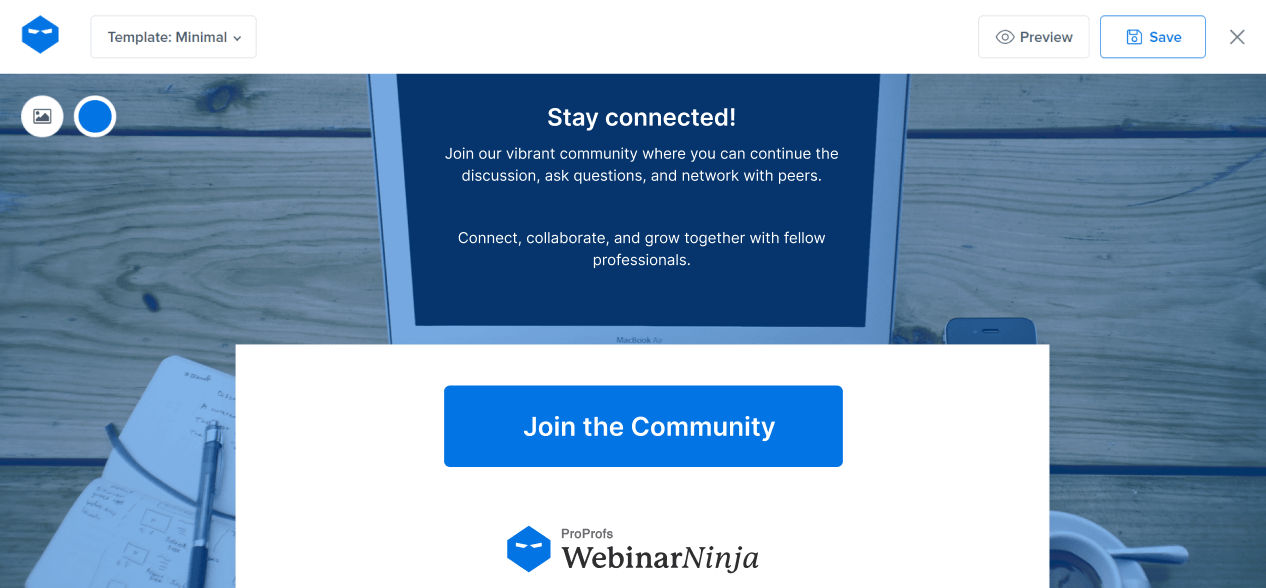
8. Community and Networking Page
Promotes joining a community group, forum, or social media group where attendees can continue the discussion and network.
What Are The Benefits of a Webinar Thank You Page?

“Please and thank you are still magic words.”


A webinar thank you page isn’t just a polite gesture; it’s a strategic opportunity to leave a lasting impression and foster a deeper connection with your audience.
Here are the major benefits that showcase its importance:
- Enhance Attendee Appreciation
A thank you page helps express genuine gratitude to your attendees, making them feel acknowledged and valued. This simple gesture can foster a positive connection and encourage future participation.
- Provide Access to Exclusive Resources
By offering links to additional resources, such as presentation slides, e-books, or further reading materials, you extend the value of your webinar. This helps attendees continue learning and deepens their understanding of the topic.
- Encourage Future Engagement
Use the thank you page to invite attendees to follow your social media channels, subscribe to your newsletter, or join a community group. This will keep them engaged with your brand and inform them about future events and content.
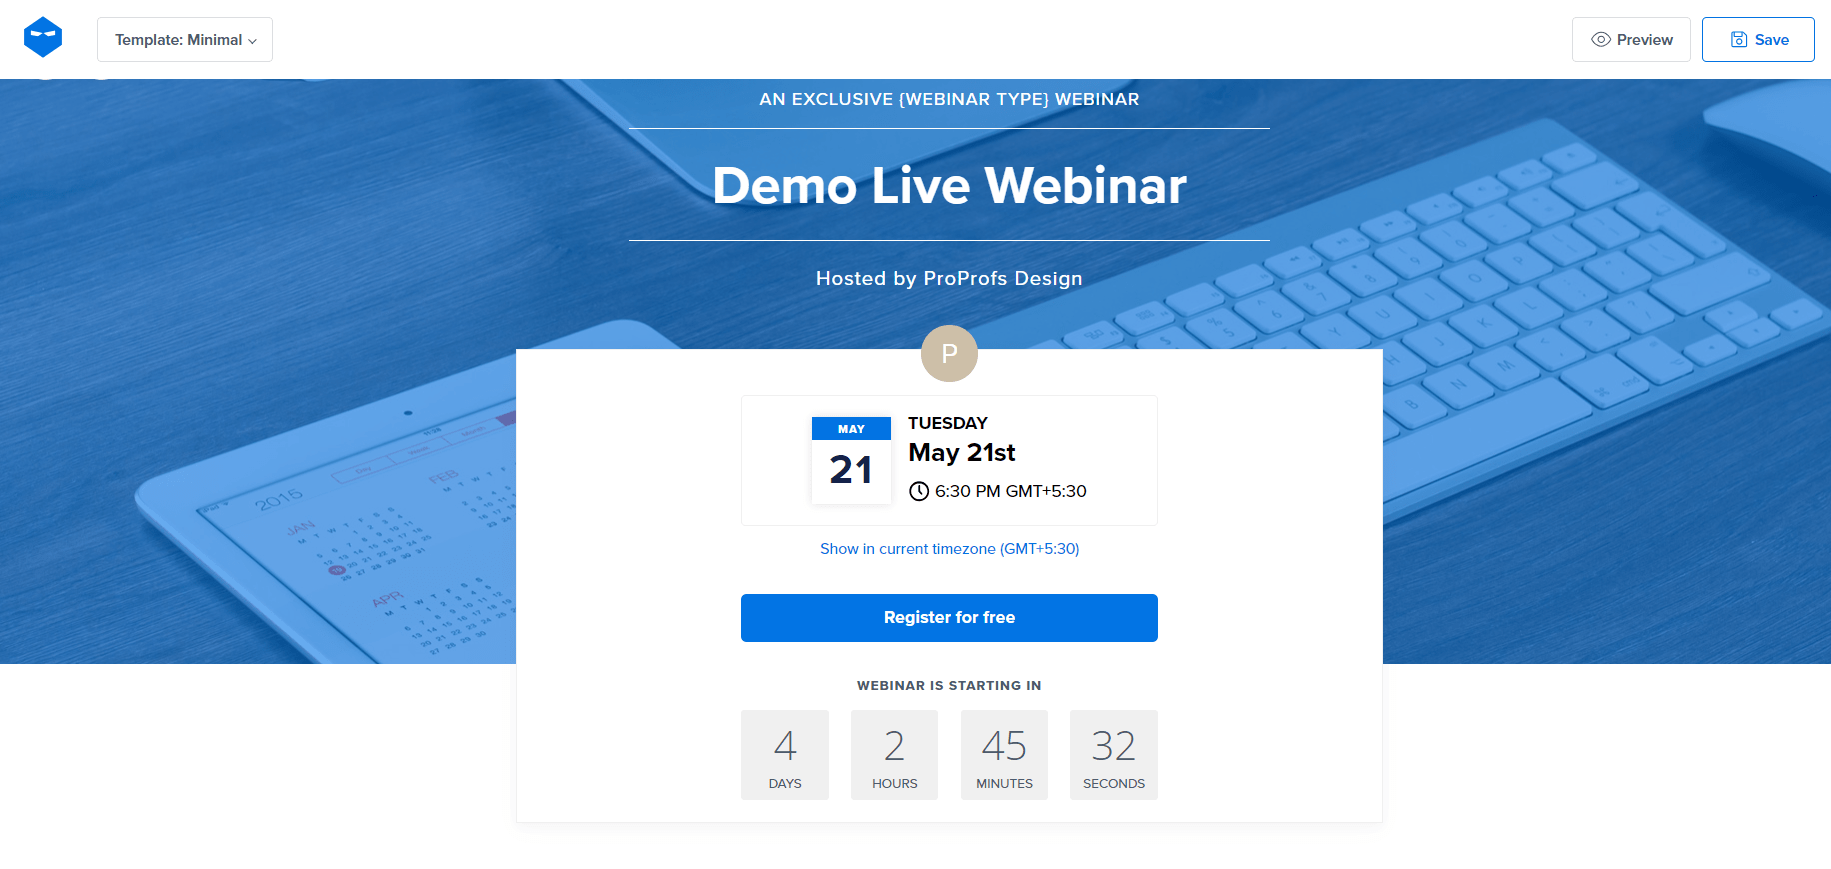
- Facilitate Easy Registration for Upcoming Events
Promote your next webinars or events directly on the thank you page. Attendees who found your content valuable are more likely to register for future sessions, increasing attendance and building a loyal audience.

- Gather Valuable Feedback for Improvement
Include a short survey or feedback form on the thank you page to collect insights on what worked well and what could be improved. This information is crucial for refining your future webinars and delivering better experiences.
- Upsell Relevant Products or Services
Highlight related products, services, or courses that complement the webinar topic. This will not only add value to the attendee’s experience but also open up additional revenue streams for your business.
- Strengthen Brand Recall and Recognition
A well-designed thank you page that reflects your brand’s personality helps reinforce brand recognition. It’s an opportunity to leave a lasting impression and remind attendees of who you are and what you offer.
- Provide Contact Information and Support
Offer easy access to contact details or customer support links. This shows that you’re approachable and ready to assist, building trust and ensuring attendees can reach out if they have questions or need help.
How to Build a Webinar Thank You Page
Most good webinar tools allow you to create a good and engaging webinar thank you page within the tool.
Here, let’s check out the steps to build a webinar thank you page using WebinarNinja:
Step 1: Access Your Webinar
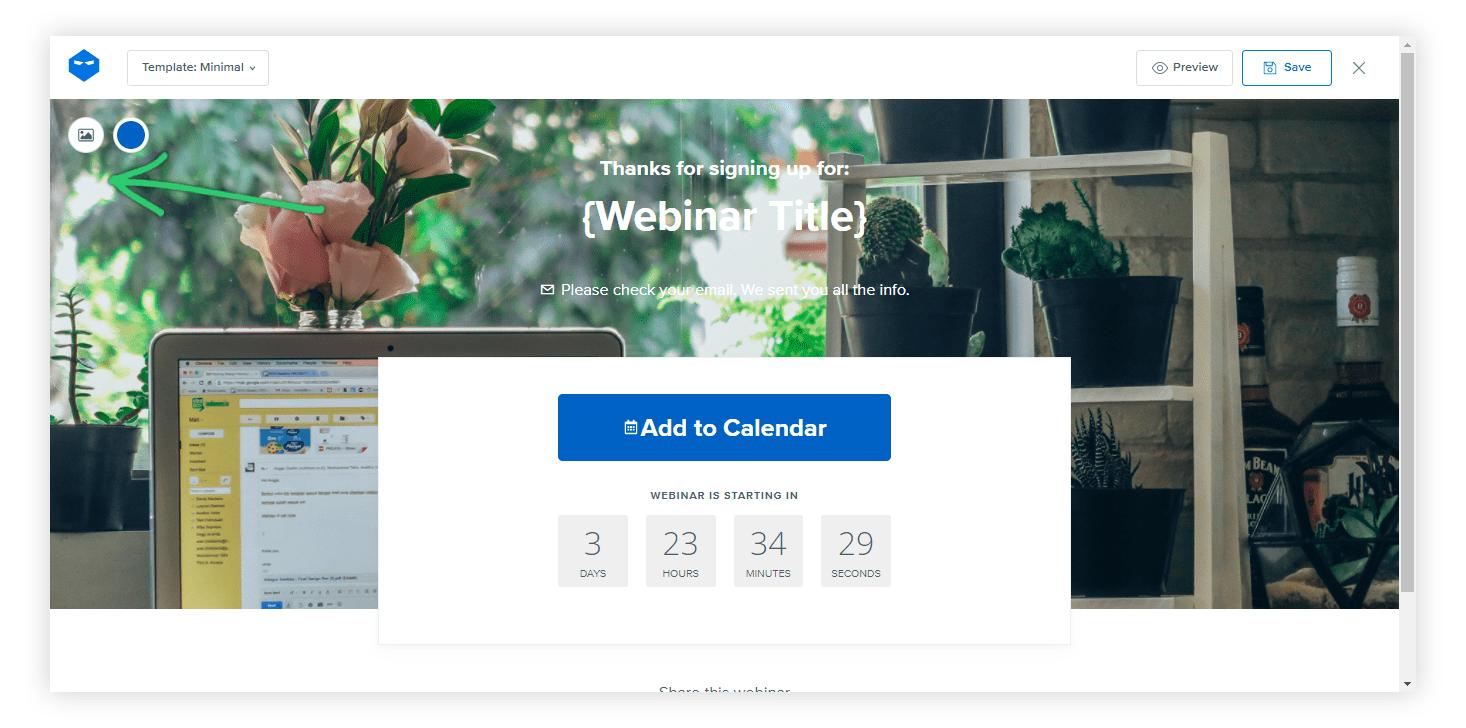
From your dashboard, go to the ‘My Webinars‘ section to view your list of webinars. Click on ‘Options’ and then select ‘Thank You Page Template’ from the drop-down menu.
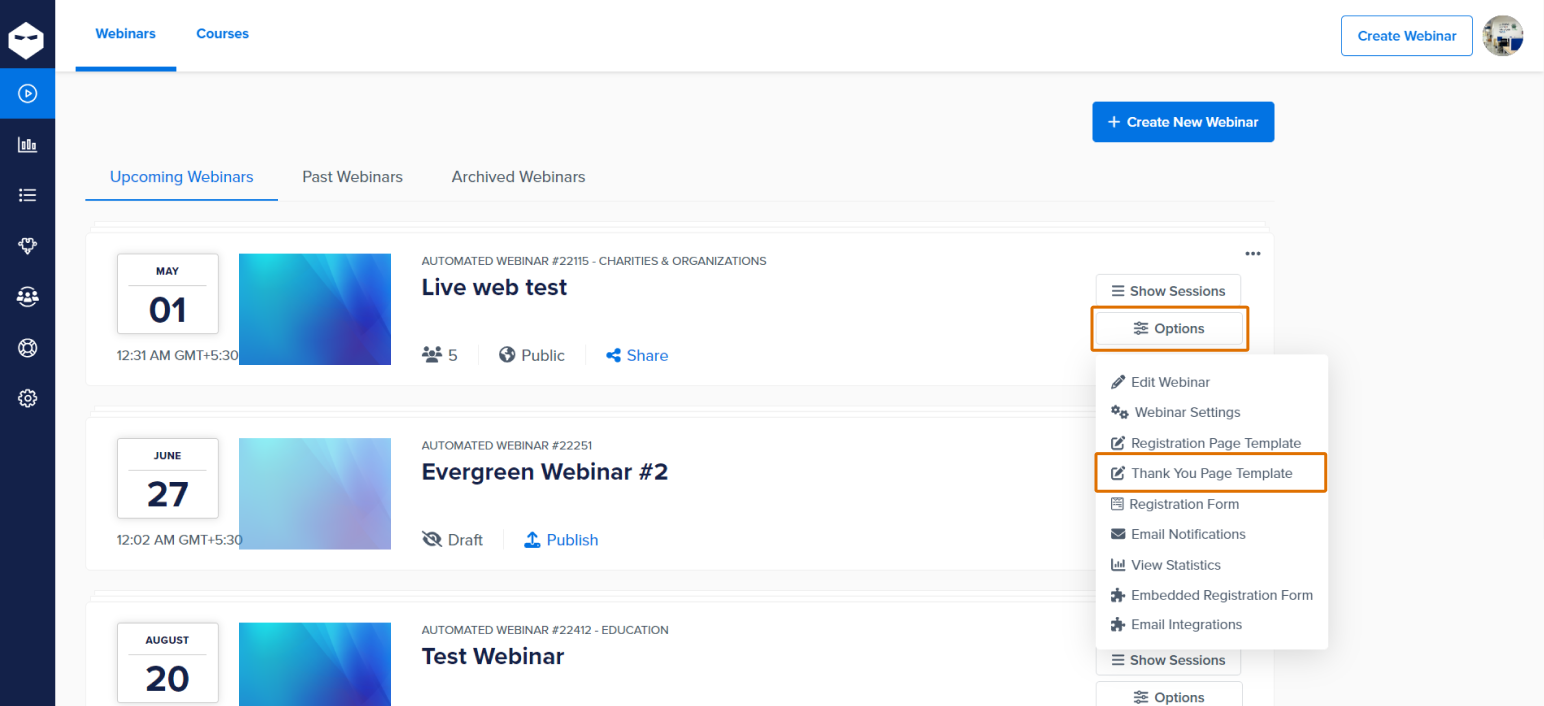

This will lead you to a page builder.

Step 2: Select the Page Template
There’s a drop-down menu in the top-left corner. You can choose from the WebinarNinja Templates or click on ‘My Saved Templates’ to pick from your saved templates.
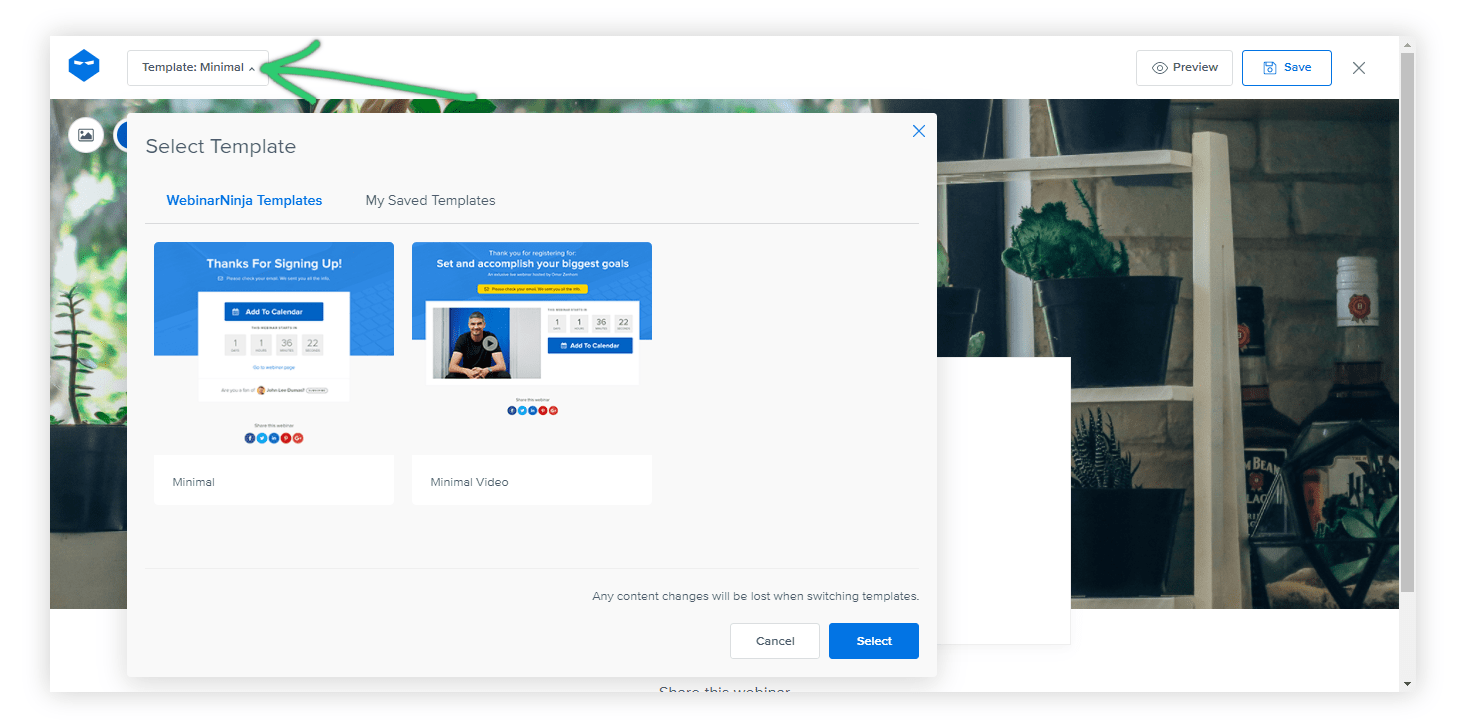

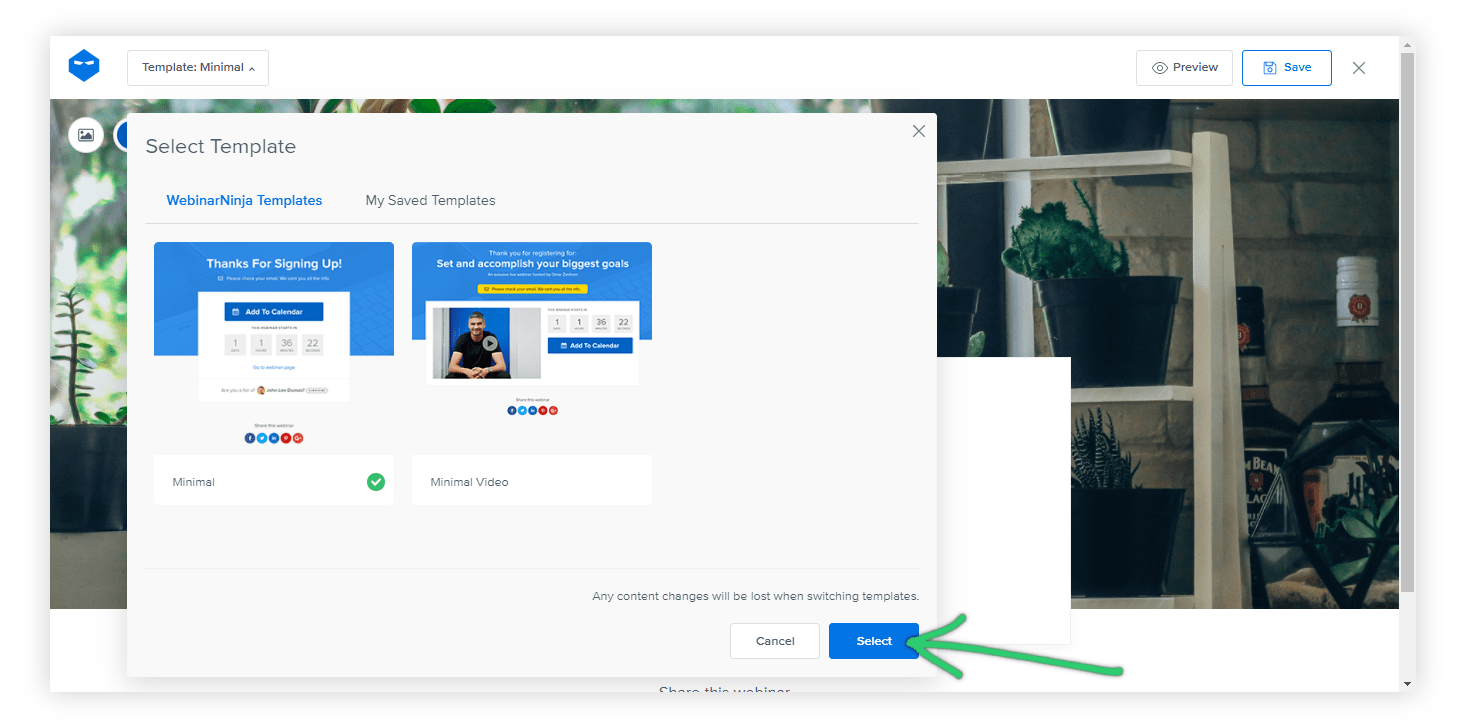
Click on ‘Select’ to move forward.

Step 3: Customize the Thank You Page
- Set the Background:
To change the background color, select the button at the top-left corner.
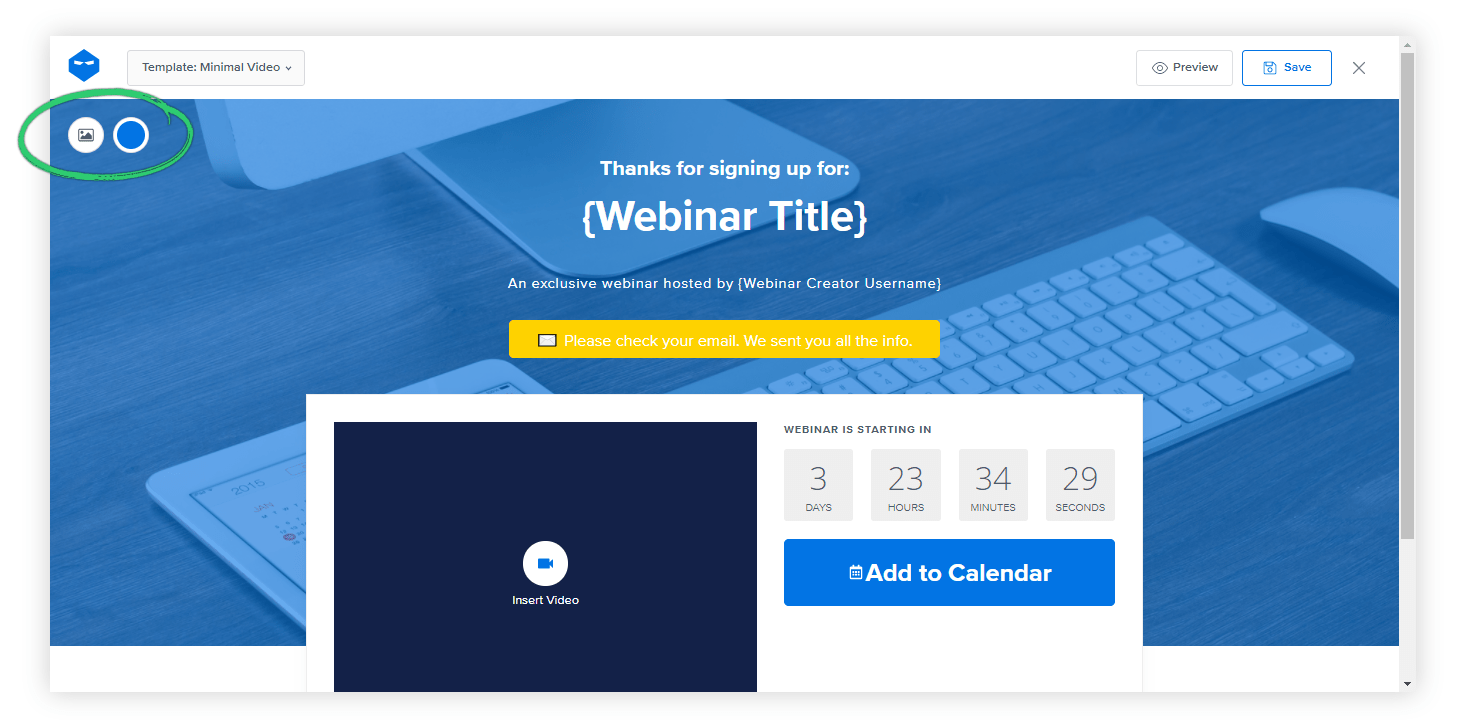

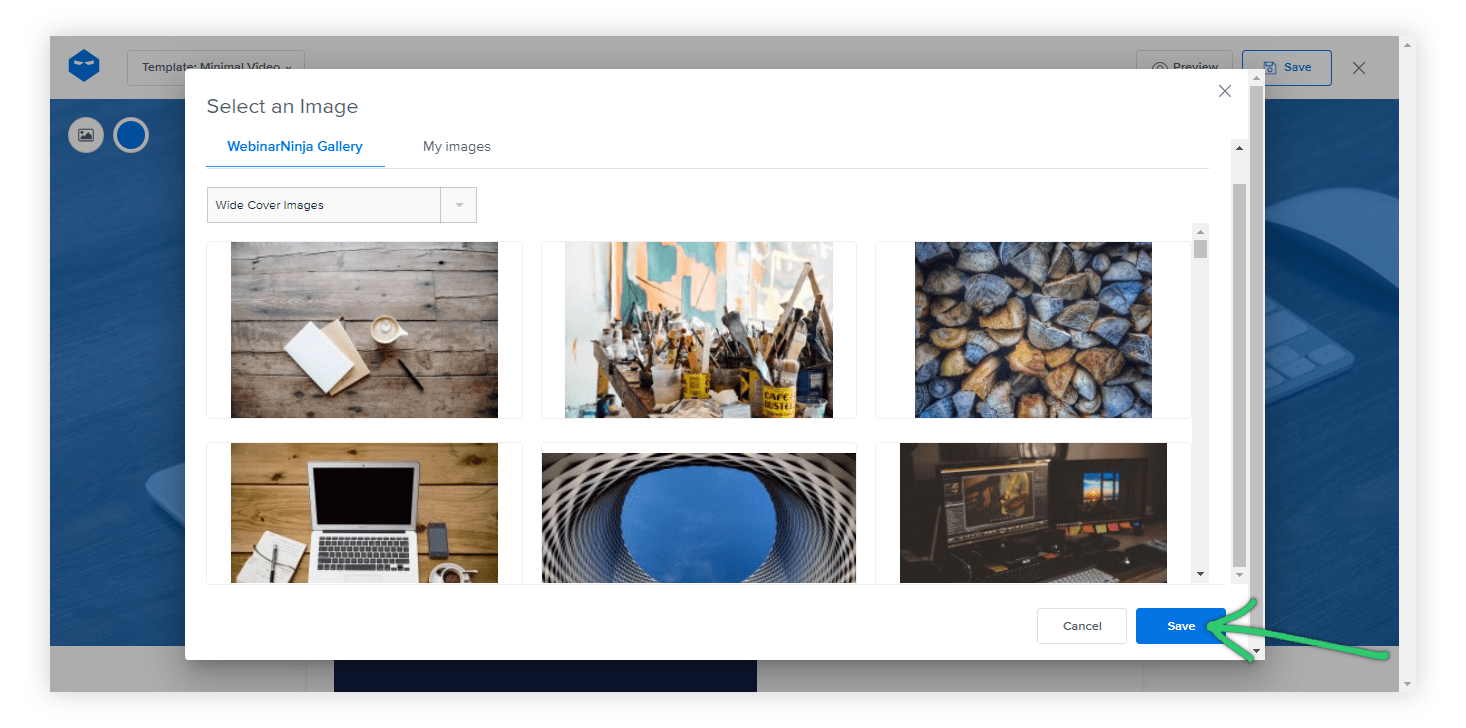
You can also select from stock images by clicking Select From Gallery and then choosing them from WebinarNinja Gallery or My Images. Choose an image, then click Save.

You can also upload a new image. For this, click the image button and then click Upload an Image.
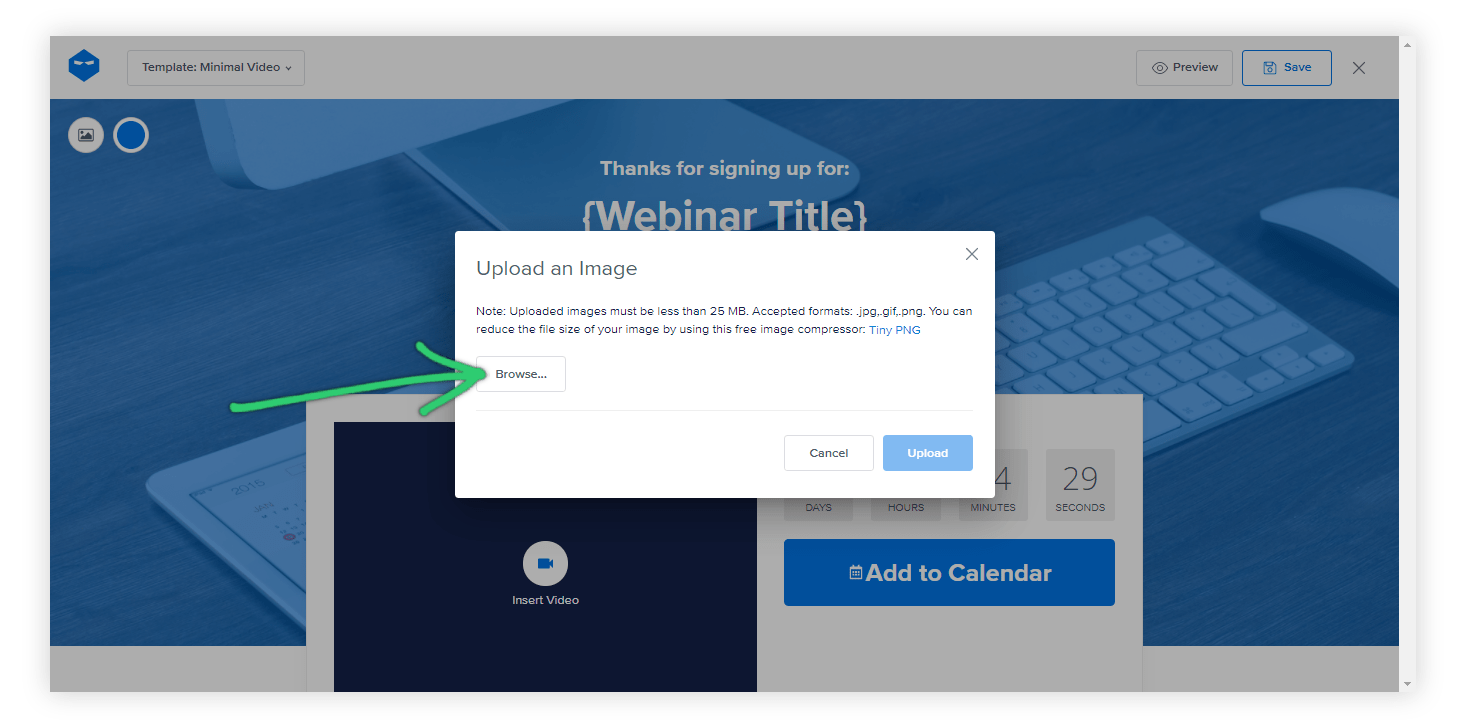

You can select your image in the appropriate resolution and format up to 2 MB in size. Click on Upload to upload your image.
- Edit the Text Block:
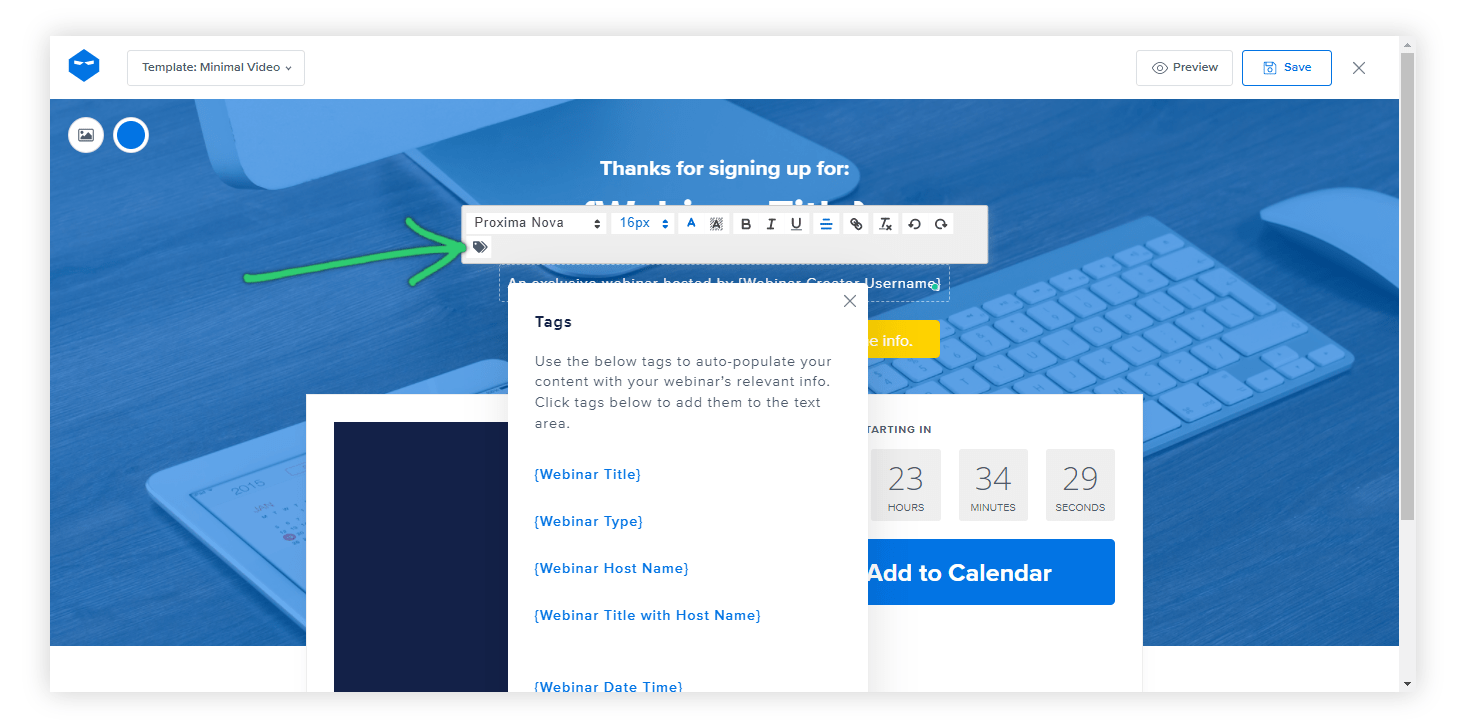
You can click on any text area and include your required formatting options in all different languages. This includes elements such as:
- Font
- Text size
- Text color
- Text highlight color
- Text styles – bold, italic, underlined
- Text alignment, etc.

- Add a Short Video:
You can embed a video message from the host thanking the attendees for registering.
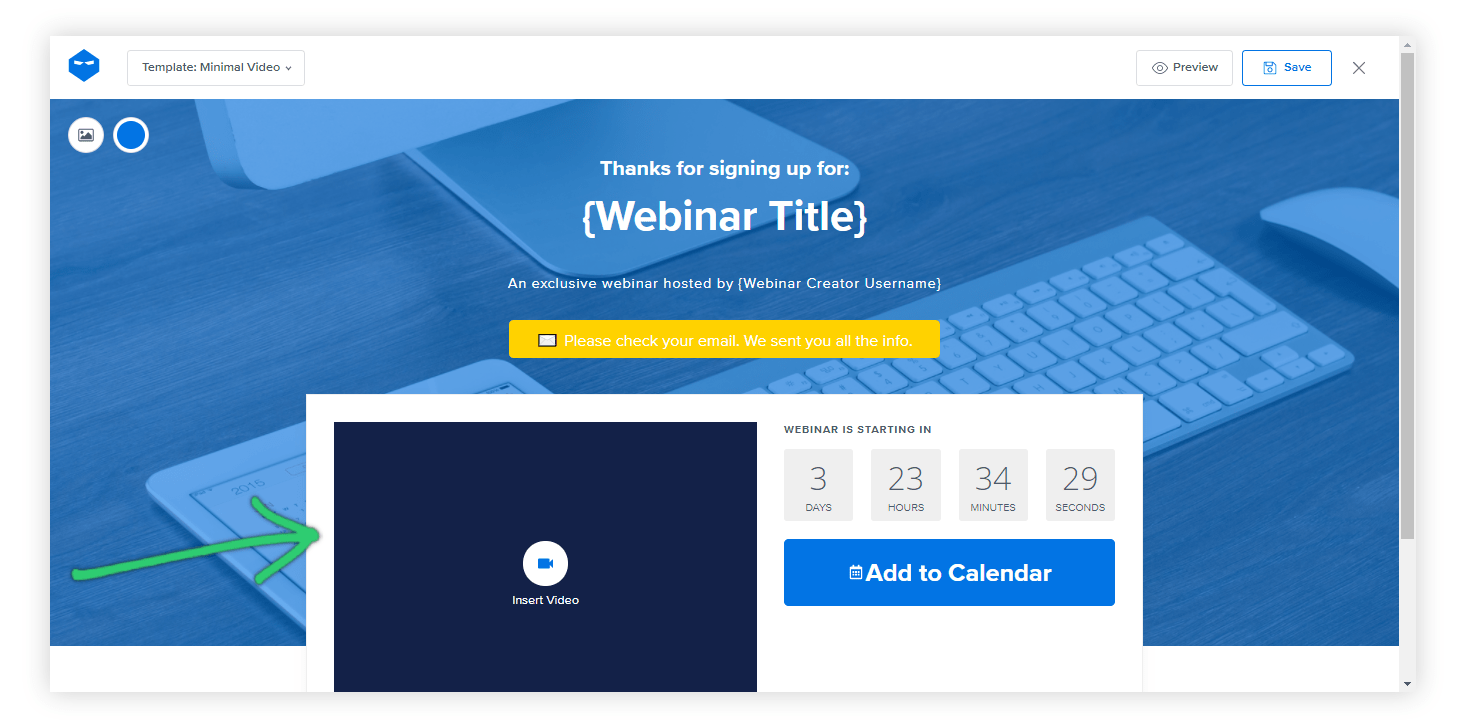

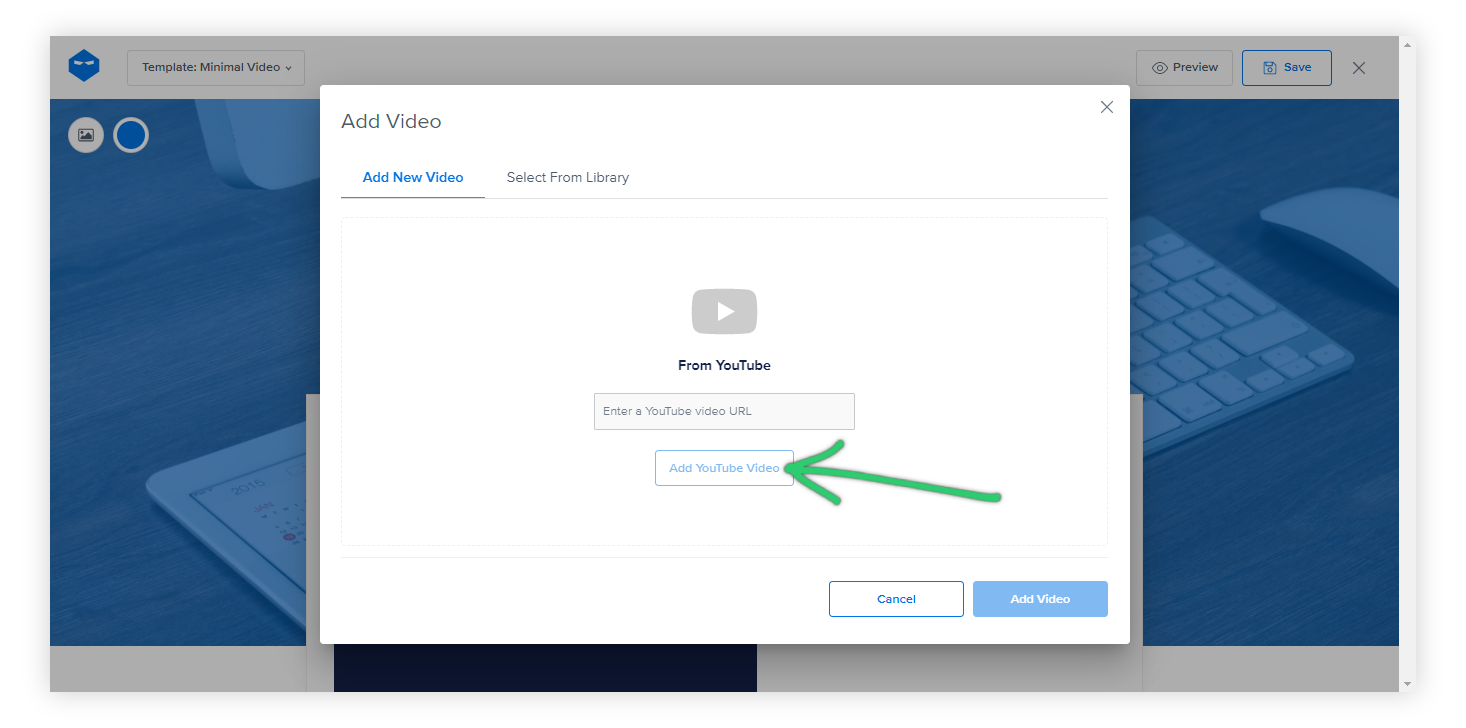
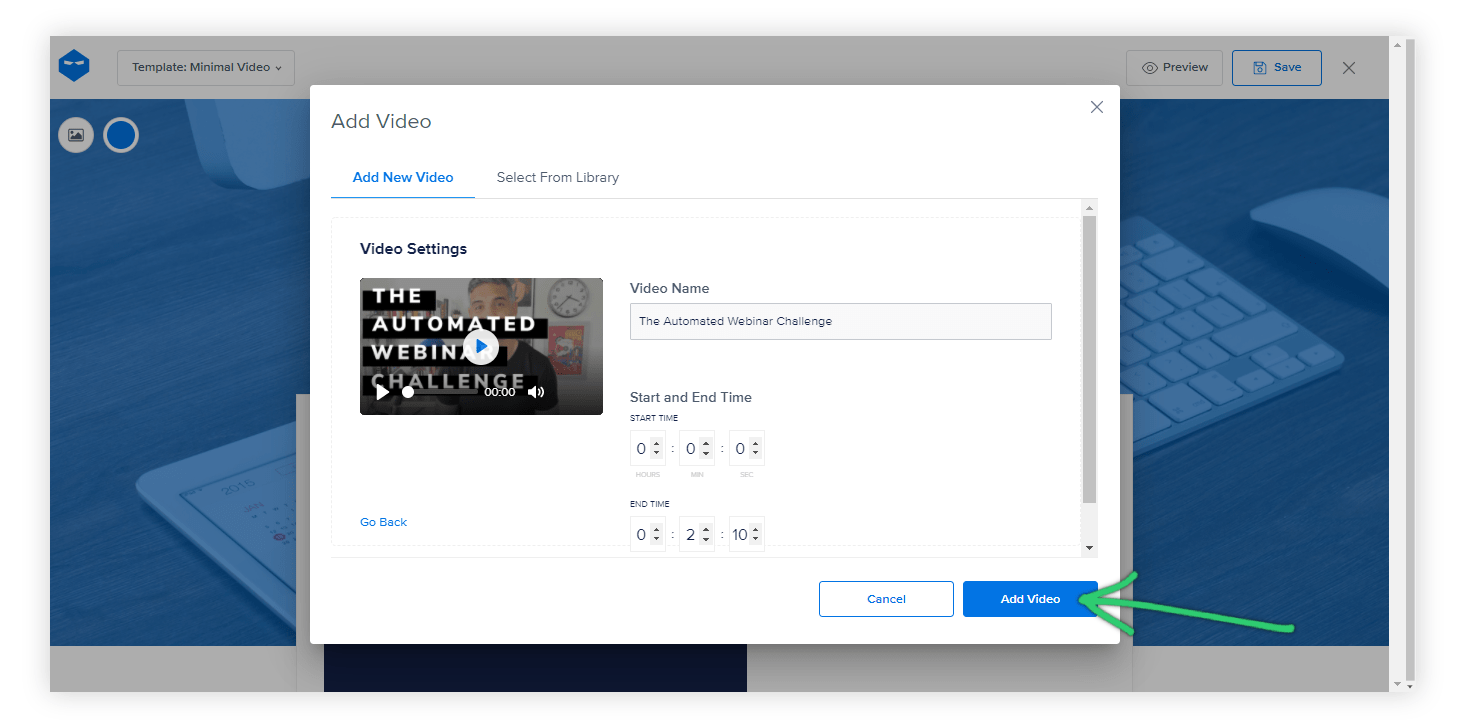
For this, you can choose a video from your library or Add a YouTube Video. You can also choose from previously added YouTube videos in your library.

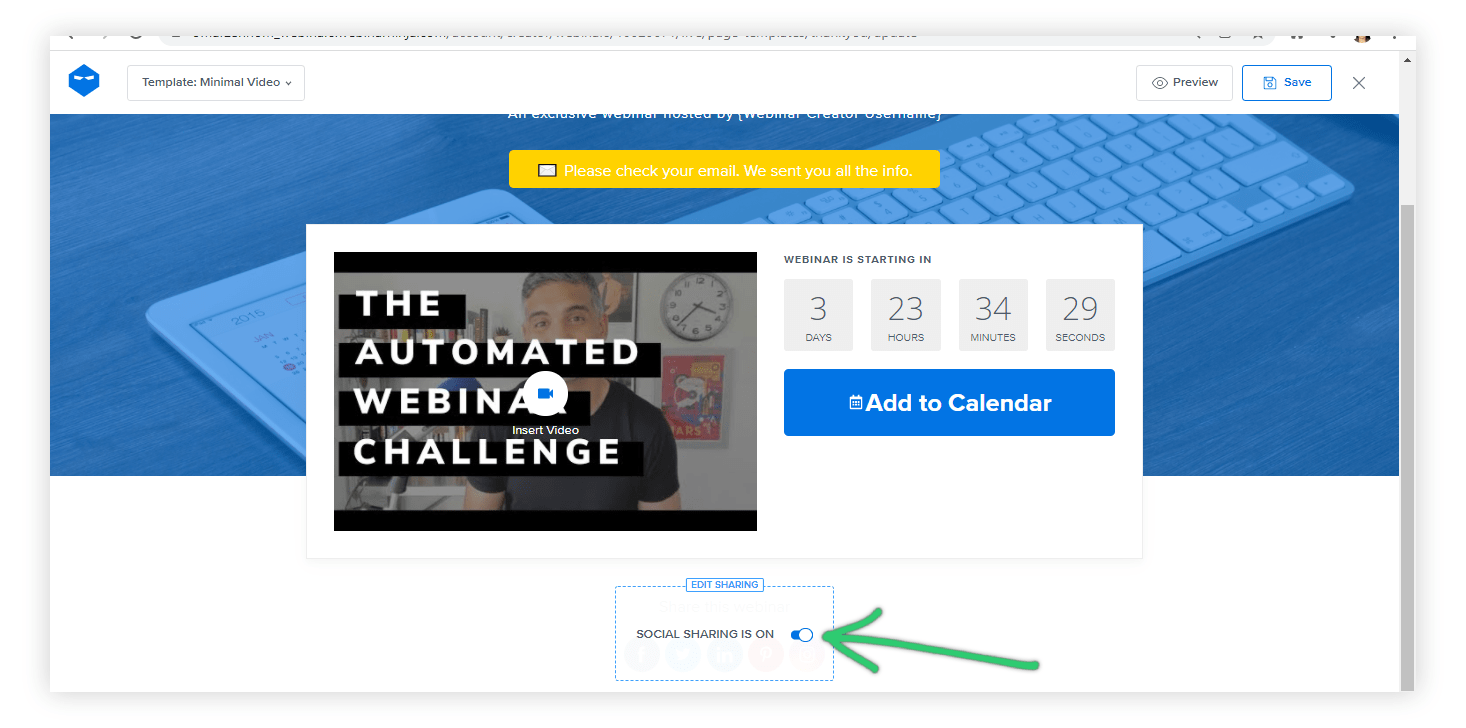
If you need to disable the countdown timer, you can do so by clicking on it and then clicking the toggle.

You can also disable the social media sharing buttons.

Step 4: Preview
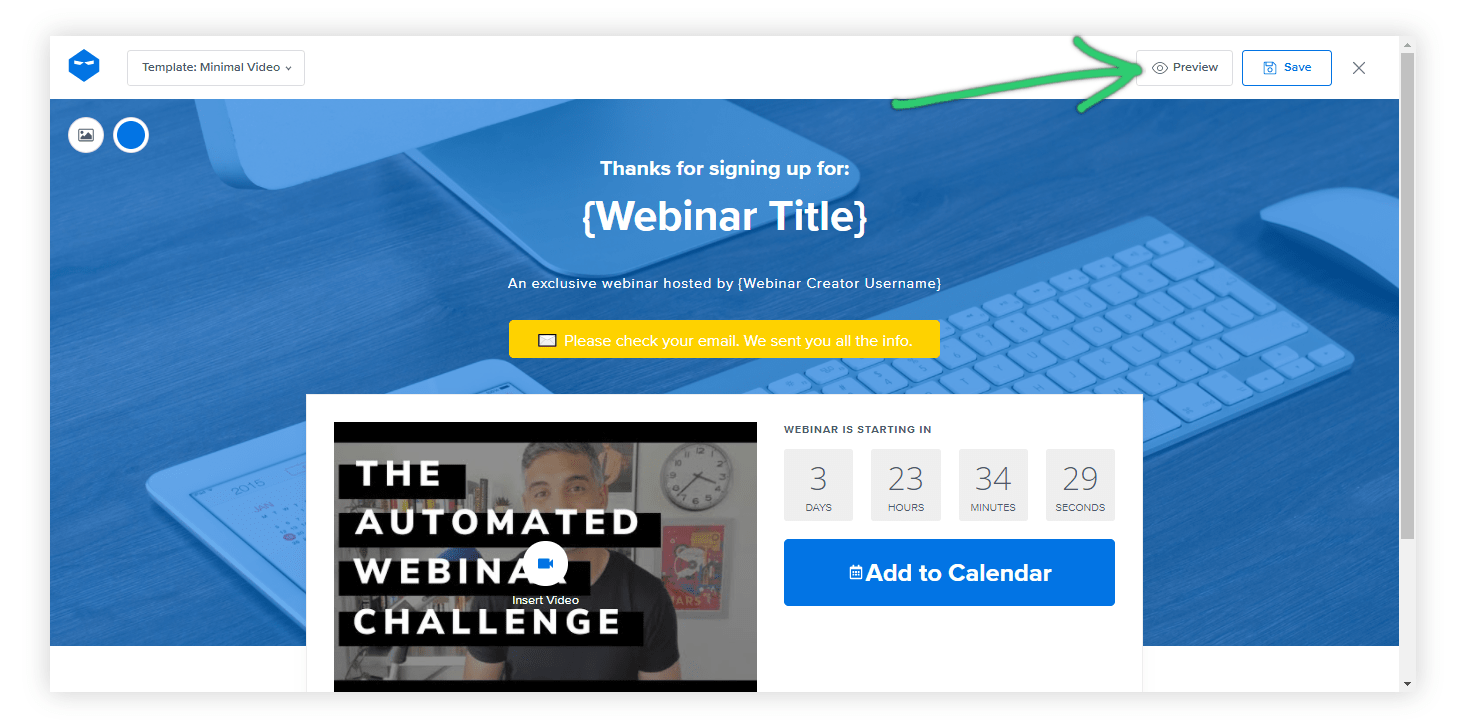
Before finalizing, click ‘Preview’ and check the thank you page to see how it will look to your attendees. Make any necessary adjustments to ensure everything looks perfect.

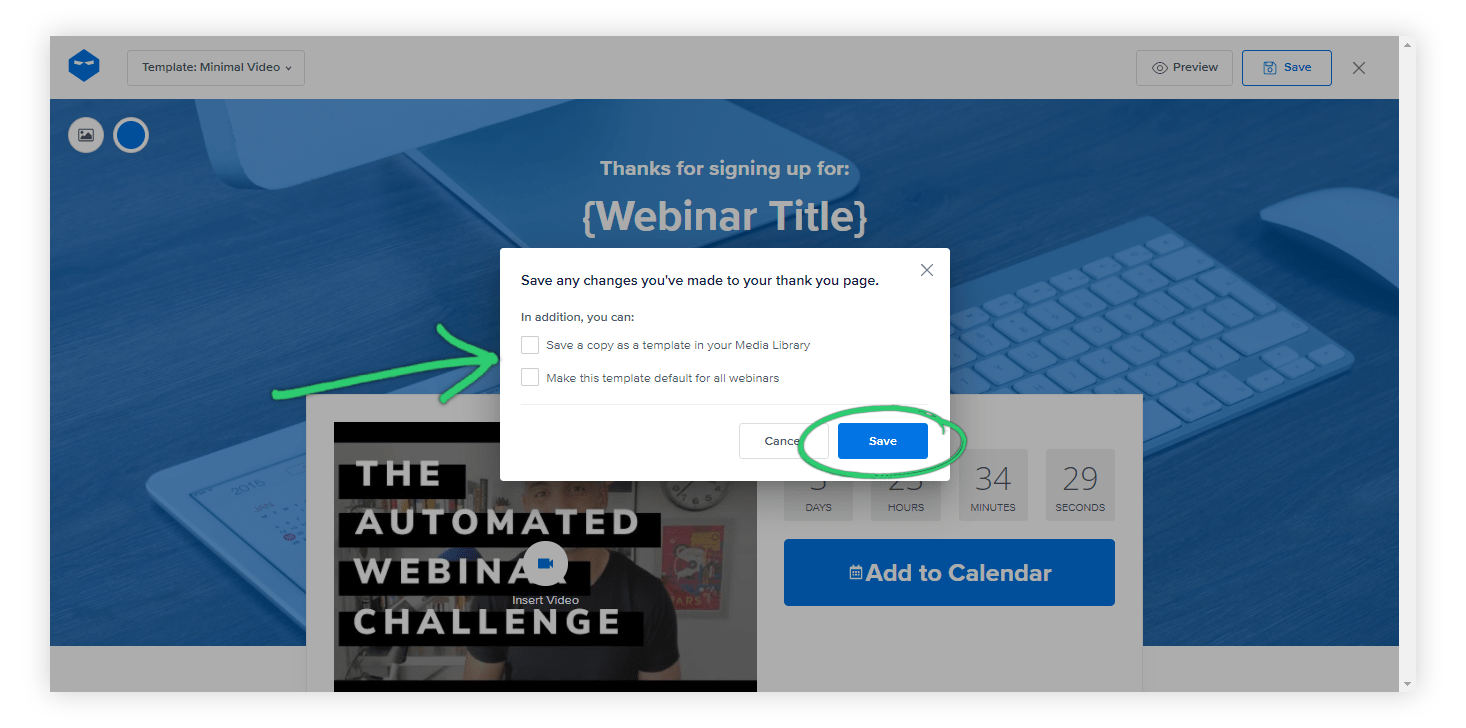
Step 5: Click Save
This allows you to save the changes you made as a template for other webinars and/or as the default for all new webinars of the same type.

There you go!
Your webinar thank you page is ready in no time and with minimal effort.
To know how to create a custom thank you page, click here.
Boost Your Webinar Engagement With Custom Thank You Pages
Customizing your webinar thank you pages can significantly boost engagement and leave a lasting impression on your audience. By personalizing these pages, you show appreciation and encourage further interaction, whether through additional content, surveys, or social media links.
If you need to create thank you pages that resonate with your audience, you can use a good webinar tool like WebinarNinja. This tool offers innumerable features, like webinar thank you page templates, to easily create and customize thank you pages, ensuring your audience feels valued and engaged even after the webinar ends.
Want to host a webinar for free?
Use WebinarNinja to teach, improve marketing, and grow your sales.


