Your webinar landing page is the bridge between “someone who clicked” and “someone who registered.” It has roughly 8 seconds to communicate value, earn trust, and push a visitor toward that sign-up button. A poorly designed page, no matter how good your webinar actually is, bleeds registrations silently every day.
The good news is that this is one of the most fixable problems in marketing. A sharper headline, a better-placed CTA, or a single piece of social proof can swing your registration rate dramatically. Webinar landing page conversion rates can reach as high as 51%, while the average sits around 22.84%, meaning there’s real room between where most pages perform and where the best ones land.
In this guide, you’ll find 20 real webinar landing page examples from brands that are getting it right. Whether you’re creating your first webinar registration page or trying to squeeze more sign-ups out of an existing one, the examples and tactics ahead are built to give you a clear path forward.
What Makes a Webinar Landing Page Convert?
A high-converting webinar landing page needs:
(1) a benefit-driven headline
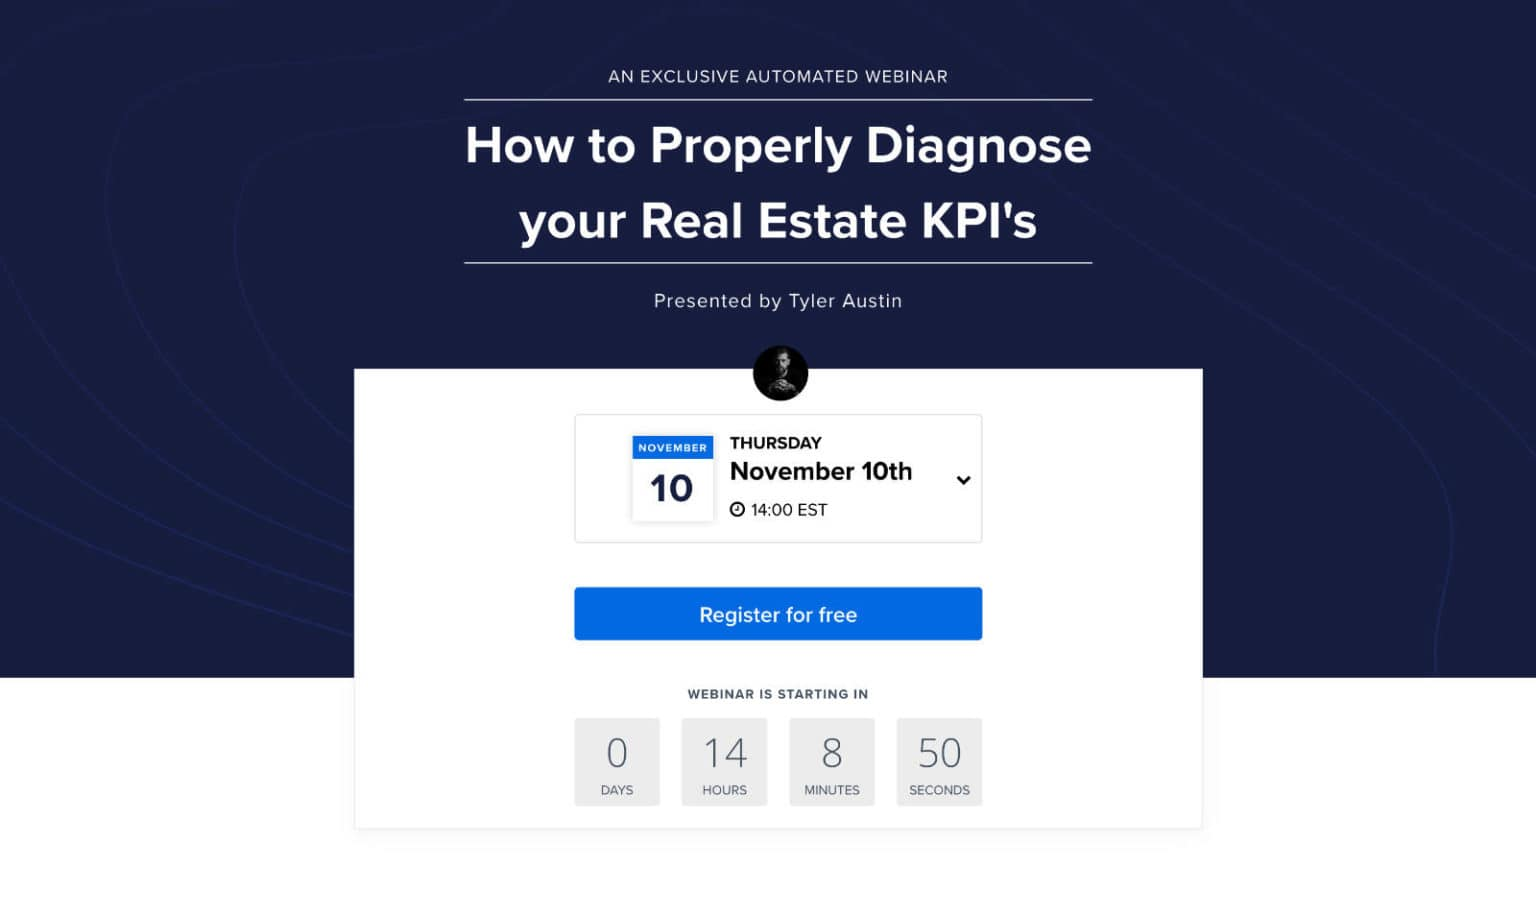
(2) a CTA visible without scrolling
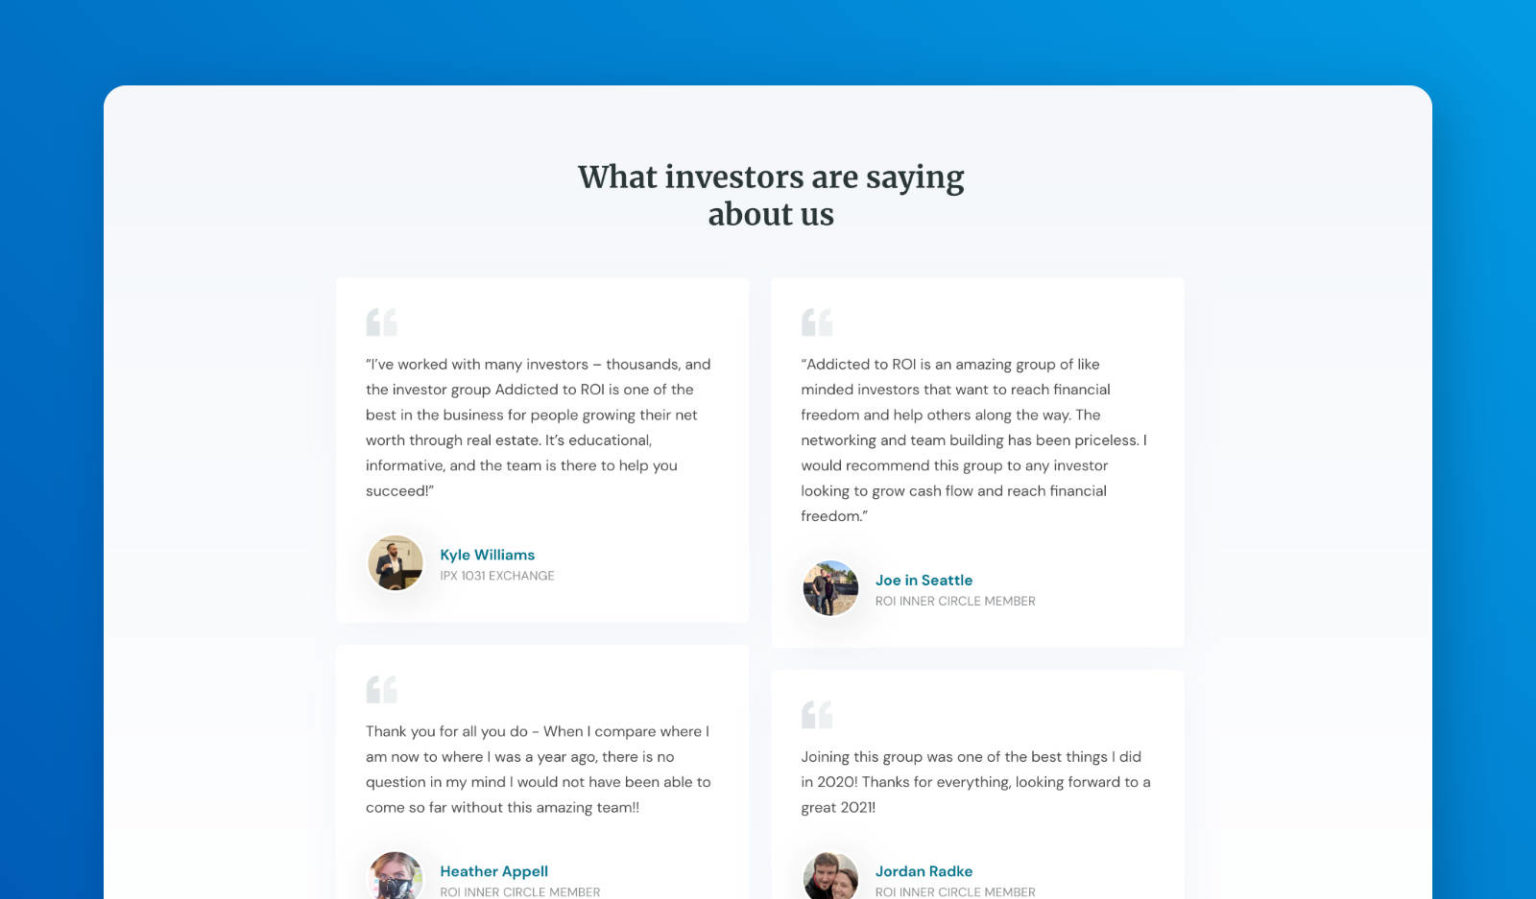
(3) social proof, such as testimonials or registrant counts
(4) a short registration form, name, and email, if possible
(5) a presenter bio
(6) a countdown timer for urgency, and
(7) a mobile-responsive layout.
20 Webinar Landing Page Examples That Work (And Why)
The 20 pages below were selected because each one demonstrates at least one deliberate, high-impact design or copy decision worth understanding and applying to your own registration pages.
Rather than just showing you what they look like, we’ll show you exactly what each page does well, and the specific principle behind it that you can steal.
1. WebinarNinja

WebinarNinja’s registration pages stand out because the entire experience, landing page, form, confirmation, and follow-up, is built into one platform. There’s no separate page builder to juggle or embed code to wrestle with unless you want it.
The page builder works inline: click any section to edit the headline, subheadline, speaker bio, or event details directly. Smart dynamic tags like {Webinar Title} and {Date} auto-populate throughout the page, eliminating manual updates whenever something changes.
Every page includes a native countdown timer that creates genuine urgency in the final hours before your event. The registration form is kept lean by default, name and email, but fully customizable. If you’d rather host the form on your own site, an embeddable code snippet lets you drop it into any page builder in minutes.
Post-registration, the customizable thank-you page lets you add a calendar button (the single highest-impact tactic for improving show-up rates), a resource download, or a relevant offer.
Built-in analytics track the full funnel: page visits, sign-up rate, show-up rate, and replay views, all exportable to CSV.
Why use this registration page approach:
- All-in-one platform with no tool-stacking required: The landing page builder, registration form, confirmation emails, and analytics all live inside WebinarNinja; no separate page builder, no third-party form tool, no manual integrations to maintain.
- Mobile-responsive layouts by default: Every registration page WebinarNinja generates is optimized for mobile out of the box, so your page converts whether visitors arrive on desktop, tablet, or phone, without any extra configuration.
- Native countdown timer that drives last-minute sign-ups: A live timer showing the exact time remaining until your event starts creates real, deadline-driven urgency, especially effective in the final 24–48 hours of your promotional window.
- Embeddable registration form for your own website: Generate an embed code from the Integrations tab and drop the form into any page builder or website, letting visitors register without ever leaving your domain.
- Customizable thank-you page that improves attendance rates: Add a calendar button, a downloadable resource, or a relevant offer immediately after registration, the moment a visitor is most engaged and most likely to take a follow-up action.
- Full-funnel analytics exportable to CSV: Track page visits, registration rate, show-up rate, and replay views across daily, weekly, or monthly timelines, and export the data for deeper campaign analysis.
- Facebook Pixel support for paid traffic campaigns: Add your Pixel to both the registration and thank-you pages to track conversions accurately, build lookalike audiences, and measure true cost per registration from paid channels.
- Native integrations with leading email marketing platforms: WebinarNinja connects directly with Mailchimp, ConvertKit, ActiveCampaign, HubSpot, and more, automatically adding every registrant to your list or nurture sequence without any manual work.
2. HubSpot
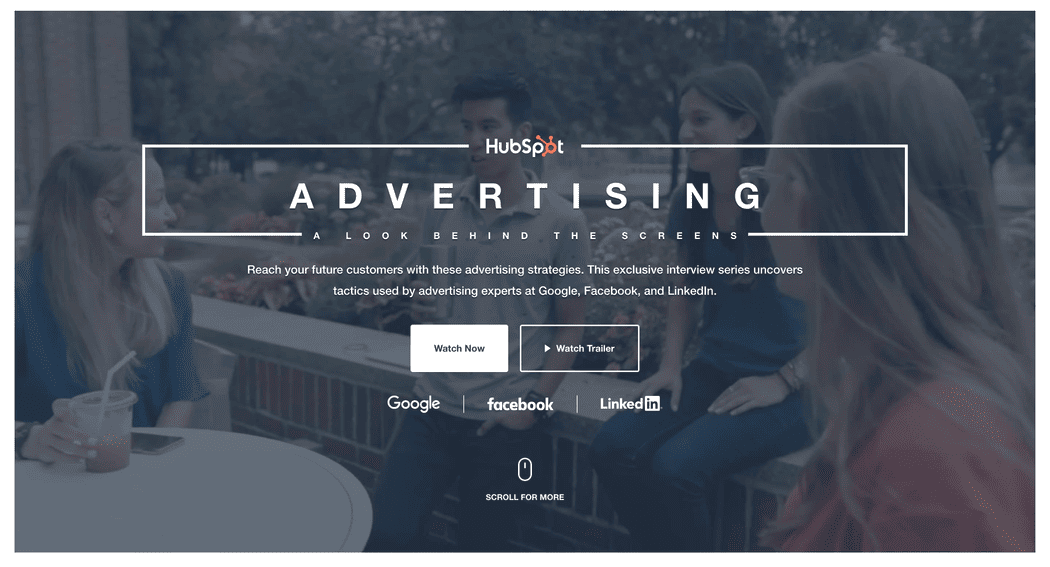
This webinar series landing page for advertising by HubSpot relies on multimedia elements. It promises quality webinar content with engaging videos.
The landing page is a classic example of how you can lean into the visual experience of your page by designing it creatively.
You can use it as a landing page template for advertising purposes.
Why It Works: Leaning Into the Visual Experience
- Well-designed to attract potential attendees
- Provides relevant information about a webinar
- Encourage greater sign-ups
3. Unbounce
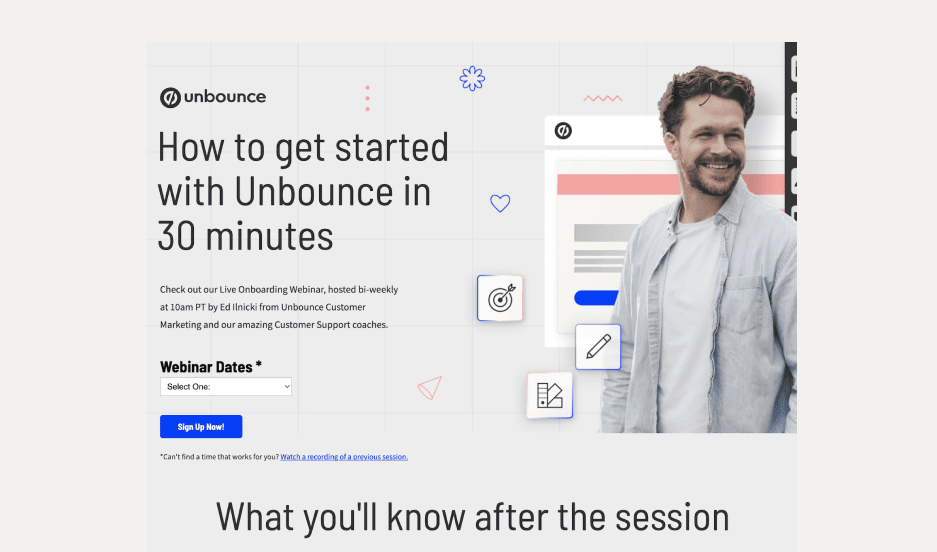
The webinar registration landing page by Unbounce is full of confidence. The page can help businesses drive registrations for their webinars by providing a seamless and optimized experience for visitors.
The section on what visitors will gain by registering for the webinar is eye-catching. It demonstrates the value potential participants will get from the webinar.
This webinar landing page example provides the basic necessary information quickly, plus access to previous webinar recordings in case visitors can’t make it to the live one.
Why It Works: Clarity About What Attendees Will Gain
- It focuses on critical elements essential for driving conversions
- An attention-grabbing headline that clearly communicates the webinar’s value
- Highlights of the key benefits attendees will gain from participating
4. Airbnb
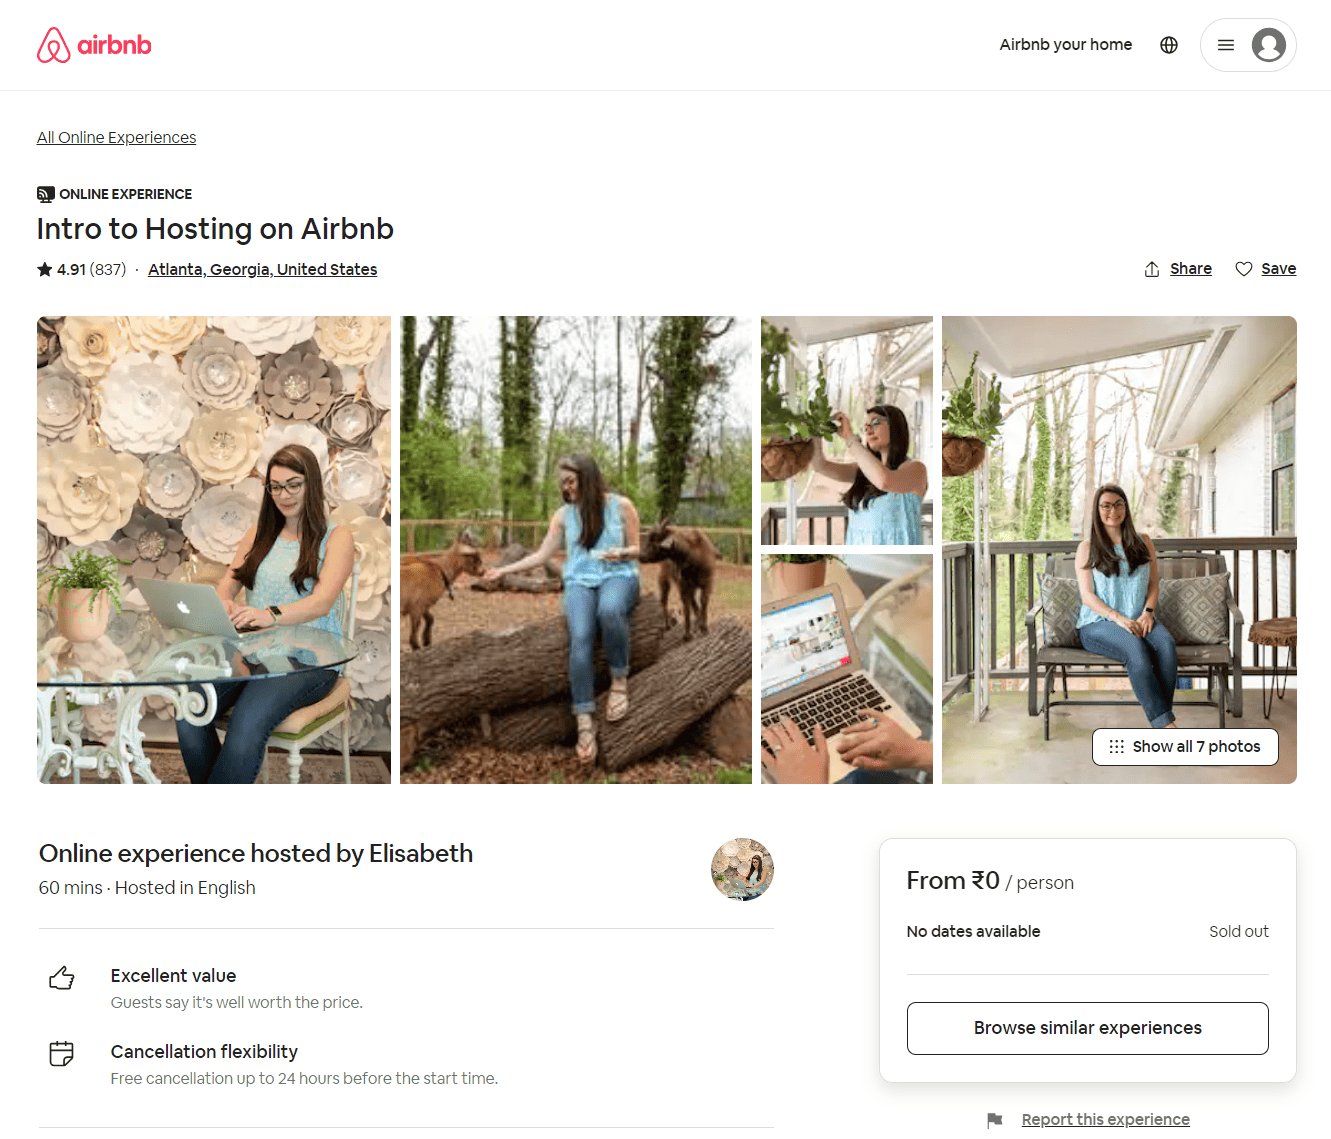
Nothing can be more exciting than becoming a host at this popular and widely used vacation rental company. By using this webinar landing page template, you can create introductory webinars that teach people how to set up a listing and become a host.
The landing page is marked by a short and clear headline. It also introduces the host of the webinar to visitors, besides giving two clear options for participation. Testimonies by previous guests enhance the credibility of the page.
Why It Works: The Personal Touch That Builds Trust
- There is a personal touch to how the whole page is set up and presented
- It has kept each section simple and easy to understand
- Social proof by incorporating reviews from previous webinar attendees
5. Tailwind
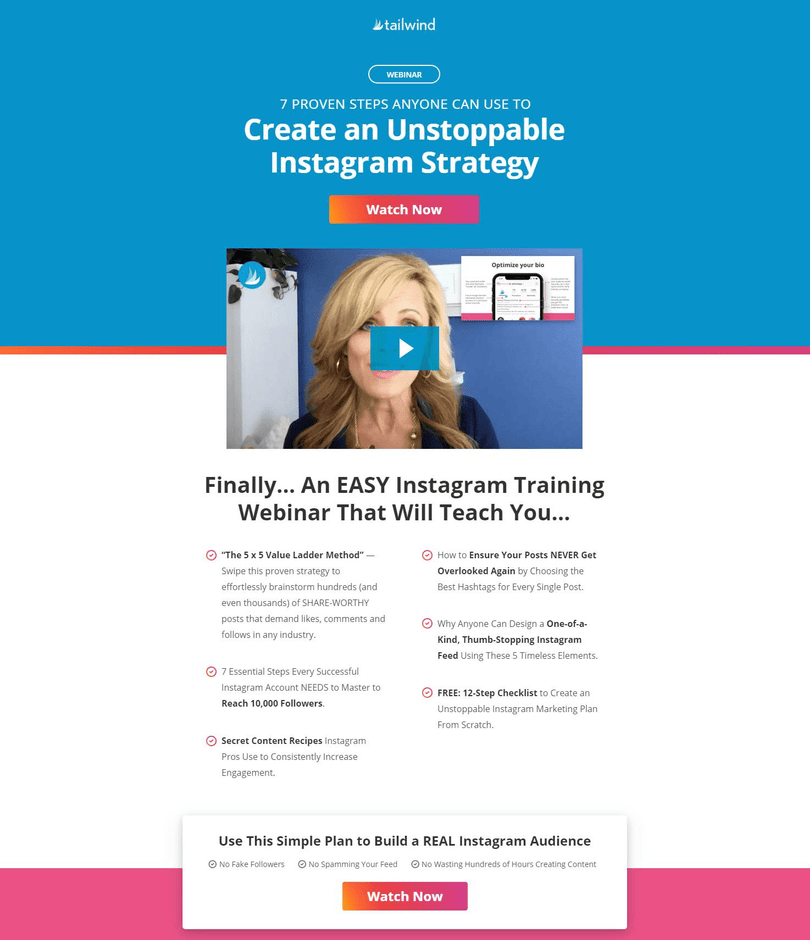
Tailwind’s webinar landing page on Instagram strategy is led by a call to action at the top. It also presents what attendees can expect at the end of the webinar.
The landing page has been kept short and simple with just the above sections, an expert testimony, and something about the host.
The focus is entirely on the target audience – what they will get out of the webinar, and there’s no hard selling about the company.
Why It Works: Audience-First Copy With Zero Hard Selling
- Focused on simplicity and effectiveness
- A visually pleasing image or video reflecting the webinar topic
- Visually distinct and strategically placed CTA buttons
6. Bandzoogle
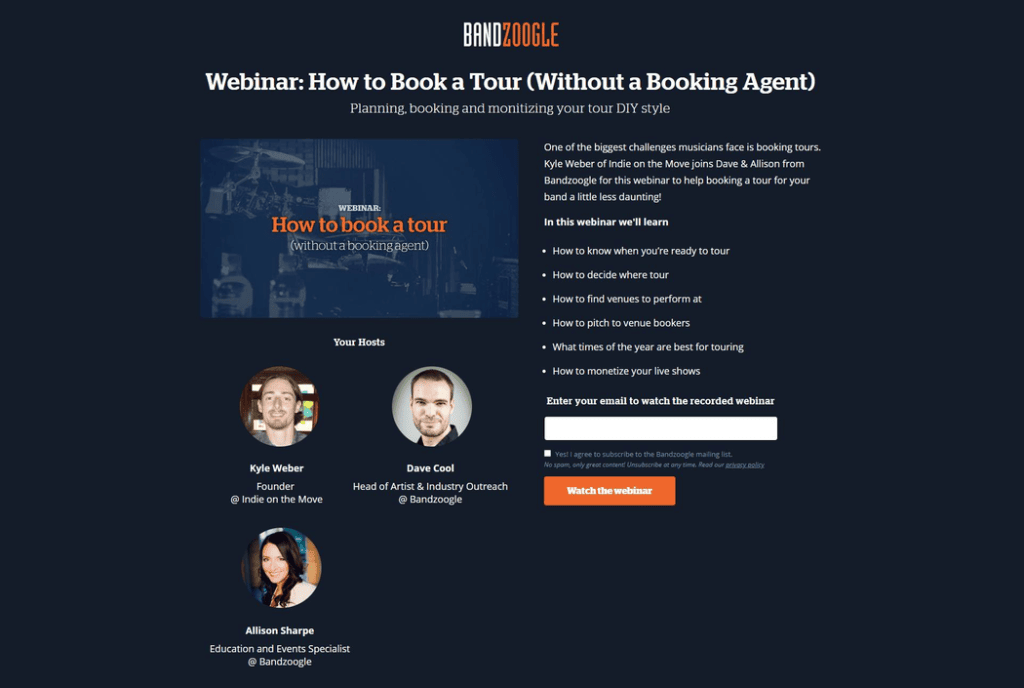
This online platform for musicians maintains a straightforward and above-the-fold webinar landing page. The headline is clear and helpful.
The page consists of the webinar title, what attendees will learn, who the hosts are, email sign-up space, and a CTA. That’s it. There is no overdose of copywriting seen here.
You can leverage this landing page style to promote your short-term events.
Why It Works: Above-the-Fold Simplicity Built for Mobile
- Clean and simple design
- Clear and compelling messaging
- Focuses on the essential information & removes any distractions
This above-the-fold-only layout is particularly effective on mobile, where scroll fatigue dramatically reduces form completions. A visitor arriving on a 375px phone screen sees the headline, the value, and the CTA without having to touch the screen. That’s the ideal state for any registration page, and Bandzoogle achieves it with remarkable restraint.
7. INBOUND
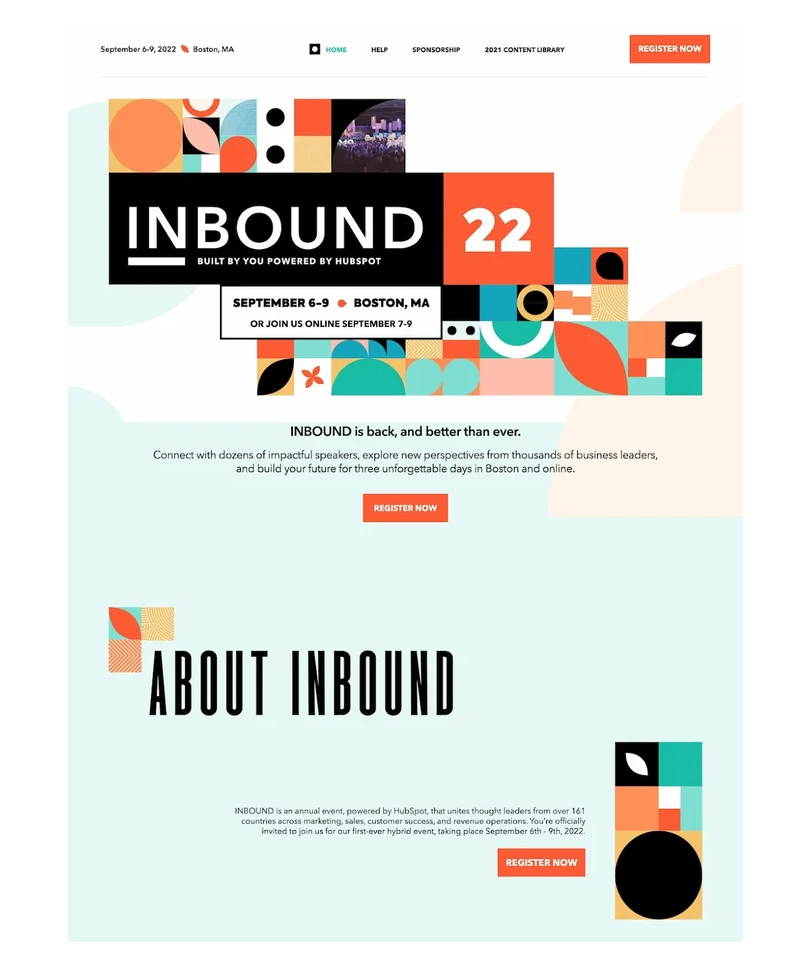
INBOUND’s webinar landing pages make it easy for users to register for a webinar event or gain access to a recorded webinar.
What makes its landing pages unique is their focus on delivering a seamless user experience. They prioritize user-friendly design, making it easy for visitors to navigate the page and find the information they need to make a decision to register.
Compelling visuals, informative content, and clear calls-to-action create a sense of urgency and encourage visitors to take action.
Why It Works: Multiple CTAs That Don’t Let Visitors Escape
- User-focused design
- Colorful page designs that capture visitors’ eyes and draw them
- Multiple CTAs placed throughout the landing page to ensure it’s not missed
8. LinkedIn Learning
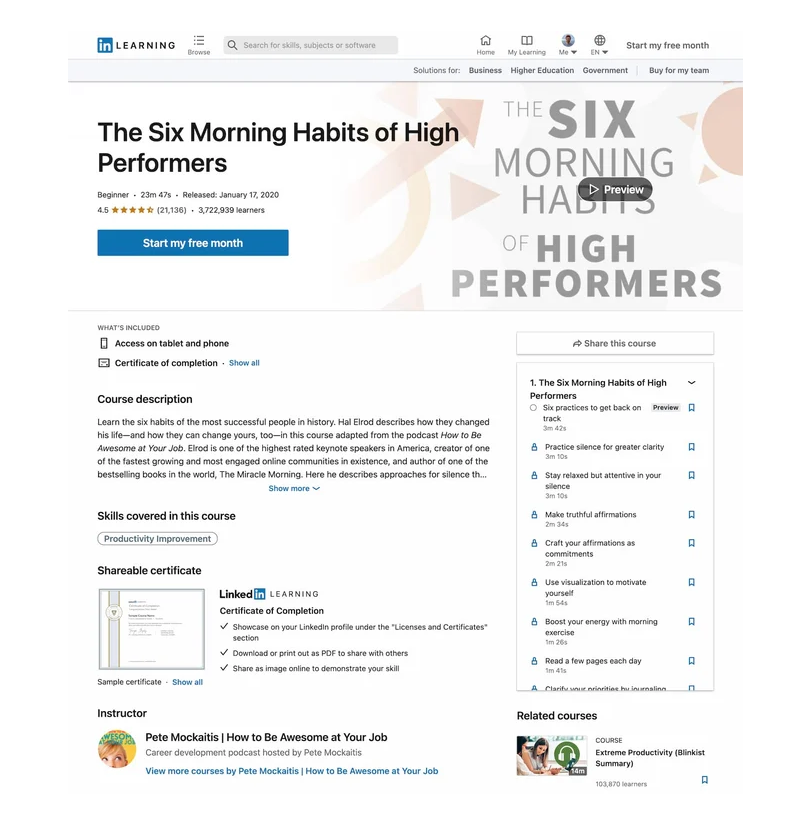
As you can see, LinkedIn Learning presents a comprehensive and informative landing page for its video courses, like the above.
This unique feature sets the online platform apart.
The landing pages often include user ratings and reviews for the course. This feedback provides valuable insights from learners who have already taken the course, helping prospective learners gauge its quality and effectiveness.
Why It Works: Using Peer Reviews as Registration Fuel
- Detailed course information to quickly understand what the course is about
- Short course previews to get a glimpse of the course content and teaching style
- Related courses to help learners achieve specific learning objectives through a set of courses
9. The New York Times
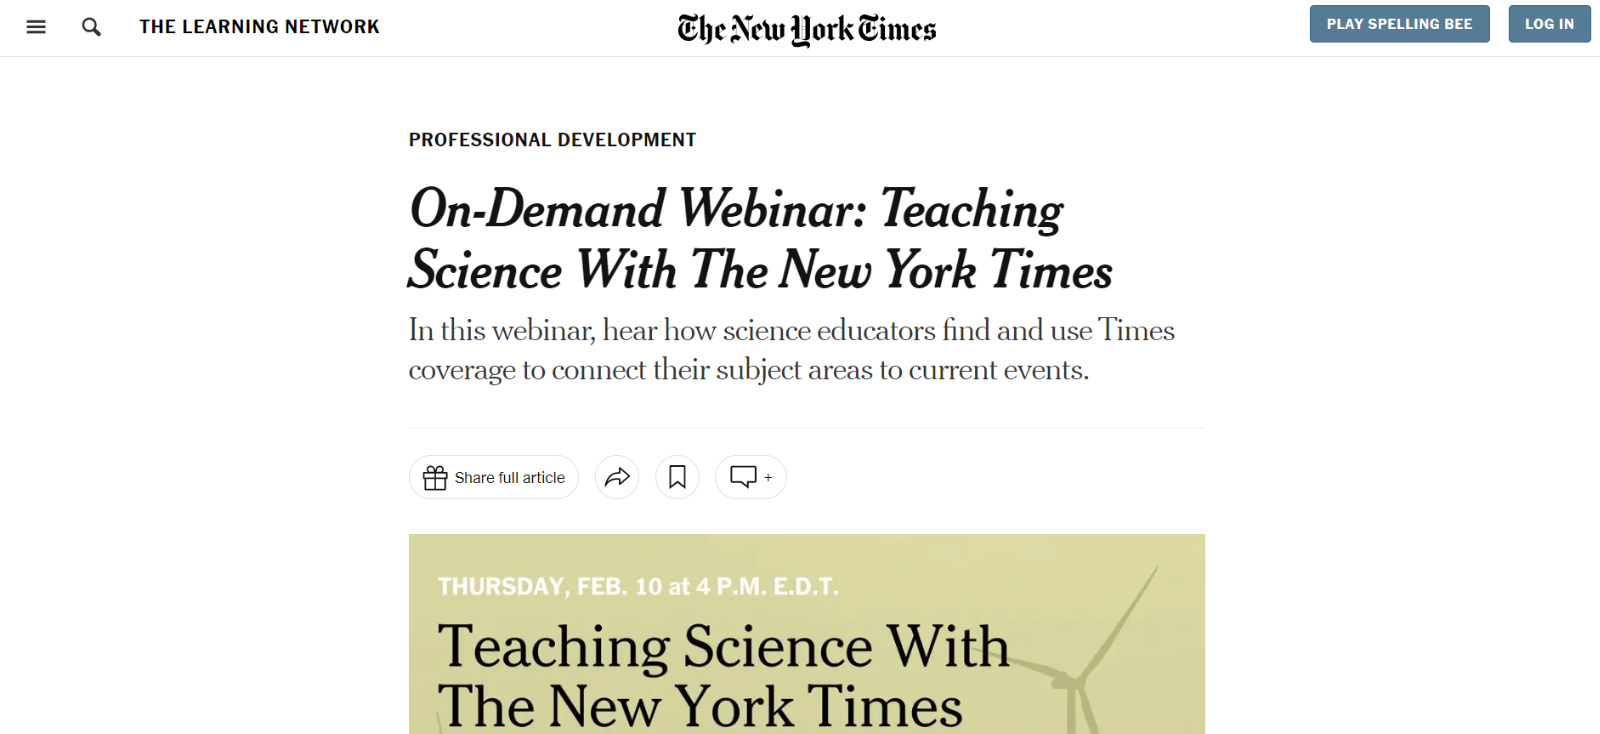
The on-demand webinars offered by the New York Times cover a wide range of topics, including teaching resources, accessible journalism formats, and special topics.
Landing pages by the newspaper often showcase a combination of featured articles, news stories, opinion pieces, multimedia content, and relevant advertisements.
Its focus on educational content makes these pages and the ensuing webinars particularly valuable for teachers and other education professionals.
Why It Works: On-Brand Design That Feels Native to the Publication
- On-brand CTAs are linked in the copy, but they are still prominent and easily spotted
- These landing pages look like other pages on the newspaper’s website, like a news article itself
- Classic newspaper style with heading, subheadings, and bulletins
10. Canva
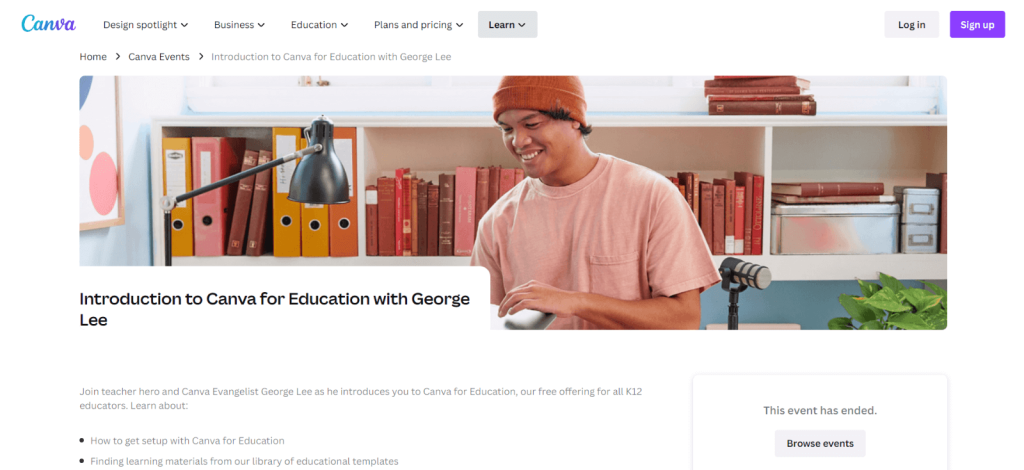
Canva is an online design and visual communication platform. It has designed its webinar landing pages with brevity in mind. They are in short form and designed to capture visitors’ attention quickly and guide them toward taking a specific action.
In the example page image above, you can see that it contains only the webinar title, what attendees will learn, speakers, and available sessions.
Right after that, you can register for the webinar. Canvas keeps things as simple as that.
Why It Works: Radical Simplicity With a Dropdown for Flexibility
- A minimalist approach to landing page design
- Colorful stock pictures that make a landing page more lively
- A dropdown for webinar sessions on multiple days and times
11. Sprout Social
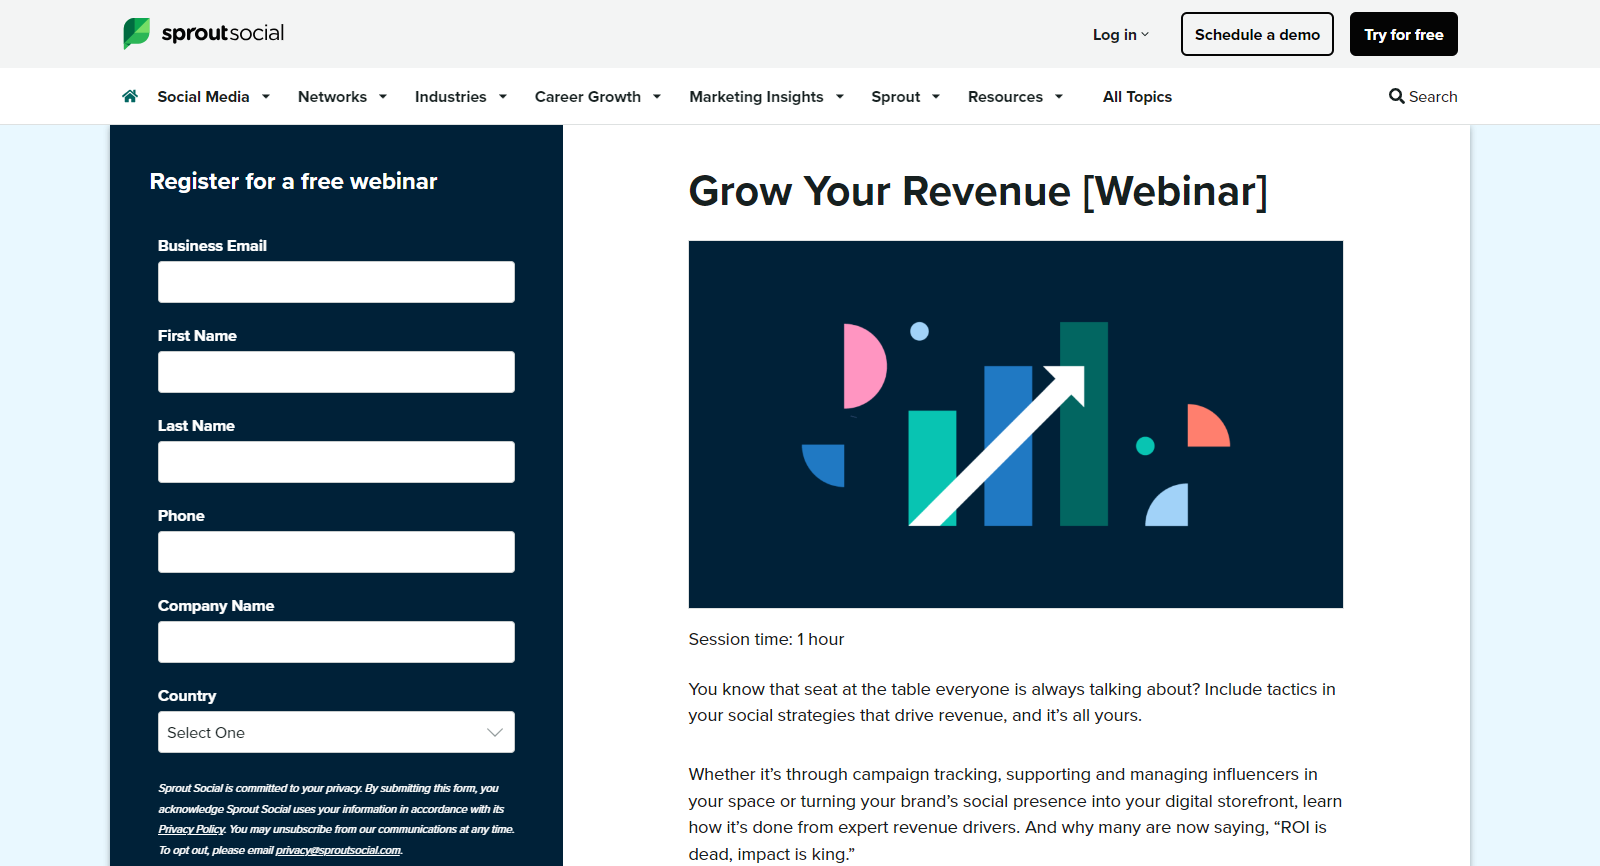
A provider of an all-in-one social media management platform, Sprout Social also follows a simple layout and design for its webinar landing pages.
Its landing pages are clean and modern, and they get straight to the point by employing a clear value proposition.
The prominent form on the left requests attendees’ details to watch the webinar.
Why It Works: Left-Aligned Form for Immediate Action
- Visually appealing and easy to read
- Clear headings & sections for easy understanding of the purpose and value of a webinar
- Attendees can make up their minds quickly about whether the webinar aligns with their interests and needs
12. Vyond
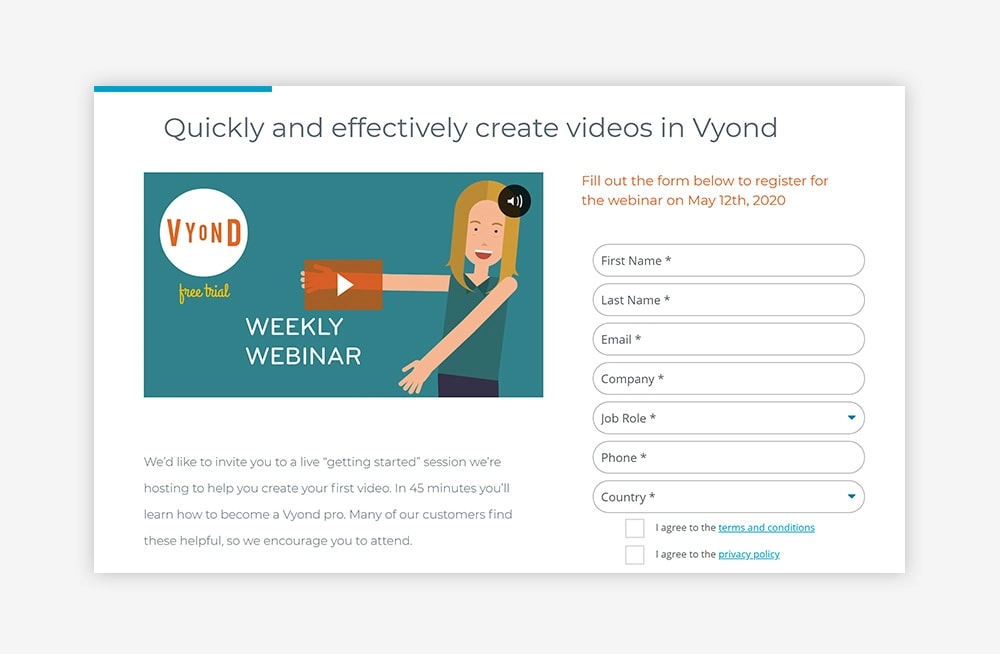
Vyond is an animated video creation platform, and understandably, the most striking part of its landing pages for webinars is the animated elements.
These animations capture the attention of visitors and make the landing page visually appealing.
Like many thoughtfully designed pages, Vyond’s webinar landing pages keep things to a minimum with only a summary of the webinar and a sign-up form.
Why It Works: Animation That Demonstrates the Product While Building Trust
- Trust-building animated videos
- Clear headline
- Polished look for making a great first impression on potential attendees
13. MailChimp
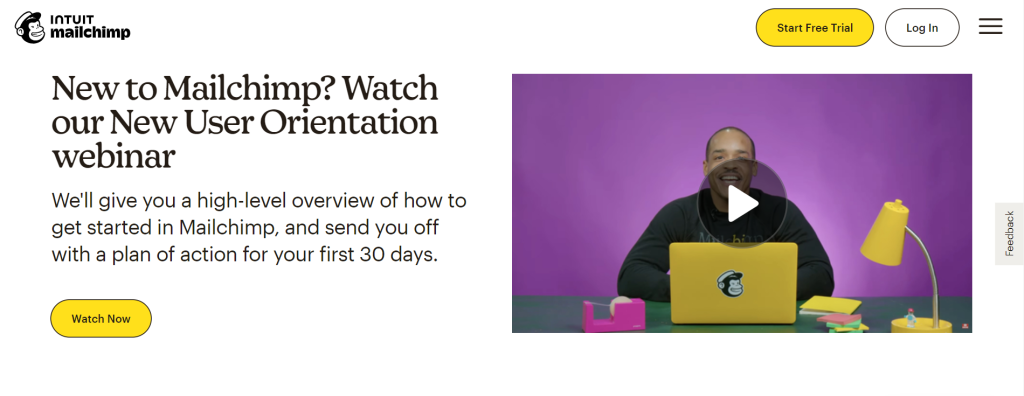
MailChimp’s webinar landing pages are known for their professional and inviting look.
The webinar title and signup form are always visible without the need to scroll. This approach is effective in capturing the attention of visitors and encouraging them to take action.
The new user onboarding webinar shown above is placed at the top of the landing page with a summary below. Attendees can also register for more related webinars further down the page.
Why It Works: Above-the-Fold Title and Form That Never Disappear
- A professional design with high-quality images, appealing typography, and a well-thought-out color scheme
- Above-the-fold content for enhanced visibility & easy access to essential information
- The webinars can be accessed online from any location, whether they are live-streamed or pre-recorded
14. Wix
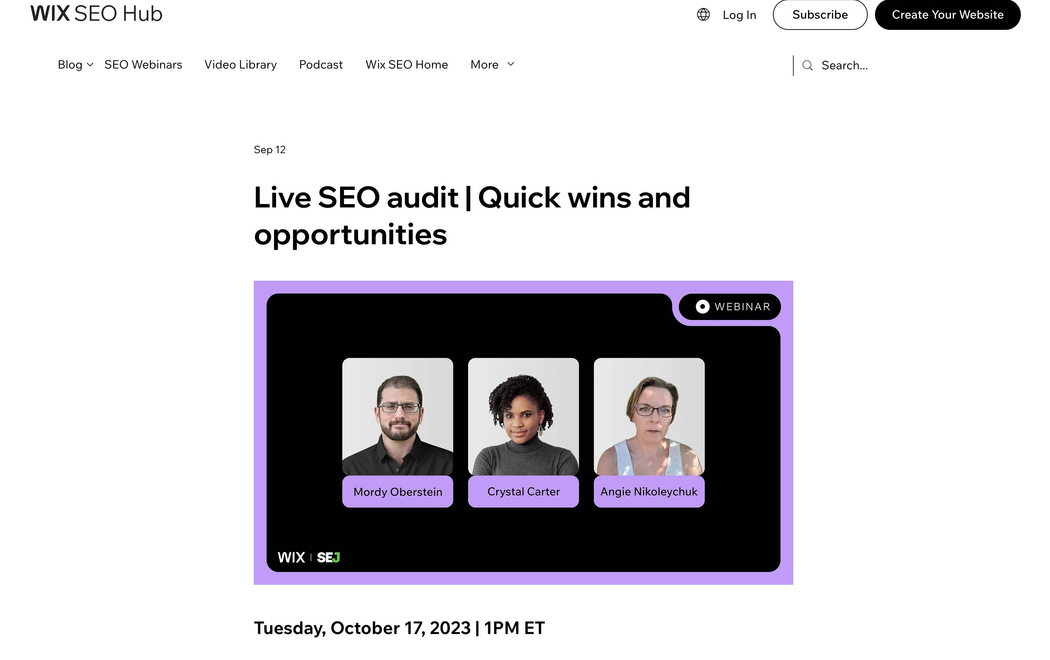
If there’s one word that best describes webinar landing pages by Wix, it is pure simplicity. Its landing pages are designed to be user-friendly and easy to navigate, ensuring a seamless experience for both the presenter and the attendees.
A streamlined design ensures a clean and minimalist layout that focuses on the essential components of an event, such as the title, date, time, and sign-up button.
By removing unnecessary distractions, the landing pages give a clear and straightforward interface, making it easy for visitors to understand the purpose of the webinar and take the desired action.
Why It Works: Drag-and-Drop Simplicity That Puts Hosts Center Stage
- Intuitive customization options via a drag-and-drop editor
- Sufficient space dedicated to showcasing the hosts’ bios
- The landing pages are designed to incorporate SEO best practices
15. WordPress
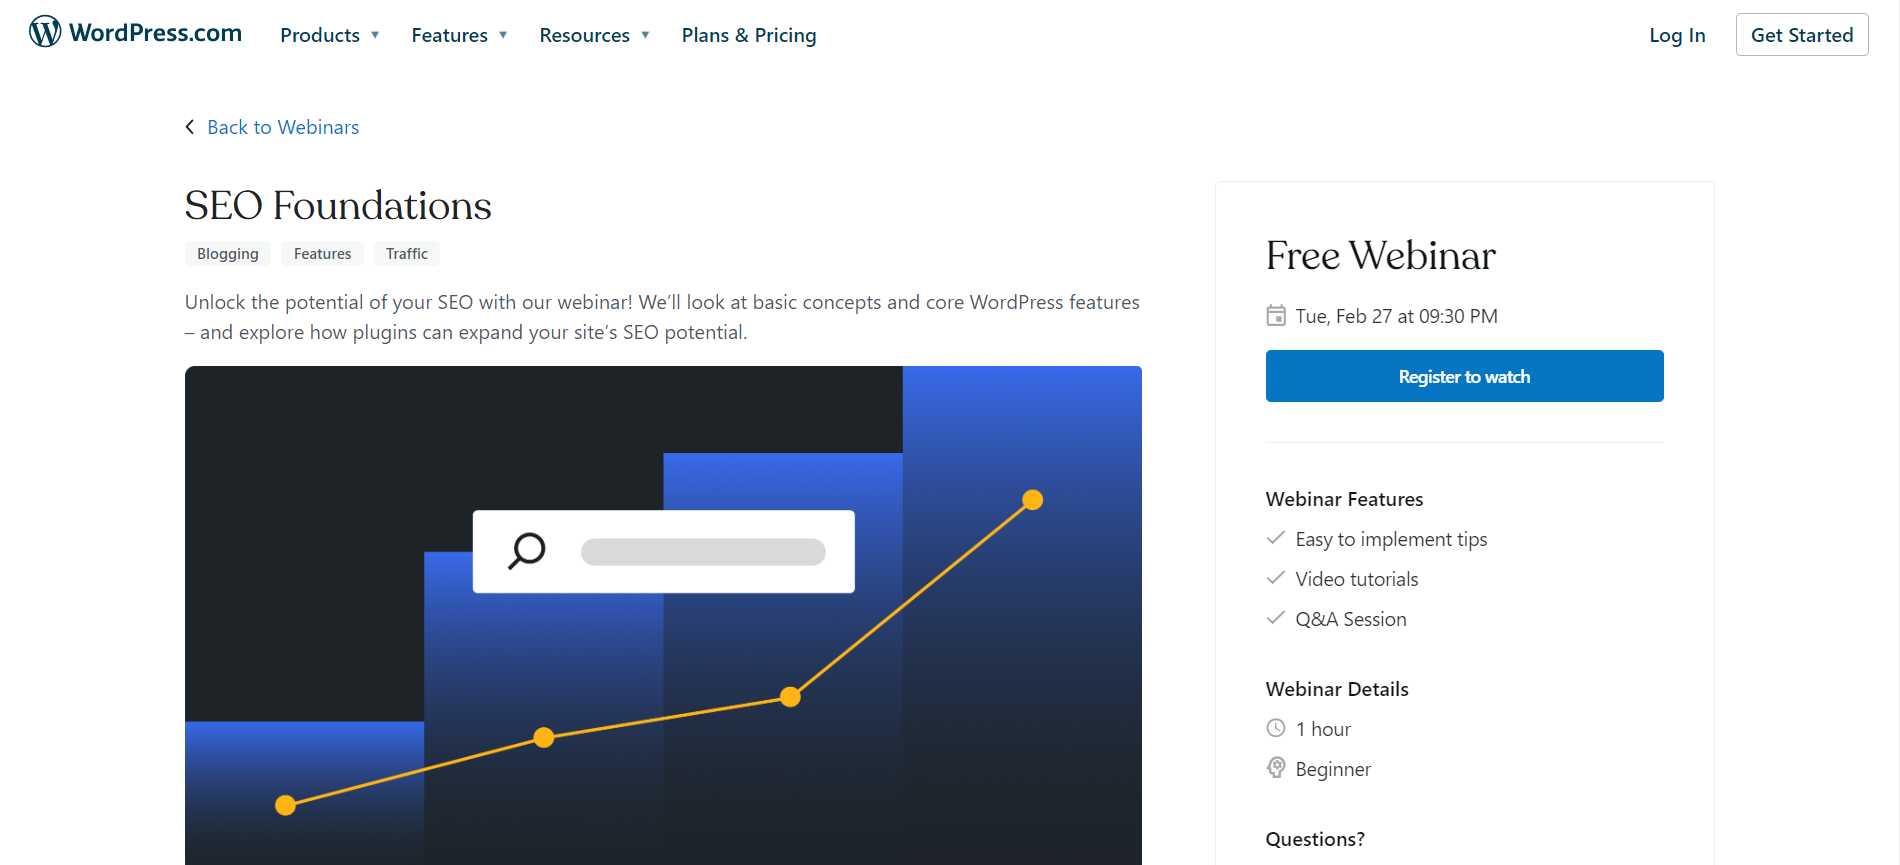
WordPress provides some of the best “getting started” webinars for free. After the webinar title and a one-liner, the landing pages highlight the features of the webinar and other details.
After this, you’ll find the full description and the topics covered.
There is also a recording of one of its recent presentations of the webinar in question.
Helpful resources and a link to its community are other key elements.
Why It Works: Resource Density That Makes the Page Bookmark-Worthy
- You can easily find the next webinars and self-paced courses on the same page to learn the basics or dive deeper with live expert sessions
- Descriptive information in a consolidated form, so that interested visitors find everything in one place
- Links to additional resources that provide more details about the webinars
16. Calendly
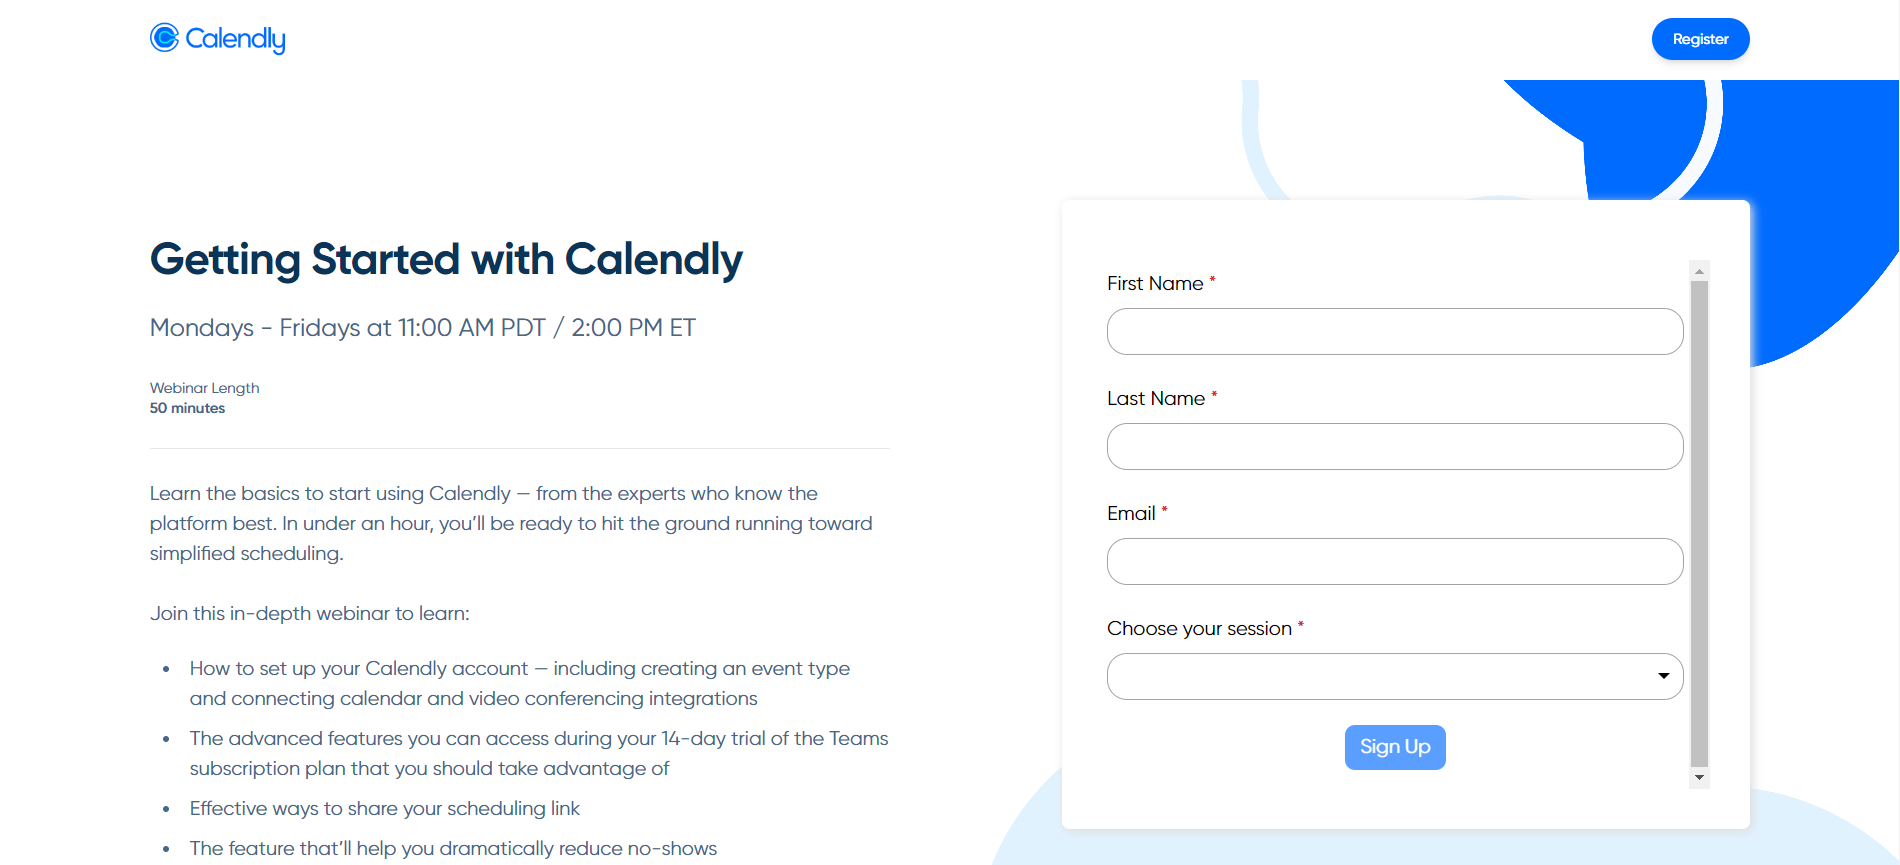
This webinar landing page by Calendly is designed to help users get started with the meeting scheduling platform. The page provides a clear and concise overview of information, including the availability of the webinar, its length, and the topics covered.
The page is structured in a way that highlights the features and benefits of Calendly, as well as gives users a clear understanding of what they can learn from the webinar.
The inclusion of a Q&A chat box suggests that participants will have the opportunity to interact with product specialists and get their questions answered, which adds value to the webinar experience.
Why It Works: Pain-Point Framing That Speaks Directly to the Reader
- The page provides a clear outline of the topics covered to quickly determine the relevance
- Addresses common user pain points, such as sharing availability and setting up Event Types, which resonate with the target audience
- The mention of learning directly from experts implies that the webinar will provide valuable insights and best practices for using Calendly effectively
17. Adobe
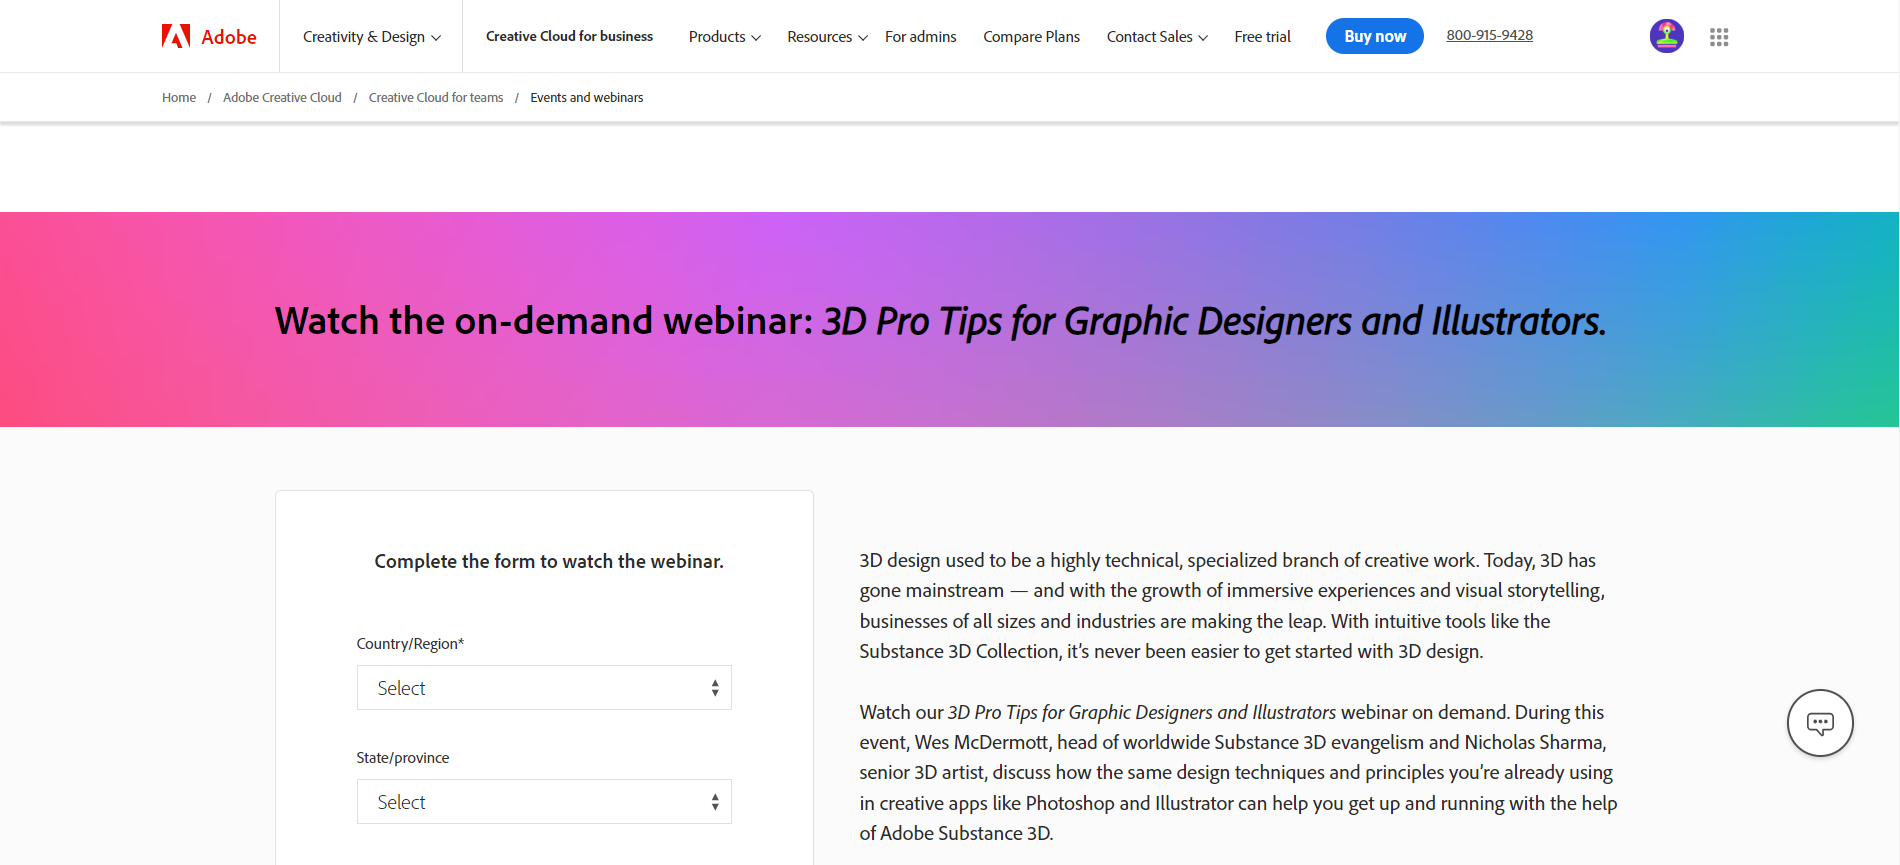
What visitors notice first in Adobe’s landing pages for on-demand webinars is its comparatively long sign-up form. This indicates that the company intends to make its forms the main focus of the pages without wasting any time on lengthy descriptions.
Apart from that, the pages contain all the essential information, such as something about the webinars, what attendees will learn, and who the speakers are.
Why It Works: Form-Forward Design That Skips the Warm-Up
- Future attendees are taken to the form directly and quickly to take action
- A professional look and feel that builds trust and credibility with potential customers
- Maximized usability for visitors to engage with the pages effortlessly
18. Gartner
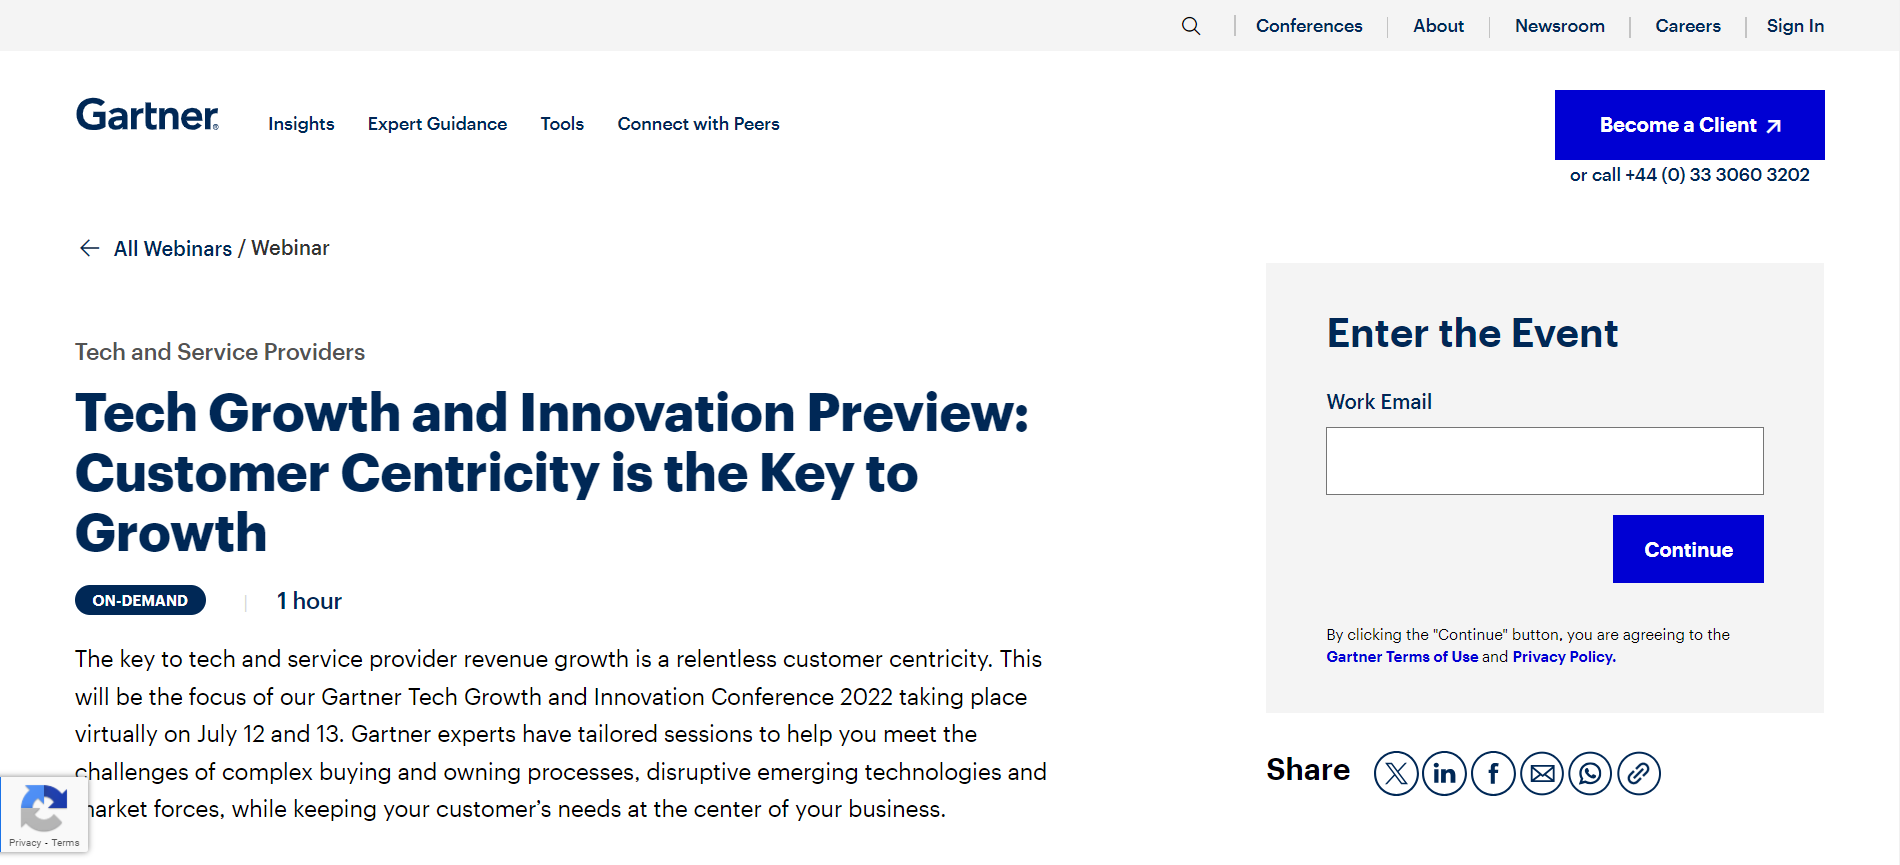
Gartner’s webinar landing pages are just the opposite of Adobe’s. It gives information about the webinar topic, what type of webinar it is, the duration, and a detailed description.
But what makes Gartner’s pages different is that it has kept its webinar registration form relatively small.
Prospective participants are required to share their work email to enter an event.
There is also a social share button to share a webinar with visitors’ social networks.
Why It Works: Reducing Friction to a Single Email Address
- Interested individuals only need to provide their email address, and by continuing, they get access to the rest of the sign-up form
- The forms feature a progress bar that encourages visitors to complete the entire process
- Detailed information on what visitors can expect from the webinars
19. Google Digital Garage
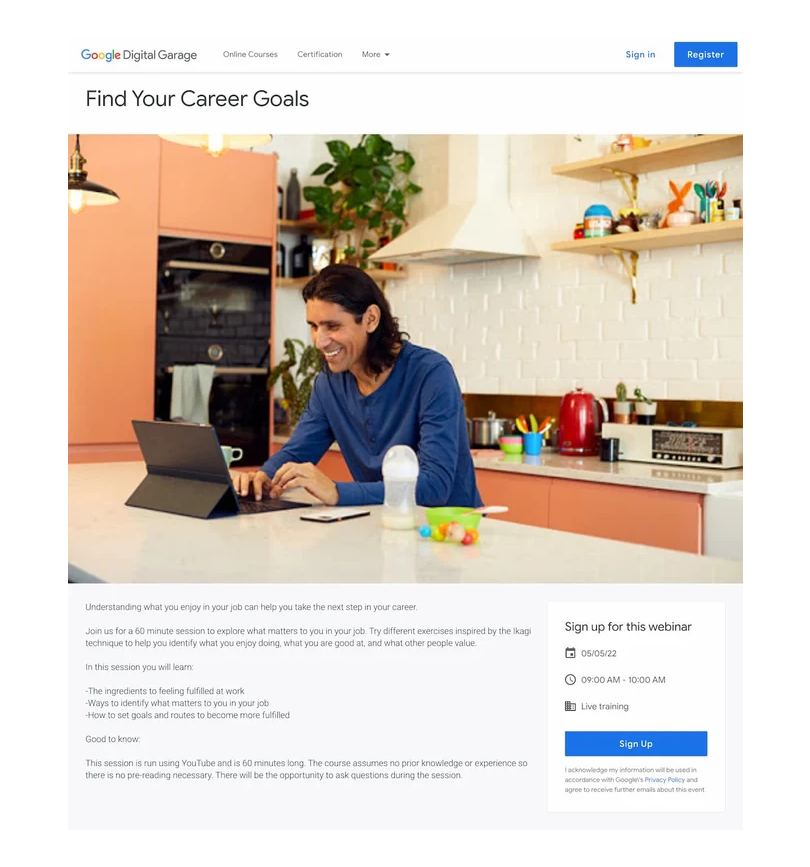
Google Digital Garage is a free online platform created by Google to provide individuals with digital skills training to help them grow their careers or businesses.
Its webinar landing pages are designed to incentivize users to sign up for digital marketing courses, Google AdWords, SEO, and social media training.
These landing pages are designed in a way that draws users’ attention to the course or webinar being offered and encourages them to register. They typically use eye-catching images or videos that spark interest, concise headlines that communicate the value proposition, and brief descriptions that give users a clear understanding of what to expect.
Why It Works: Equal Visual Weight Between Content and Form
- Information about the webinar and the registration form are of the same size; no disproportionate look
- In addition to what attendees will learn, there is “good to know” information added at the end
- Brief and quick to read for anyone interested
20. Kapost
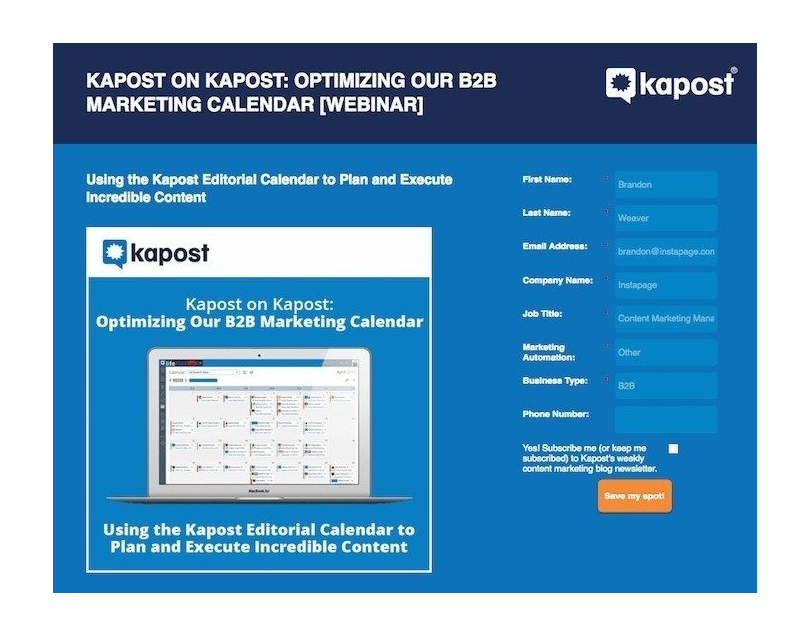
This leading provider of content marketing software has pulled off a completely different webinar landing page style.
With a predominantly blue background, the landing page design above stands out for its heading. It has been repeated multiple times throughout the page.
There is no information about the hosts and webinar timing but just a standard registration form on the right.
A screenshot of the Kapost calendar gives visitors an idea of how the company can help optimize their marketing calendars.
Why It Works: First-Person CTA That Creates Ownership
- The CTA “Save my spot” is in first person for a more personalized experience
- Minimal and well-separated text for easy reading and understanding
- The page actually lives out the idea that less is more
Why Webinar Landing Page Is Your Most Important Registration Tool

“Your registration page is where visitors make the decision — is this worth my time, and is this worth giving you access to my inbox? All the important information needs to be above the fold, and everything else just endorses their decision to register.”
— Omar Zenhom
Founder, WebinarNinja
Before a single attendee joins your webinar, before the first slide loads, before you say a word, your landing page has already done the most important job in your entire webinar funnel. It either converted a curious visitor into a confirmed registrant, or it didn’t.
Most webinar organizers treat the landing page as an afterthought, something to get done quickly before they move on to promoting the event. That’s a mistake.
Here’s why it deserves far more attention than most marketers give it:
It’s Your Only Chance to Convert Cold Traffic
Paid ads, social posts, and newsletter mentions all point to one place: your registration page. A visitor arriving from any of these channels may have never heard of you. The landing page is your entire pitch. If the headline doesn’t resonate, if the value isn’t immediately clear, or if the form looks long and intimidating, they’ll leave, and you’ll never know they were there.
A well-crafted headline, a clear value proposition, and a visible CTA can be the difference between a 15% registration rate and a 45% one from the exact same traffic source.
It Captures the Lead Regardless of Attendance
Even if someone registers and then can’t make it to the live event, you’ve captured their name and email. That’s a lead generated, and you can follow up with a replay, nurture with content, or invite them to future webinars. The registration page doesn’t just fill seats, it builds your list.
It Sets Expectations and Filters the Right Audience
A vague landing page attracts vague attendees: people who sign up without a clear sense of what the webinar covers and then don’t show up.
A precise, specific page that clearly communicates who the webinar is for and what it delivers attracts people who are genuinely interested. This is why specificity in your headline (“For SaaS founders generating $500K–$2M ARR”) consistently outperforms generic positioning (“For business owners”).
It Reflects Directly on Your Brand
Whether you’re an independent coach, a B2B SaaS company, or a digital agency, your webinar landing page is a brand touchpoint. A clean, professional, well-written page signals that the webinar itself will be equally polished. A cluttered, generic, or copy-light page raises doubts, even if your actual webinar is outstanding.
How to Create a High-Converting Webinar Landing Page
Like any other skill, learning how to build a landing page for a webinar is best done with a good example. WebinarNinja handles the entire registration page experience natively; no external landing page tool, no separate form builder, no piecing things together, so once your page is live you can move straight into hosting a webinar without any extra setup.
Here’s exactly how to set up your registration page from inside the platform. The process takes under 15 minutes from a blank start, less if you’re cloning an existing webinar.
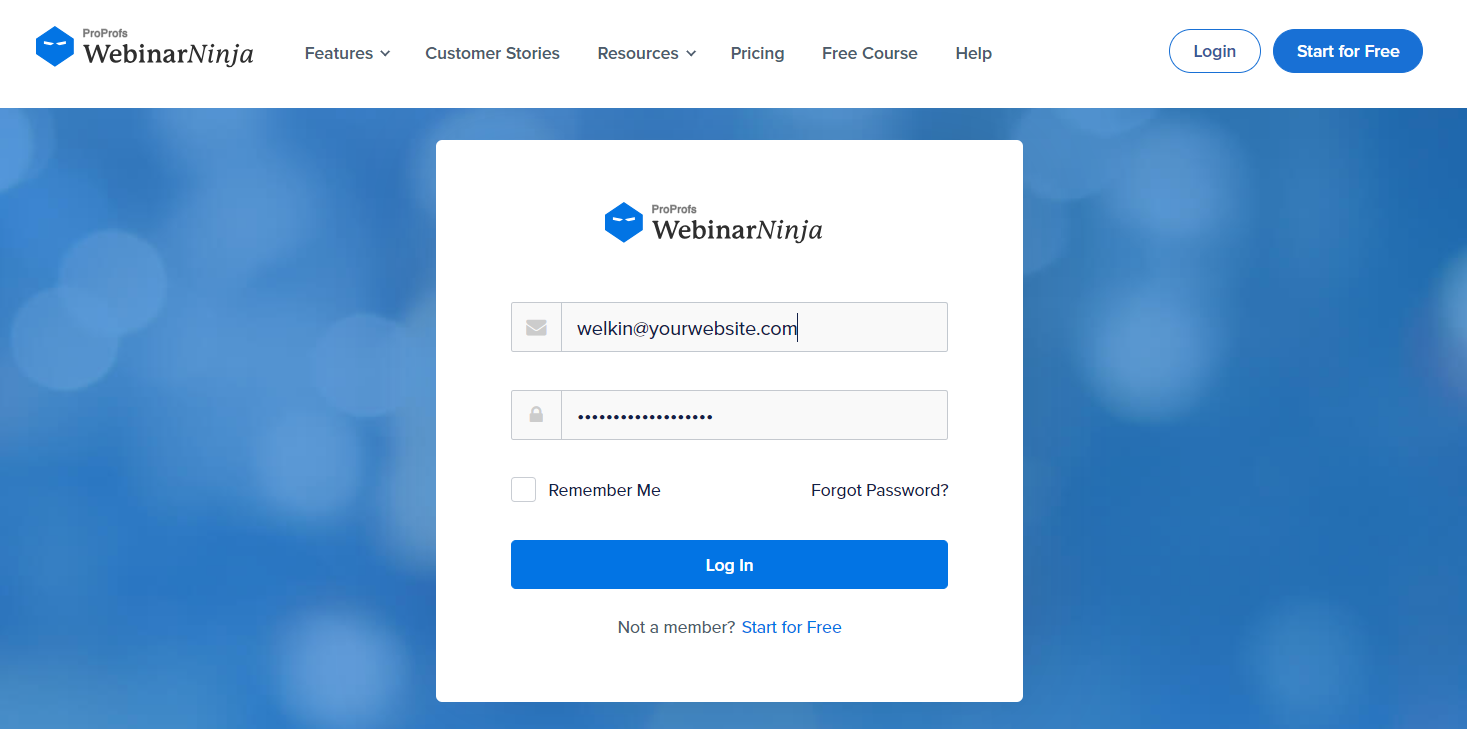
Step 1: Log in to your WebinarNinja account.
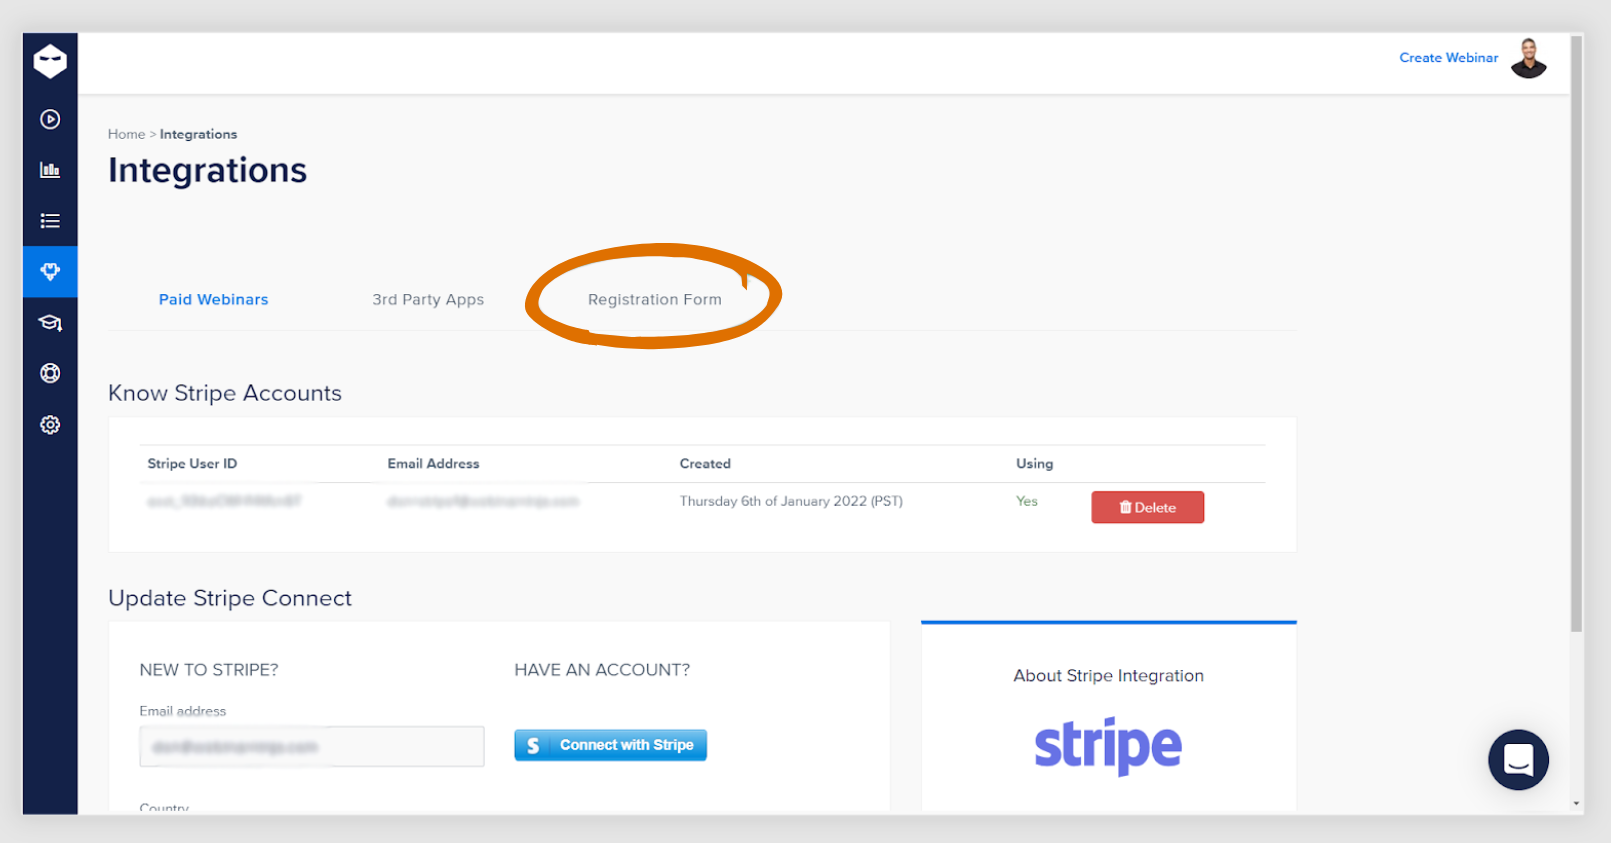
Step 2: Click the “Integrations” icon from the left menu.
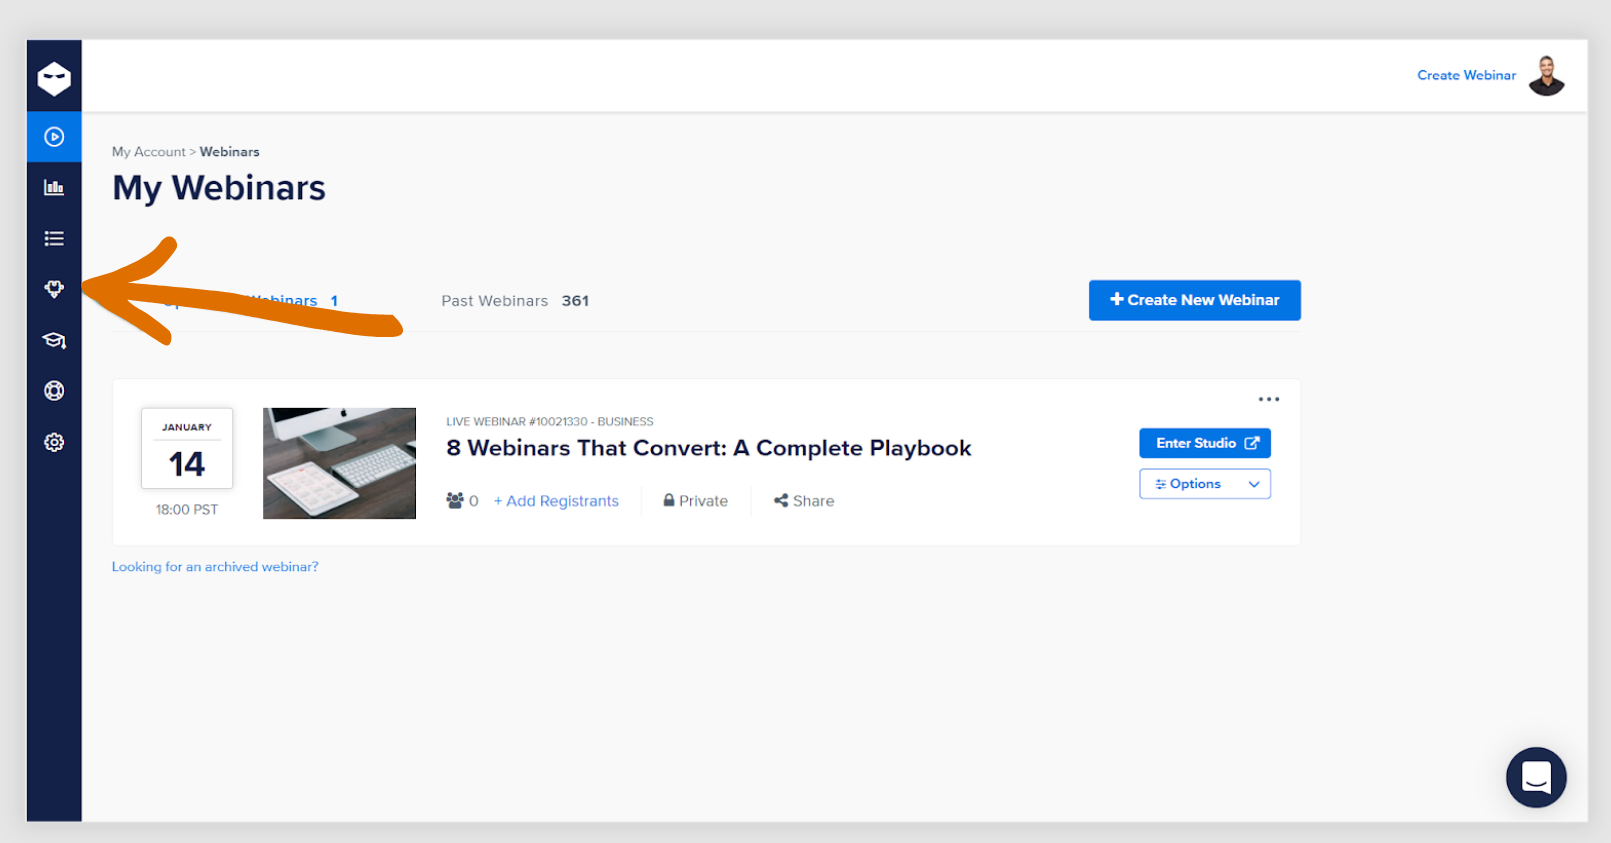
Step 3: Click the Registration Form tab.
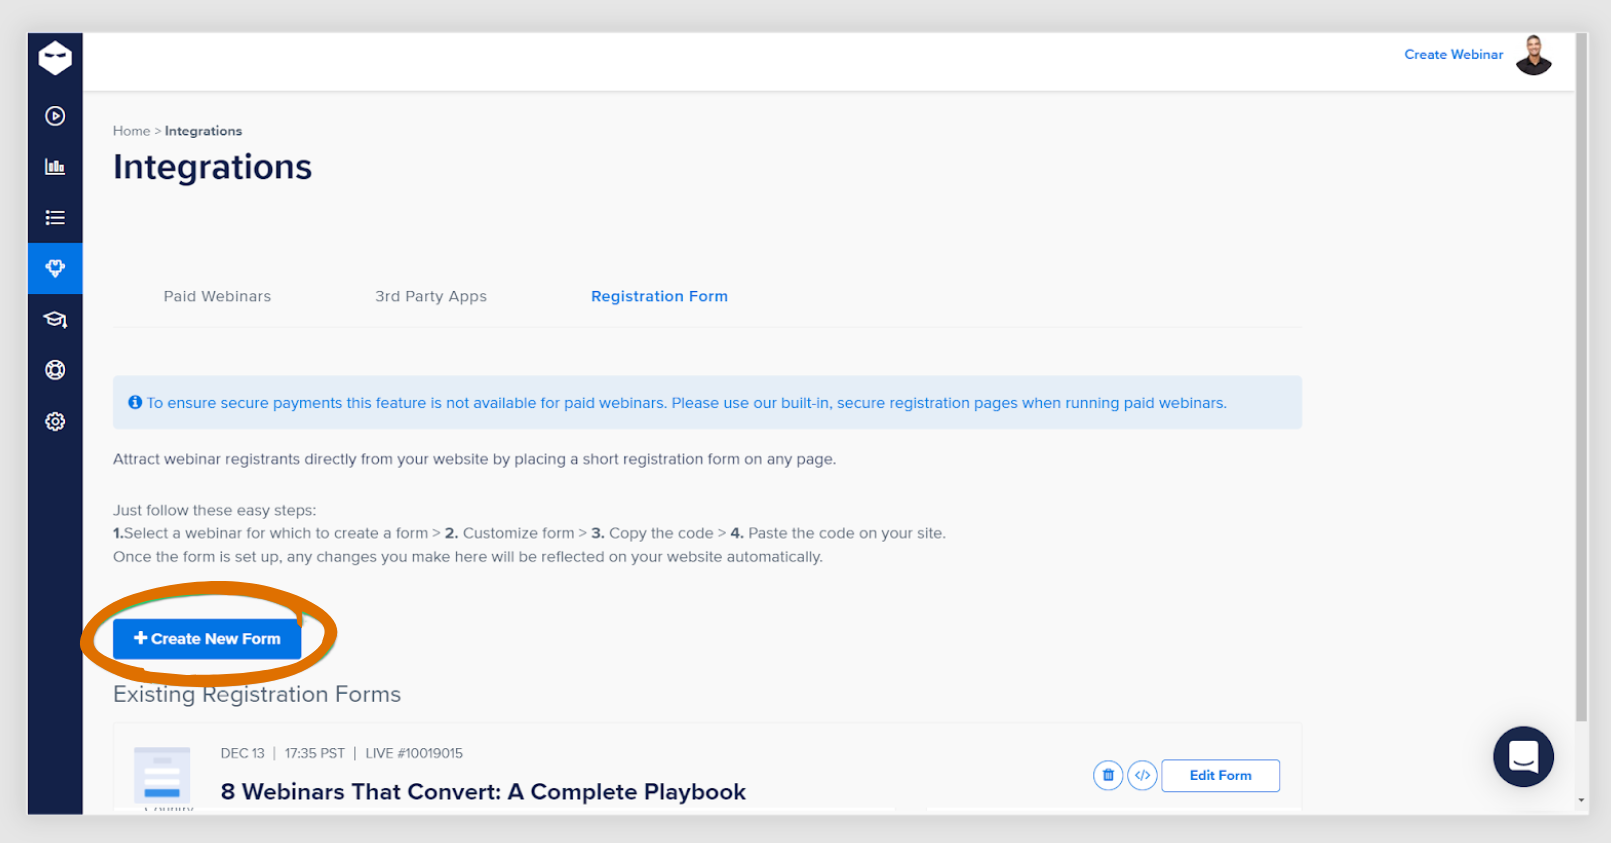
Step 4: Click the blue “+Create New Form” button.
Step 5: Choose the webinar you want to create a form for and click “Continue”.
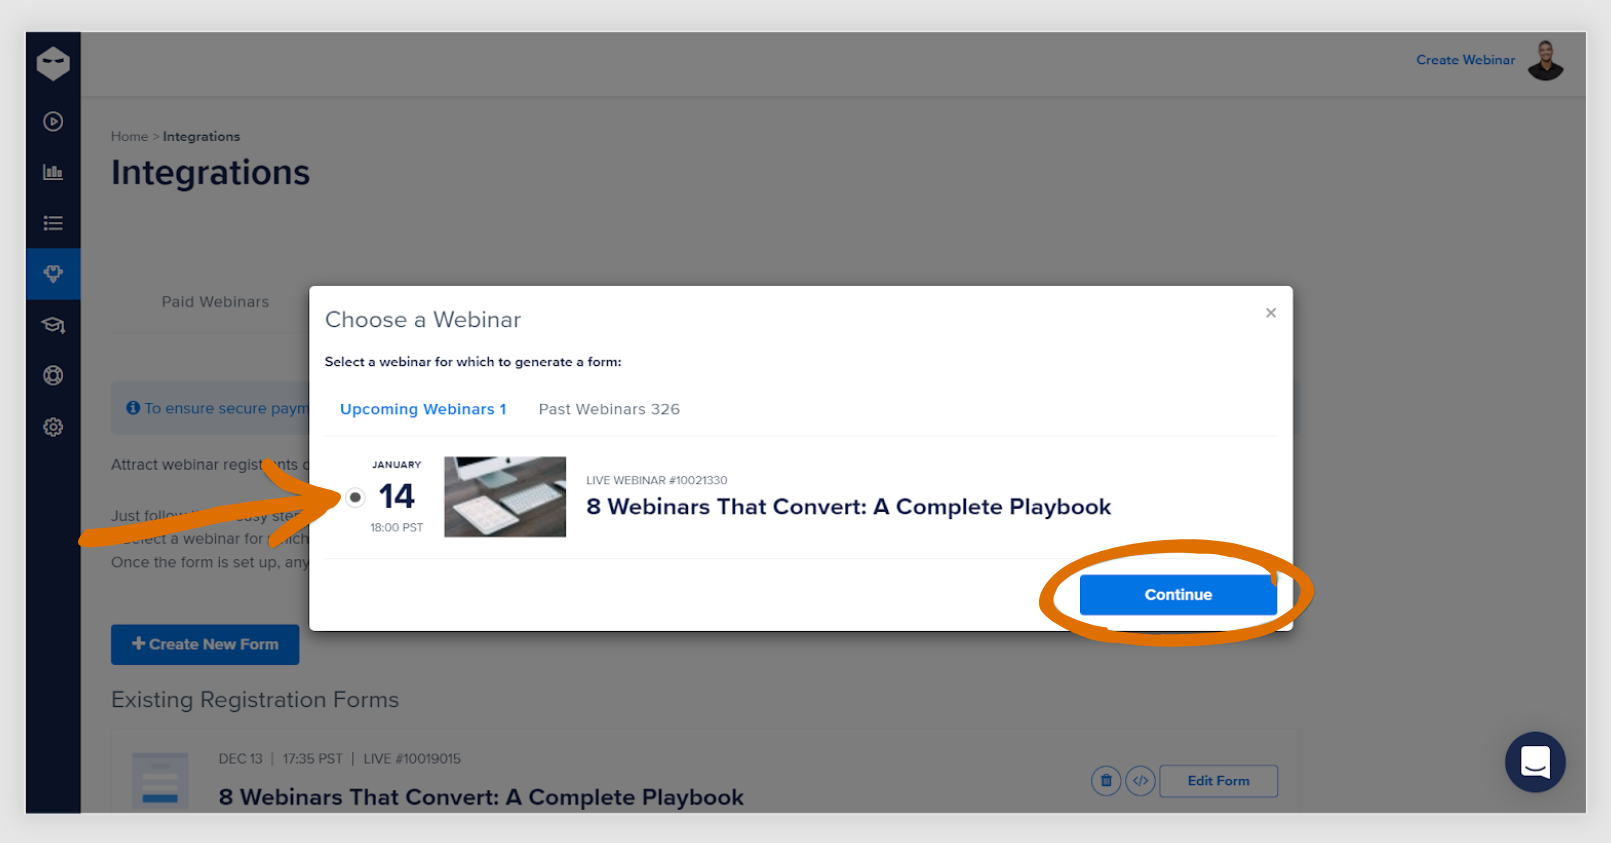
Note: If you do not see your webinar listed here, it may be unpublished. Publish your webinar first and then try again.
Step 6: Start creating the look of your registration form.
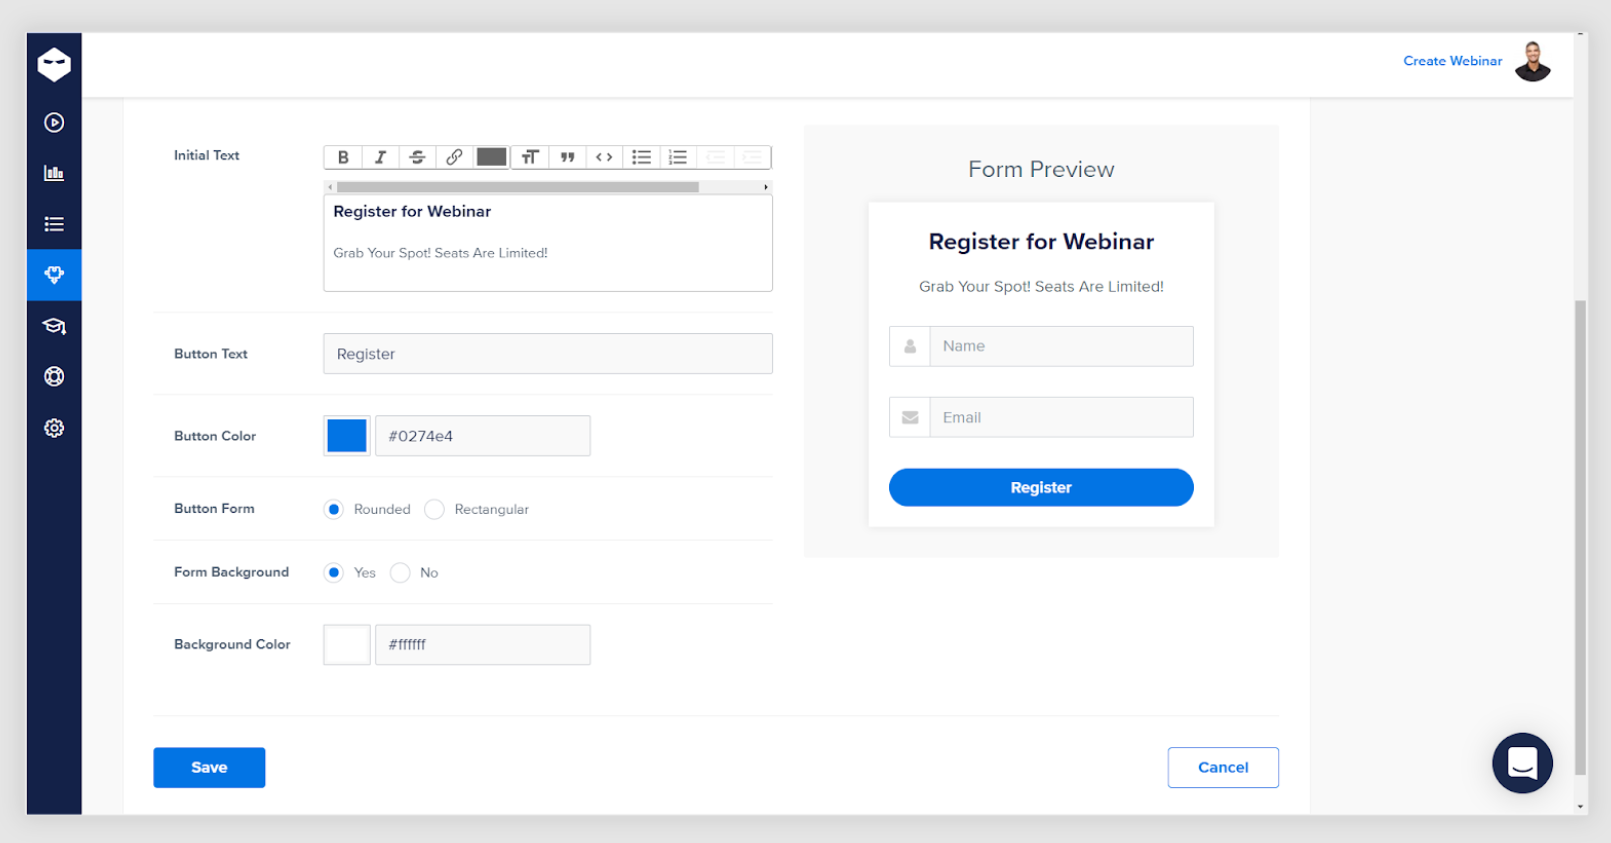
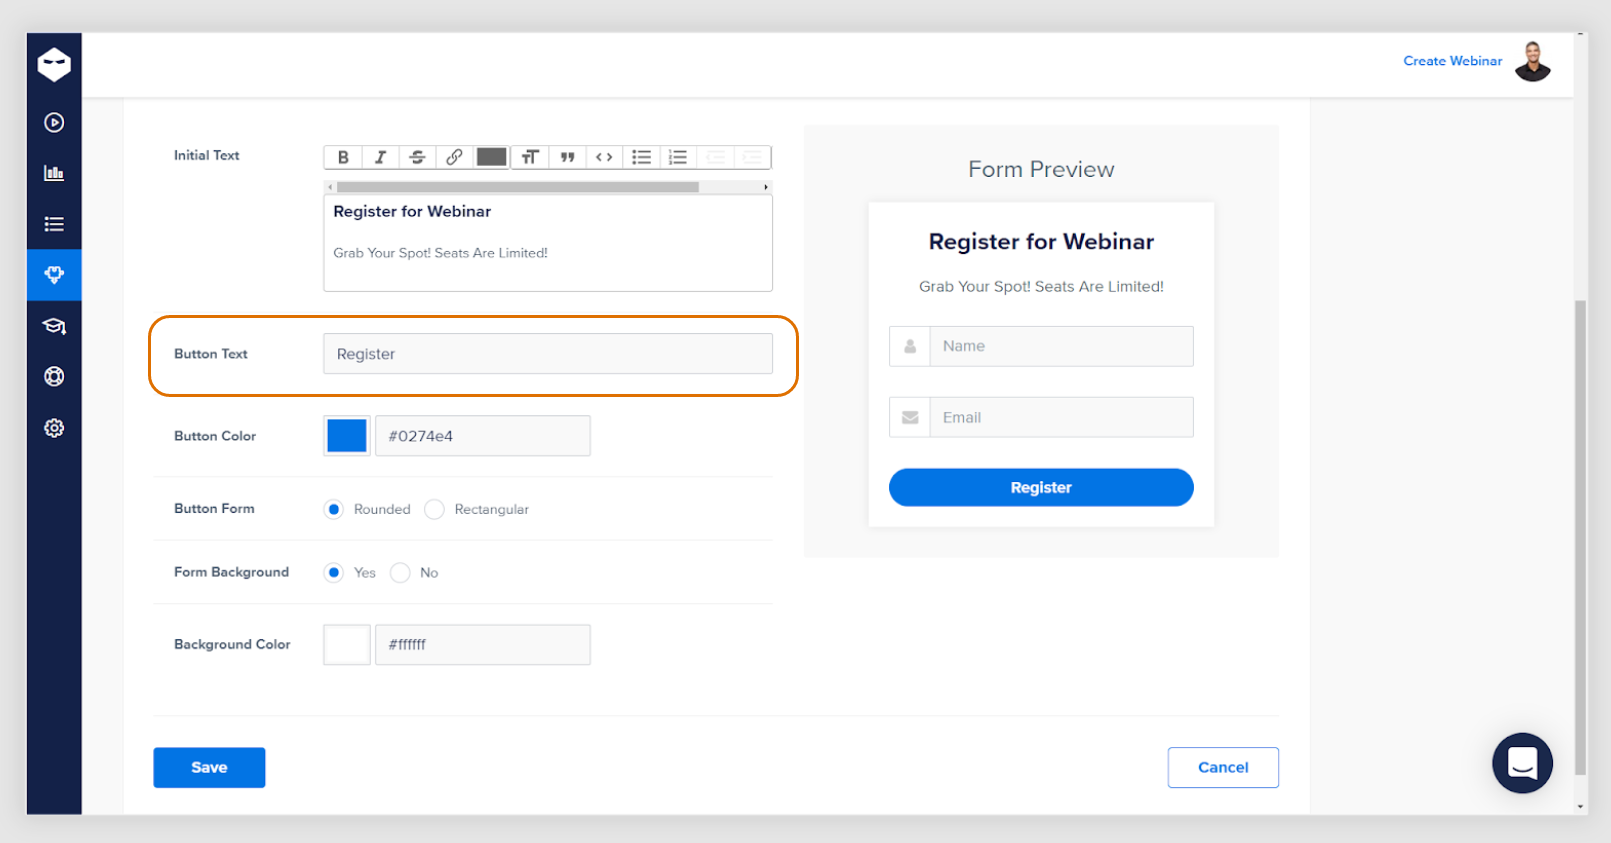
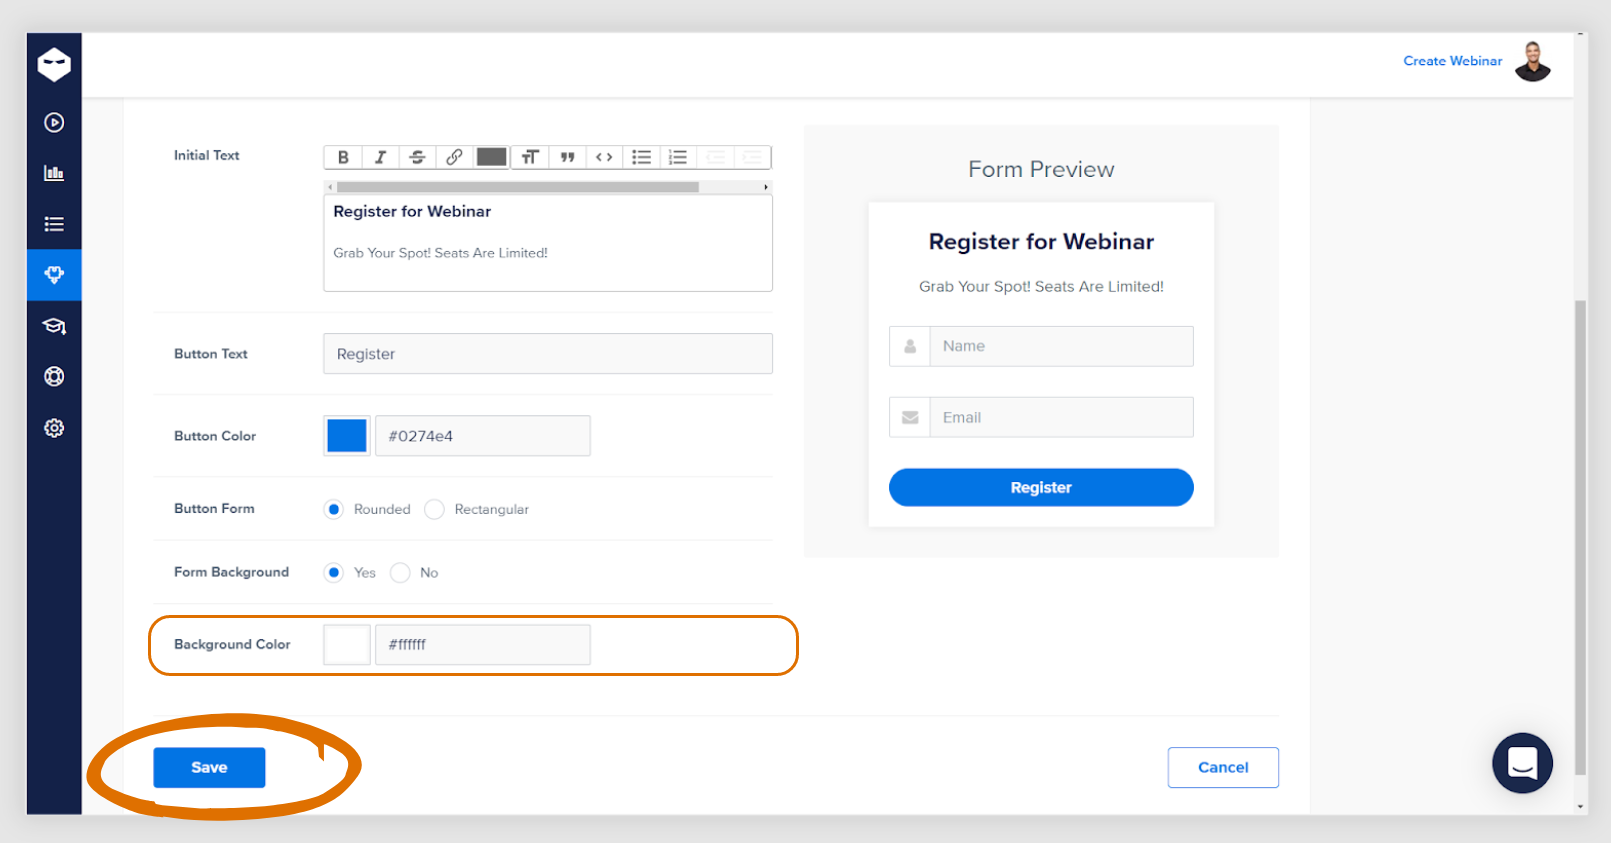
Step 7: Set up the initial text for the registration form. Use the formatting options to your preference.

Step 8: Enter a text for the registration button.
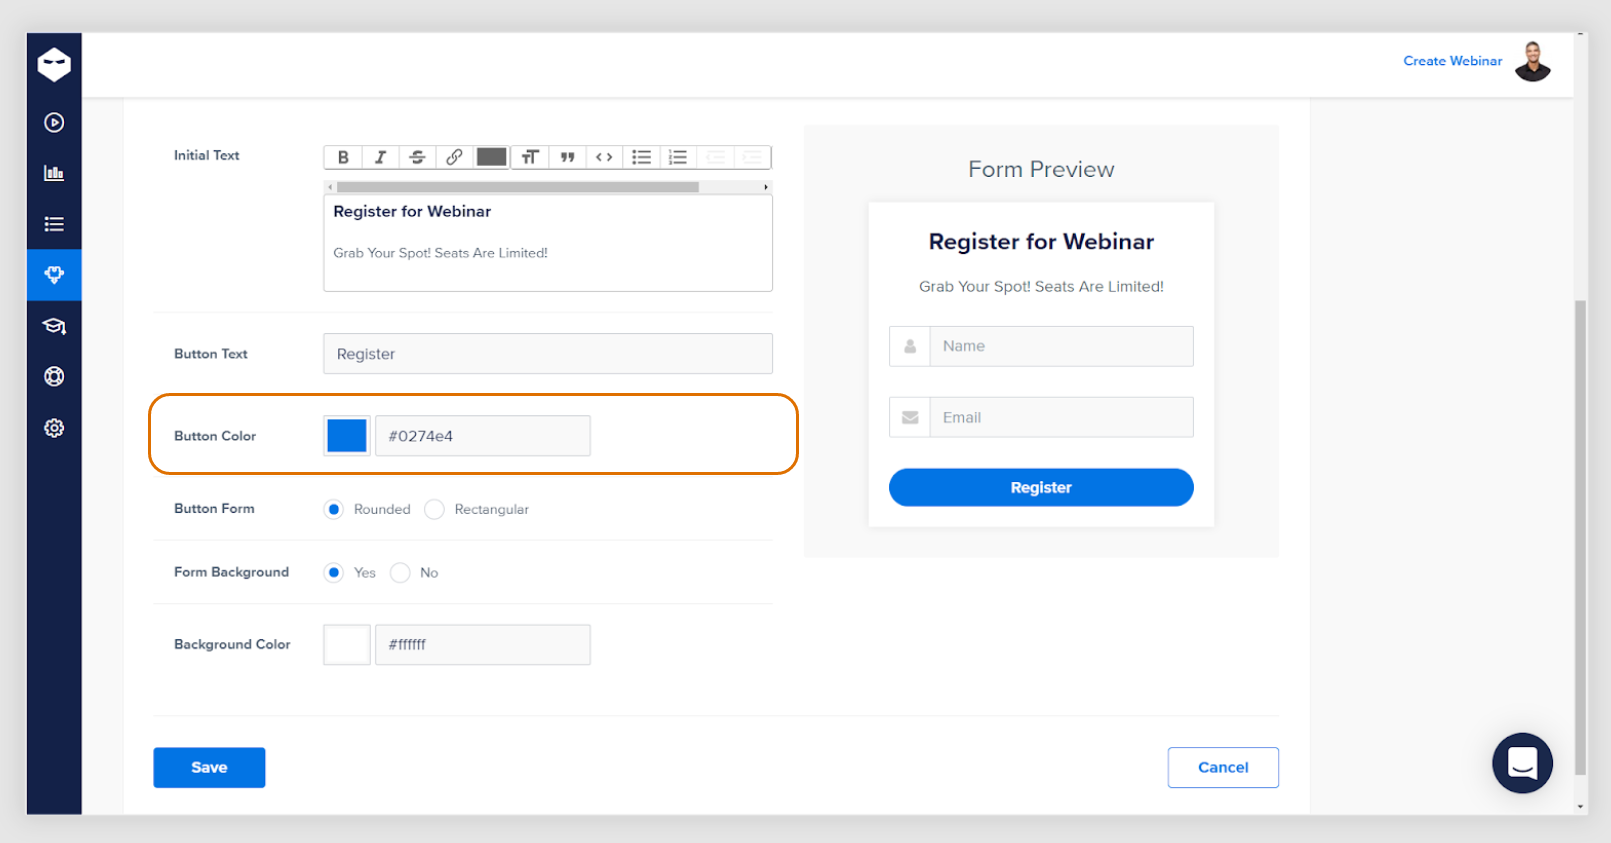
Step 9: Choose a color for the registration button.
Step 10: Choose if you want the button to be “Rounded” or “Rectangular”.

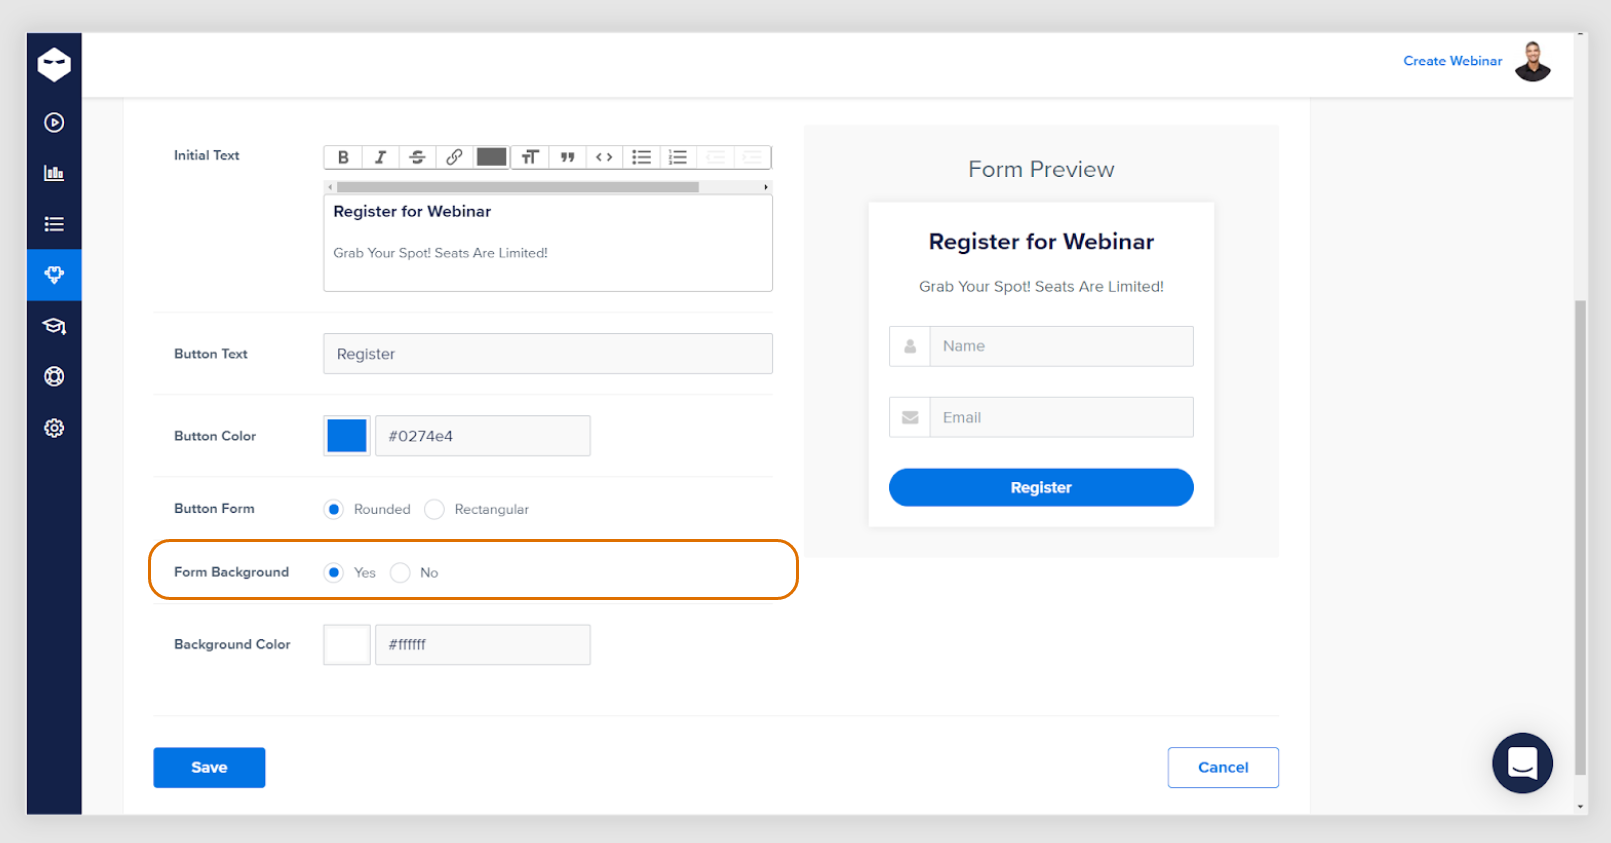
Step 11: Click “Yes” if you want a solid background for your registration form. Click “No” if you want it to be transparent.
Step 12: If you clicked “Yes” above, choose a background color.
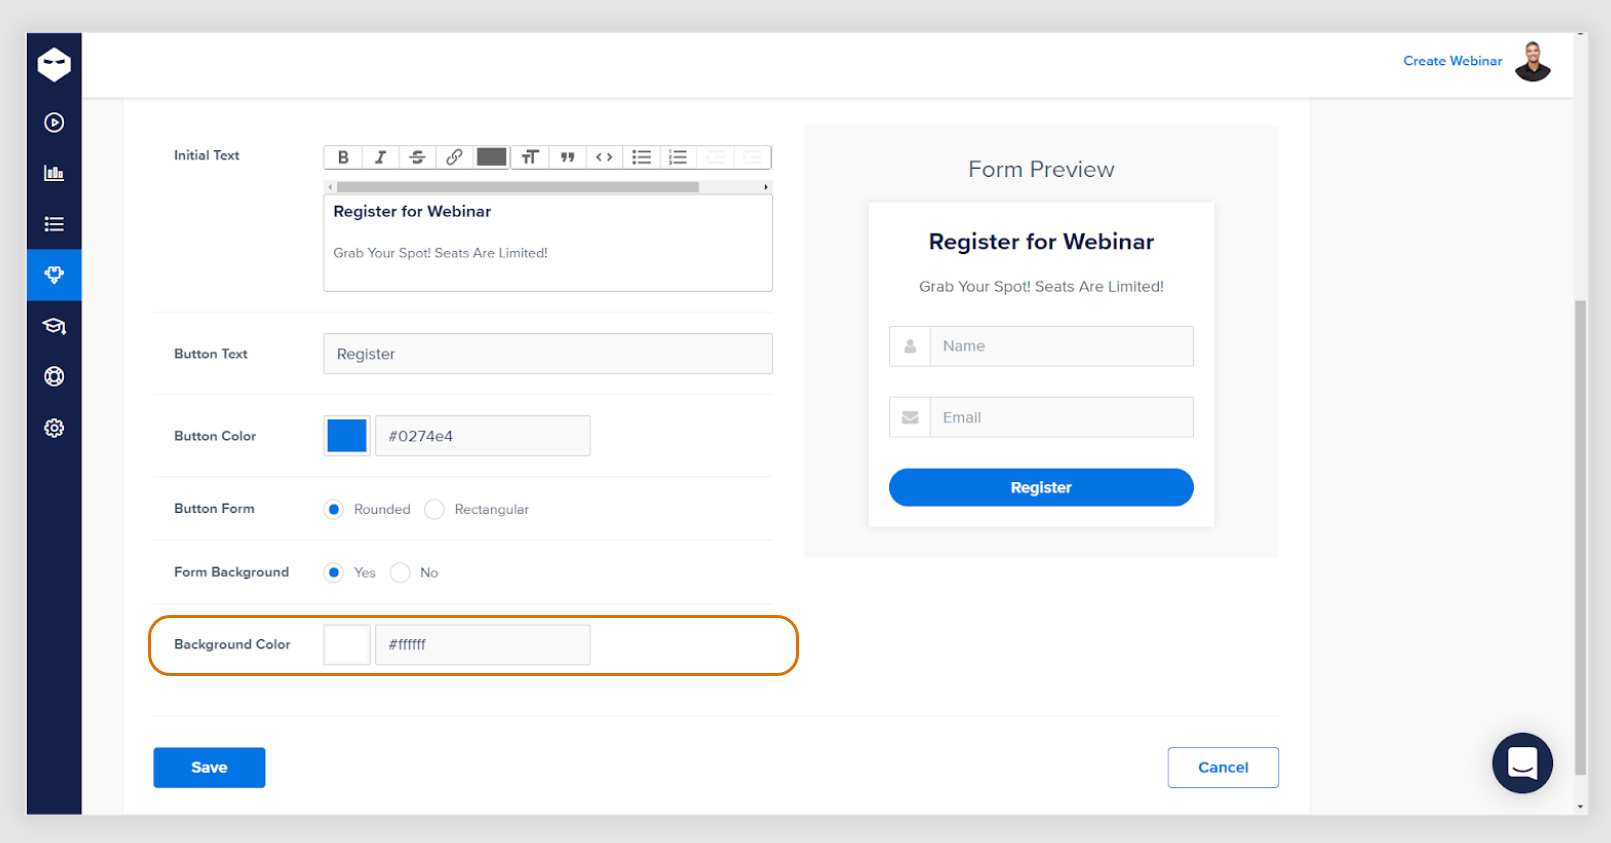
Step 13: Click “Save”.
You now have a registration form ready to be embedded in your website.
Placing the registration form on your website
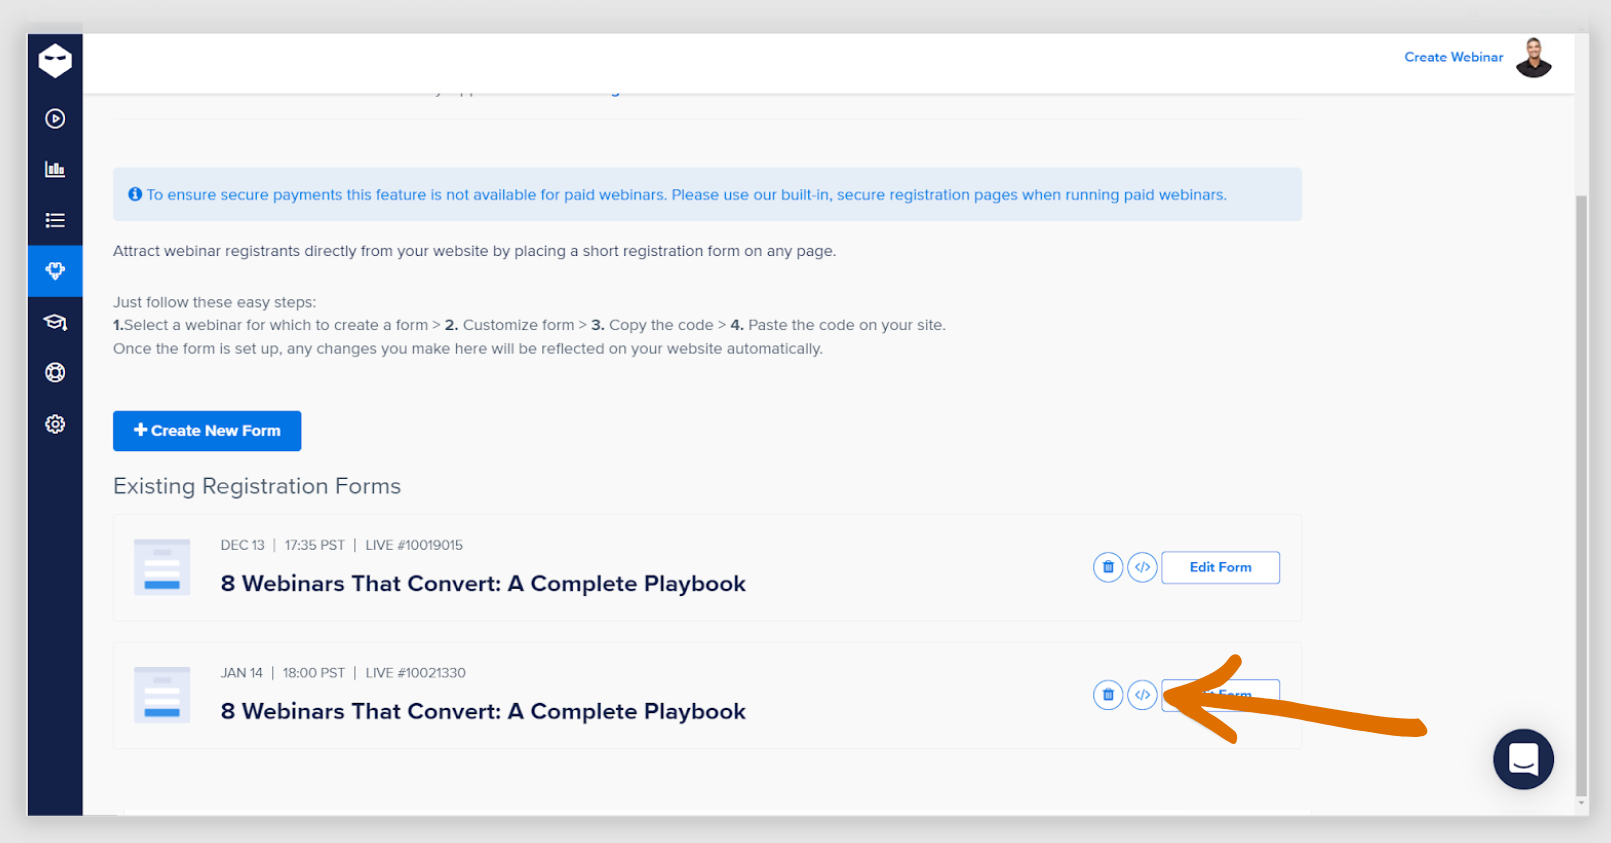
Step 1: On the registration form page, find the webinar you want to embed a registration form for and click the “Copy Code” icon to the right. There will be a small blue popup to confirm you have copied the code.
Step 2: Go to the page in which you want to embed a registration form and find the option to place an iframe code. In this case, we are using Google Sites.
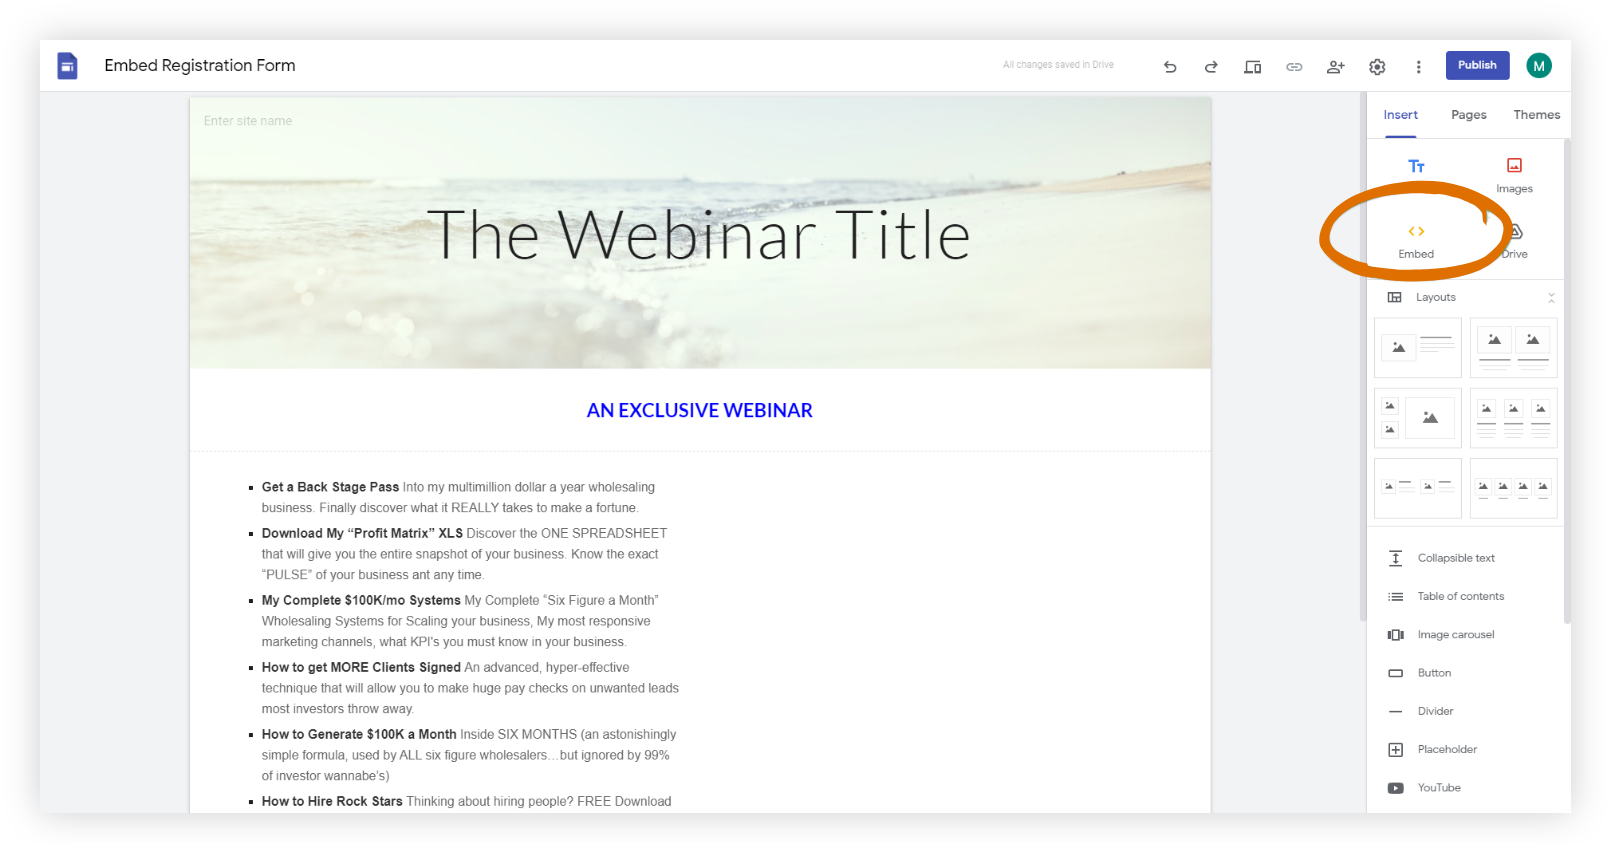
If you’re not sure where this option is in your page builder, you can contact the support team.
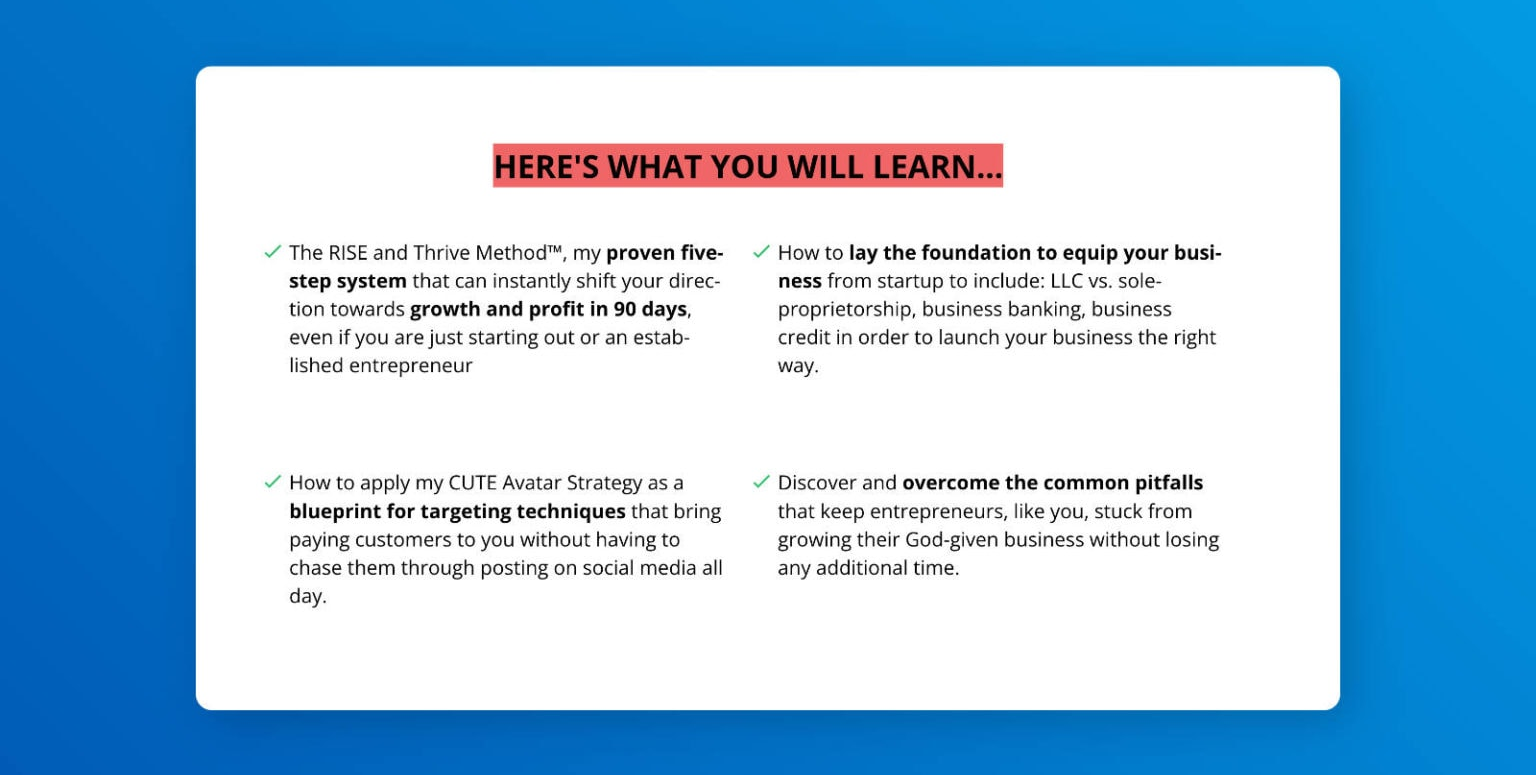
Here’s how it looks in the preview:

Publish your landing page, and that’s it! You are now ready to accept registrations for your event.
Create an effective webinar landing page in minutes.
Use WebinarNinja – the delightfully simple webinar solution that does it all.
How We Selected These Examples
These 20 pages were selected based on three criteria: each demonstrates at least one high-impact design or copy decision, each comes from a brand with a publicly known webinar program, and together they represent a range of industries, audiences, and page complexity levels, from a 5-element stripped-back page to a multi-section resource hub.
What Conversion Rate Should Your Webinar Landing Page Hit?
Before you redesign your registration page, it helps to know what good actually looks like. Here are the benchmarks that matter, pulled from independent research, not guesswork.
The Registration Rate Benchmark
Webinar landing pages have an average conversion rate of 22.84%, with top-performing pages reaching as high as 51%.
For context, the median conversion rate across all landing page types is around 6.6% as of Q4 2024, which means webinar registration pages, when optimized, outperform the average landing page by a significant margin. If your page is converting below 15%, your headline, form length, or CTA placement almost certainly needs attention.
For warm traffic, existing email subscribers who already know and trust you, registration rates routinely exceed 40%. The average webinar registration page conversion rate is 30% for cold traffic, meaning first-time visitors who arrive from ads or social posts.
The gap between cold and warm traffic underscores why social proof and a strong presenter bio matter so much: they do the trust-building work that your existing audience doesn’t need.
The Form Length Effect
Reducing one field on a sign-up form can increase conversions by up to 50%. That’s not a rounding error; it’s one of the highest-leverage, lowest-effort changes you can make to any registration page.
Every field you add beyond name and email is a tax on your conversion rate. Unless you have a specific, quantified reason to collect more data at registration, keep the form to two fields and collect additional information via follow-up email after someone has already confirmed their seat.
The Mobile Registration Reality
If your page isn’t mobile-optimized, you’re leaving a meaningful share of sign-ups on the table. And with email being the primary channel for driving registrations, up to 57% of registrations come from email marketing, and more than half of email opens happen on mobile, the journey from “I got an email about this” to “I’m now on the registration page” increasingly happens entirely on a phone screen.
The Countdown Timer Effect
Urgency is one of the most reliable conversion levers available on a registration page, and webinars are perfectly suited for it because they have a real, immovable deadline.
A live countdown timer showing the time remaining until the event starts creates a concrete reason to register now rather than later.
Most organizers see a disproportionate spike in registrations in the final 24 hours before an event, and a countdown timer makes that window visible and psychologically present to every visitor.
The Social Proof Multiplier
92% of consumers read testimonials when considering a purchase or action and this behavior translates directly to webinar sign-ups.
A testimonial from a past attendee, a quote about the speaker’s expertise, or even a visible registrant count (“842 people have already registered”) increases trust with cold traffic who has no prior relationship with the host.
For brands running paid traffic to registration pages, this is one of the fastest ways to improve cold conversion rates without changing the offer.
What Does a Mobile-First Webinar Landing Page Actually Look Like?
With more than half of email opens happening on mobile and nearly one in four webinar registrations completed on a phone, mobile optimization is no longer a nice-to-have. It’s a conversion requirement.
Yet most articles about webinar landing pages show only desktop screenshots. Here’s what mobile-first design actually means in practice, with specific examples from the pages reviewed above.
Single-Column Layout That Stacks Cleanly
Everything on a mobile webinar registration page should stack vertically in a single column. Your headline at the top, then a one-line subheadline, then your key bullet points, then the registration form, then the presenter bio.
Any side-by-side layout you use on a desktop must collapse into this vertical stack on screens under 768px wide.
Canva’s registration page (example #10 above) does this particularly well. Its minimalist layout translates to mobile without any structural breakdown, there’s nothing to rearrange because there was never anything extraneous to begin with.
This is the hidden advantage of going lean on desktop: your mobile layout inherits the simplicity automatically.
CTA Above the Fold on Every Screen Size
On a 375px-wide phone screen, “above the fold” means the first approximately 600px of vertical height, roughly what fits on the screen without scrolling. Your register button must appear within this window.
Ideally, it appears even before your body copy, paired directly with your headline.
WebinarNinja’s registration pages place the CTA in the first fold by default. The date, time, and sign-up button are all visible on the initial screen load. A visitor never has to wonder where the registration button is or scroll down to find it.
Sticky CTA for Longer Pages
For pages with more content, a detailed agenda, multiple speaker bios, past attendee testimonials, and a sticky “Register Now” button that remains visible as the user scrolls is one of the highest-ROI mobile UX improvements available.
WebinarNinja supports this natively. If your registration page is longer than three scrolls on mobile, a sticky CTA is worth implementing immediately.
Form Fields That Are Easy to Tap
Mobile form fields should be at least 44×44 pixels for comfortable tapping without errors.
If your form requires a phone number, company name, job title, and country in addition to name and email, you’re asking a mobile visitor to fill out five fields, often using autocorrect and a soft keyboard, before they’ve committed to anything.
The abandonment rate at that point is brutal. Keep mobile forms to name and email. Use your thank-you page or a post-registration email sequence to collect the rest.
Page Speed Is Part of Mobile Design
53% of mobile visitors abandon a page if it takes longer than 3 seconds to load. A registration page packed with large images, heavy fonts, or unoptimized scripts will lose more than half its mobile visitors before they read a single word.
Compress all images below 100KB where possible, avoid loading large video files above the fold, and test your page speed using Google PageSpeed Insights before every campaign launch.
Here’s a quick video to help you set up your email sequences for your webinar registrants:
What Are the Most Common Webinar Landing Page Mistakes to Avoid?
A well-intentioned registration page can still quietly destroy conversions through a handful of entirely avoidable design and copy errors. These are the most common ones, and more importantly, what the fix looks like in practice.
Mistake #1: Burying the CTA Below the Fold
If a visitor has to scroll to find the registration button, you’ve already lost a meaningful percentage of them. The webinar CTA should appear in the first screen view on both desktop and mobile, not after your full agenda, three testimonials, and two paragraphs of speaker bio.
The fix: Place your headline, a single line of supporting copy, and your registration button in the first fold. Everything else, the agenda, the bio, the testimonials, can live below it for visitors who want more convincing before they commit.
Mistake #2: Writing for the Company Instead of the Attendee
Copies like “Join us for our Q3 marketing update” fail the only test that matters: what’s in it for me? The attendee doesn’t care about your quarterly cadence. They care about what they’ll know, be able to do, or avoid after attending.
The fix: Every line of copy on your registration page should answer one question from the visitor’s perspective. Compare “Annual product roadmap webinar” with “The 5 features shipping in Q3, and exactly how to use them to close more deals.” The second is specific, outcome-oriented, and immediately compelling to the right audience.
Mistake #3: Overloading the Registration Form
Asking for job title, company size, phone number, and country before someone has committed to anything is a conversion tax with a known rate: reducing even one form field can increase conversions by up to 50%. Every additional field beyond name and email is a question that a meaningful percentage of visitors will answer with “never mind.”
The fix: Start with name and email only. For high-demand B2B webinars where lead qualification is critical, you can add company name, but stop there. The time to collect detailed lead data is after the registration is complete, not before.
Mistake #4: Missing Social Proof for Cold Traffic
For visitors arriving from paid ads or unfamiliar channels, your registration page is their first encounter with you. Without social proof, such as testimonials, credentials, a registrant count, they have no external signal that this webinar is worth their time. Trust has to be earned somewhere on the page before the CTA will work.
The fix: Add one or two testimonials from past webinar attendees. If you’re running your first webinar and don’t have attendee testimonials yet, use testimonials about your expertise from clients or colleagues, or feature any press mentions or publications you’ve contributed to.
Even a simple “Join 1,200 registered attendees” counter, once you have the registrations to back it, outperforms a blank page.
Mistake #5: No Urgency Mechanism
A webinar with no visible deadline feels optional, something people bookmark to register for later. “Later” almost never happens. Without a sense of urgency, every visit that doesn’t convert immediately is likely lost.
The fix: Use a countdown timer. WebinarNinja includes a native countdown timer on every registration page that you can toggle on per event.
When a visitor sees “Starts in 14 hours, 22 minutes,” the psychology shifts from “I’ll get to this” to “I need to decide now.” This effect is most powerful in the final 24–48 hours before your event, which is often when the majority of your registrations come in anyway.
Mistake #6: A Page That Breaks on Mobile
With roughly one in five registrations completed on a phone, a registration page that doesn’t render cleanly on mobile is a guaranteed conversion loss. The most common failure mode is a two-column layout that doesn’t collapse correctly, creating a tiny, unreadable form squeezed beside an oversized image.
The fix: Test your registration page on a real mobile device, not just a browser resize, before every campaign. WebinarNinja’s registration pages are mobile-responsive by default, so this concern is handled for you on the platform side. If you’re embedding the form on a custom page, verify the mobile layout independently.
Mistake #7: Ignoring the Thank You Page
Most hosts treat the thank you page as a formality, a generic “you’re registered!” screen. This is a missed opportunity. The moment immediately after registration is the highest-engagement moment in your entire pre-webinar funnel. The registrant is interested, they’re already on your page, and they’ve just made a small commitment.
The fix: Use the thank you page to ask them to add the event to their calendar (this single action has the biggest impact on actual attendance rates), offer a related resource, or make a low-friction offer relevant to the webinar topic. WebinarNinja lets you fully customize the thank you page and redirect to any URL on your own domain.
What Are the Key Elements of a High-Converting Webinar Landing Page?
What makes a great webinar landing page?
How can you make sure you’re doing everything you can to get people to sign up?
A well-designed webinar landing page can make all the difference between having no one show up or blowing past your attendee limit.
To save you from the guesswork, I’ve put together a list of the essentials for creating a high-converting webinar landing page.
1) A compelling headline
It all starts with a headline.
Your headline is what will first grab your visitor’s attention and determine whether they continue reading the page or hit the back button.
You want a headline that’s clear, concise, and speaks to the main benefit of attending the webinar.
What’s the specific outcome you’re promising?
Make sure your headline communicates the benefit in a way that’s impossible to miss.
Here’s one example that does just that:

How to Write a Headline That Actually Converts
The best webinar headlines follow a simple formula: specific audience + specific outcome + specific timeframe or mechanism.
“How retail store owners increased foot traffic by 34% using local SEO, without spending a dollar on ads” is more compelling than “Local SEO for Retail.”
The more specific you are, the more you filter for the right audience, and a qualified registrant is worth ten unqualified ones. A/B test two headline variants whenever possible.
Change only the headline and keep everything else identical. Even a 5-percentage-point improvement in your registration rate compounds significantly over multiple webinars.
2) A Brief Description of What the Webinar Covers
Once you have someone’s attention with your headline, the next step is to give them a brief overview of the webinar.
This is your chance to elaborate on what they can expect to learn and how it will benefit them.
Keep it short and sweet while still including some key details.
Formatting is very important here.
Bullet points and short paragraphs are the way to go. No long paragraphs!
The goal is to get them excited about what they’ll gain by attending — without giving away too much information.
Save all the sweet stuff for the webinar!
What to Cover & What to Leave Out
Your description should answer three questions: What will I learn, why does it matter, and what will I be able to do differently afterward?
It should not summarize the entire webinar. Think of it as the back-of-book copy for a novel, enough to communicate the value and pique interest, not enough to replace the experience of attending. Use bullet points with one specific takeaway per bullet.
Avoid bullets like “Learn about social media marketing” and instead write “The three content formats that generate the most organic reach on LinkedIn.”
Specificity is the difference between a visitor thinking “sounds interesting” and “I need to be on this call.”
3) Engaging visuals
Your visuals are what will help sell the webinar and get people to take action.
They’re an important part of your visitor’s first impression.
If they’re going to be staring at your webinar for 60+ min, they’ll want to know that it’s going to be visually engaging and not just a big block of text.
Your visuals can be in the form of images, videos, or even just graphical elements like arrows or lines.
The key is to use visuals that are relevant to your webinar topic and reinforce your message.
If you’re including images, make sure they’re high quality and don’t look like a generic stock photo.
If you can, an engaging image, video, or even a digital flipbook that speaks to the transformation your attendees will experience always works well.
What Kind of Visuals Actually Move the Needle
The best-performing visual on a webinar registration page is a high-quality photo of the speaker, not a stock photo, not a generic banner graphic, but an actual photo of the person who will be presenting.
This humanizes the webinar and creates a personal connection before the event even happens. If you have a past webinar recording with strong production quality, a 15–30-second video clip embedded on the registration page can significantly increase time on page and trust.
4) Social proof
You can tell someone you have the answers to their problems, but unless they’ve been familiar with your work for a while, they might not believe you right away.
This is where social proof comes in.
People are more likely to take action if they see that others have taken action before them and gotten good results.
Including social proof on your webinar landing page is a great way to increase conversion rates by showing potential attendees that your webinar is popular and valuable.
There are a few ways you can do this:
- Include testimonials from past attendees
- Include testimonials from previous clients
- Ask someone in your network to provide a comment about the slide deck from your upcoming webinar
- Ask someone in your network to provide a testimonial on your knowledge of the industry
- Include the logos of publications that your work has been featured in
These are all easy ways to add social proof to your webinar landing page, even if you haven’t run a webinar before.
Where to Place Social Proof for Maximum Impact
Don’t put testimonials at the bottom of your page where only committed readers will see them. Place your strongest testimonial, ideally one that speaks to a specific outcome, directly below the headline and CTA.
A quote like “I implemented the pricing strategy from this webinar and closed my next deal in 48 hours” placed above the fold will convert cold traffic far more effectively than three generic testimonials buried below the fold.
If you have a registrant count, display it dynamically near the CTA: “Join 1,400 others who have already registered.”
5) An “About the Presenter(s)” section
This is your chance to make a personal connection and further build trust with your audience before the webinar begins.
Include a brief overview of who you are and why you’re qualified to present on your topic.
If you’re going to be joined by any other speakers, include a brief overview of them as well.
It’s always a good idea to include a high-quality headshot so people can put a face to the name.
People are more likely to engage with someone they feel they know, so this is your opportunity to create that connection.
How to Write a Presenter Bio That Builds Credibility Without Bragging
The presenter’s bio has one job: to answer the question “why should I listen to this person?”
The answer should be specific and evidence-based, not generic.
Instead of “John is a marketing expert with 10 years of experience,” write “John has helped 240+ SaaS companies reduce churn by restructuring their onboarding — his clients include [notable company] and [notable company].”
Specificity is credibility. Include a high-quality headshot, a link to the presenter’s LinkedIn profile if relevant, and any notable publications, podcast appearances, or speaking credits that establish authority in the webinar’s specific topic area.
6) A clear call-to-action
Now that your visitor understands what your webinar is about and why they should attend, it’s time to get them to take action.
Your CTA should be clear, obvious, and enticing.
It should stand out and be easily clickable, so there’s no confusion about what the next steps are.
A button that says “Register Now” will generally work fine, but you can always add more spice to it.
Something like “Reserve My Spot” can help add urgency if spots are limited.
“I’m Ready to XYZ” helps drive home the benefit.
“I’m in. Sign me up!” feels more personal.
Feel free to play around with your CTA text until you get something that feels right.
You can also use a few of these if you have more than one CTA on your page (recommended).
CTA Copy That Goes Beyond “Register Now”
“Register Now” works. But there are CTA formulations that convert measurably better because they frame the action as something the visitor is doing for themselves, not for you.
First-person CTAs like, “Save My Spot,” “I Want In,” “Count Me In” outperform third-person CTAs in A/B tests because they reduce the psychological distance between reading and acting.
If your webinar has limited capacity (and even if it doesn’t, communicating scarcity is effective), a CTA like “Claim Your Free Seat” adds an additional conversion lever without any deception. Use one primary CTA at the top and repeat it at the bottom of the page for visitors who read everything before deciding.
7) A form to capture contact information
Your CTA will send people to a form where they enter their contact information.
This part sounds obvious, but there are a few things you’ll want to keep in mind:
The fewer fields you have, the better. People are more likely to fill out a form if they know it’ll only take them a second.
Essential information like name, email, and maybe company name are a good starting point.
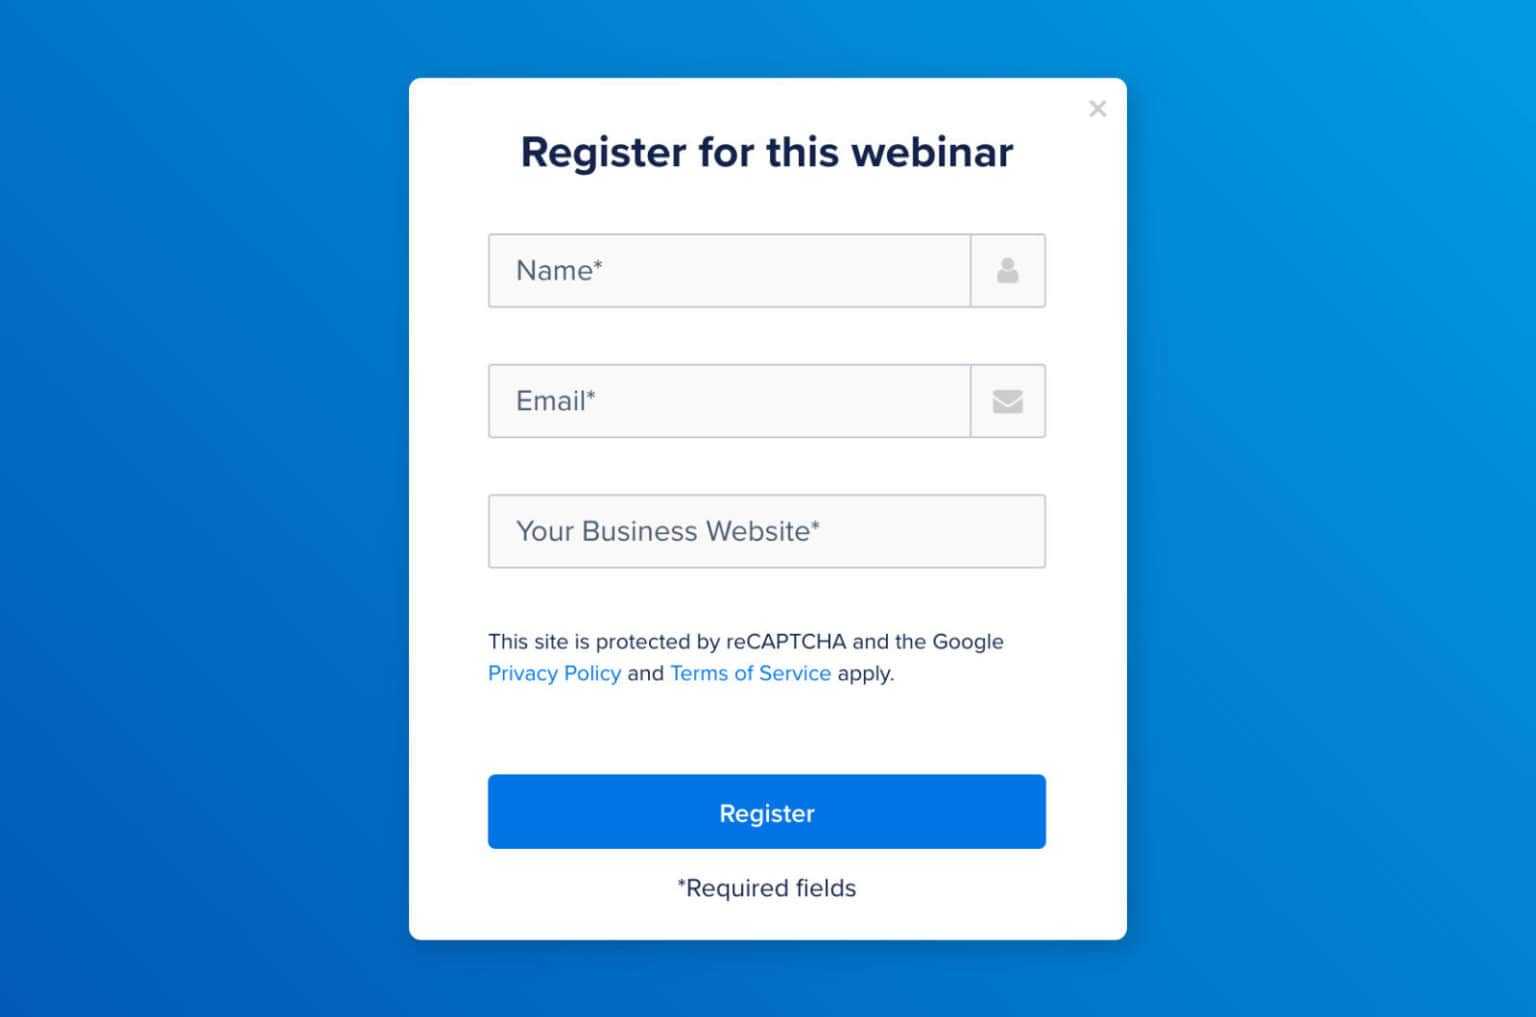
If you know your webinar will be in high demand, you can try collecting a couple more fields, but I wouldn’t push it.
You can always learn more about your attendees after they’ve engaged with you on the webinar.
Lastly, you may want to include a link to your privacy policy. This helps to build trust and assure people that their information is safe with you.
Form Design Decisions That Protect Your Conversion Rate
Beyond keeping the form short, the visual design of your form matters.
A form that looks clean, professional, and consistent with your brand signals that the organization behind the webinar is trustworthy. Use placeholder text in form fields that guides visitors without confusing them: “Your first name” and “Your best email” are friendlier than blank fields.
Add a one-line privacy assurance below the submit button: “We’ll never share your information. Unsubscribe any time.” This addresses the hesitation some visitors have about submitting their email to an unknown brand.
WebinarNinja’s GDPR consent toggle adds a compliant checkbox for audiences in European markets, ensuring you’re collecting consent correctly from the moment of registration.
8) A Countdown Timer That Makes the Deadline Real
If you are looking to introduce a sense of FOMO, countdown timers work really well. They also induce a sense of urgency, making sure the probable attendees click that ‘Join Now’ button in fear of losing a spot when the time runs out.
Why Urgency Is the Most Underused Conversion Lever on Webinar Pages
Every webinar has a real, immovable deadline, the moment it starts. A countdown timer makes that deadline visible, concrete, and psychologically present for every visitor who lands on your registration page.
Without it, the webinar lives in an abstract future. With it, the visitor is confronted with a specific number of hours and minutes, and the decision to register or not becomes immediate.
The effect is most pronounced in the final 24–48 hours before an event, when countdown timers shift visitor behavior from “I’ll come back to this” to “I need to decide now.”
Ready to Build a Webinar Landing Page That Actually Converts?
A great webinar landing page isn’t about following a visual template or copying what a well-known brand does. It’s about understanding why specific design decisions drive conversions, and making those decisions deliberately on your own page.
The common thread across every example in this guide: clarity wins. The pages that convert best are the ones that communicate the clearest value to the most specific audience, remove every unnecessary obstacle between interest and registration, and give visitors a concrete reason to act now rather than later.
If you’re building your registration page from scratch or redesigning an existing one, start with the headline. Get it specific, make it outcome-oriented, and test it against your current version. Then work your way down the page: CTA placement, form length, social proof, presenter bio, and countdown timer. Each of these is a variable you can test and improve independently.
WebinarNinja handles the technical side of all of this natively, from the registration page builder to the countdown timer to the embeddable form to the thank-you page redirect. It offers a free trial that gives you full access to the registration page builder, countdown timers, embeddable forms, and analytics.
Frequently Asked Questions

How do landing page headlines impact webinar sign-ups?
A benefit-driven, outcome-specific headline consistently outperforms a descriptive one. "The 3-Step Content Framework That Generated 12,000 Email Subscribers in 90 Days" will always outperform "Content Marketing Webinar — October 12th." The more precisely your headline speaks to what your specific audience wants to achieve, the higher your registration rate will be, regardless of everything else on the page.
What should a webinar registration form include?
At a minimum, a webinar registration form should include a first name field and an email address field. For B2B audiences where lead qualification matters, you can add the company name as a third field. Every additional field beyond these basics reduces your completion rate. The time to collect detailed profile information, job title, company size, and phone number is after registration, via a welcome email or a field added to your thank-you page.
How does a countdown timer improve webinar registration rates?
A countdown timer makes the webinar's deadline concrete and visible. Without one, a registration page feels like it describes an event that exists in the abstract future, something a visitor can come back to later. With a live countdown showing "Starts in 11 hours, 40 minutes," the decision to register or not becomes immediate and urgent.
What is the best layout structure for mobile webinar landing pages?
A single-column layout where all elements stack vertically is the correct default for mobile. The registration button should appear within the first screen view on a 375px-wide phone, before any body copy, before any agenda details, before the presenter bio. Form fields should be at least 44px tall for comfortable tapping. For longer pages, a sticky CTA button that remains visible as the user scrolls adds a meaningful conversion lift on mobile.
What is a good webinar landing page conversion rate?
Webinar landing pages have an average conversion rate of 22.84%, with top-performing pages converting as high as 51%. For context, the median conversion rate across all landing page types is approximately 6.6% as of Q4 2024, which means optimized webinar registration pages significantly outperform the average. If your page converts below 15%, your headline, form length, or CTA placement is the most likely issue.
Can I create a webinar landing page without a separate page builder?
Yes. WebinarNinja includes a fully built-in registration page builder that creates a mobile-responsive, branded landing page for every webinar you set up. You can customize the headline, body copy, imagery, CTA button text and color, countdown timer, and presenter bio directly within the platform; no external page builder, no code, no stitching together separate tools.
Want to host a webinar for free?
Use WebinarNinja to teach, improve marketing, and grow your sales.