“Are you hosting your webinars from a haunted house? 👻 Because that’s what it looks like.”
Yep, someone actually said that in my live chat. And honestly, they had a point. My background was messy, the lighting was weird, and the whole setup just felt off.
That got me thinking—does my webinar studio really look so bad? Turns out it does. A messy or boring setup can make people lose interest fast, no matter how good your content is.
After 7 years of hosting webinars, I’ve figured out what works (and what doesn’t). So, let’s talk about how to create webinar studios that actually work and keep your audience hooked. 🎥✨
Let’s dive in!
What Is a Webinar Studio?
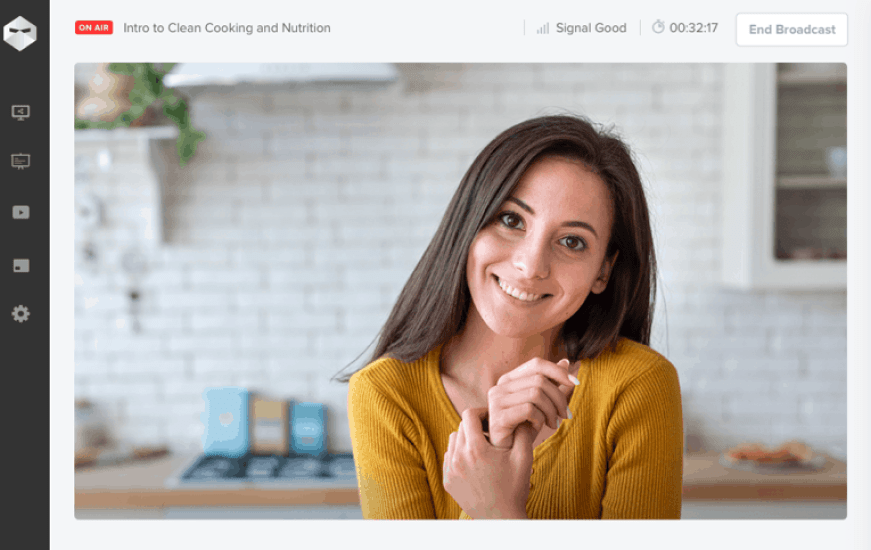
Suppose you’re watching a live webinar where the presenter’s video is clear, the audio is crisp, and the presentation slides flow seamlessly. You can ask questions, participate in polls, and everything just works.
This setup isn’t by chance; it’s the result of a good webinar studio.
A webinar studio is a specialized setup designed to deliver high-quality virtual events. It involves the right equipment, such as cameras, microphones, lighting, and software to manage everything from video feeds to audience interaction.
Whether for webinars, training sessions, or conferences, a webinar studio ensures that all technical aspects are handled with ease, giving both hosts and participants a smooth experience.
Why Do You Need a Webinar Studio?
After understanding the basics of a webinar studio, let’s understand its needs.
Do you agree that hosting a webinar is more than just showing up and pressing “start”?
Personally, I believe that whether you’re delivering an important product demo, hosting a virtual training session, or running a corporate meeting, a webinar studio is essential to ensure that your event goes off without a hitch. Here’s why:
1. Professional Quality to Make Your Webinar Stand Out
Imagine hosting a webinar where your video is blurry and the audio is hard to understand. It can quickly turn off your audience. A webinar studio provides the necessary tools to ensure your presentation is crisp and clear.
For example, using a high-quality camera and microphone ensures your viewers have an immersive experience, just like watching a live television broadcast. This professional touch elevates your brand’s image and builds trust with your audience.
2. Engagement Tools to Keep Your Audience Involved
Webinars are more than one-way communication; they need to be interactive. A webinar studio includes features like polls, Q&A sessions, and live chat that keep your audience engaged.
Take, for instance, a corporate training session. With a webinar studio setup, you can ask participants for feedback during the session and adjust the content in real-time based on their responses.
This interaction creates a dynamic, participatory experience that helps learners stay focused and engaged.
3. Branding and Customization to Strengthen Your Identity
Branding is key to making your webinar stand out and resonate with your audience. A webinar studio allows you to customize backgrounds, add logos, and maintain a consistent brand identity throughout the event.
Think about a product launch webinar. You want every slide, every backdrop, and every detail to reflect your brand’s identity. A webinar studio enables you to create a seamless and polished look that speaks volumes about your company’s professionalism.
4. Technical Support and Reliability to Ensure a Smooth Experience
One of the biggest concerns with virtual events is technical glitches—frozen screens, poor sound, or unresponsive software. A webinar studio is designed to minimize these risks.
For example, when running a large-scale virtual conference, you’ll have tools to monitor and control every aspect of the event, from speaker video feeds to audience interaction. This level of reliability ensures a smooth event, free of distractions that could impact the attendee experience.
5. Recording and Post-Event Use to Maximize Your Content’s Value
Let’s say you’ve just hosted a webinar, and you want to share it with those who missed it or use it for future marketing. A webinar studio makes recording easy, allowing you to capture the entire event in high quality.
This recording can be edited and repurposed for social media posts, training materials, or promotional content.
For instance, a business could take a recorded product demo webinar, edit out irrelevant parts, and use it as an on-demand resource for prospective customers.
6. Efficient Event Management to Simplify Your Workflow
Managing a virtual event on the fly can be stressful, but with a webinar studio, you have all the tools in one place. Whether it’s tracking webinar attendance, sharing resources, or managing speaker schedules, a webinar studio offers efficient event management features.
I once hosted a virtual team training session where I had to manage multiple speakers and keep track of attendees’ progress in real-time. The studio webinar setup I used made the process smooth and organized, allowing me to focus on content rather than the technical side of thing
What Are the Pre-requisites of a Webinar Studio?
Setting up a webinar studio isn’t as simple as pressing “record” and hoping for the best. To ensure your webinars are top-notch, you need the right gear and a bit of planning. Here’s what you need to get your webinar studio up and running smoothly:
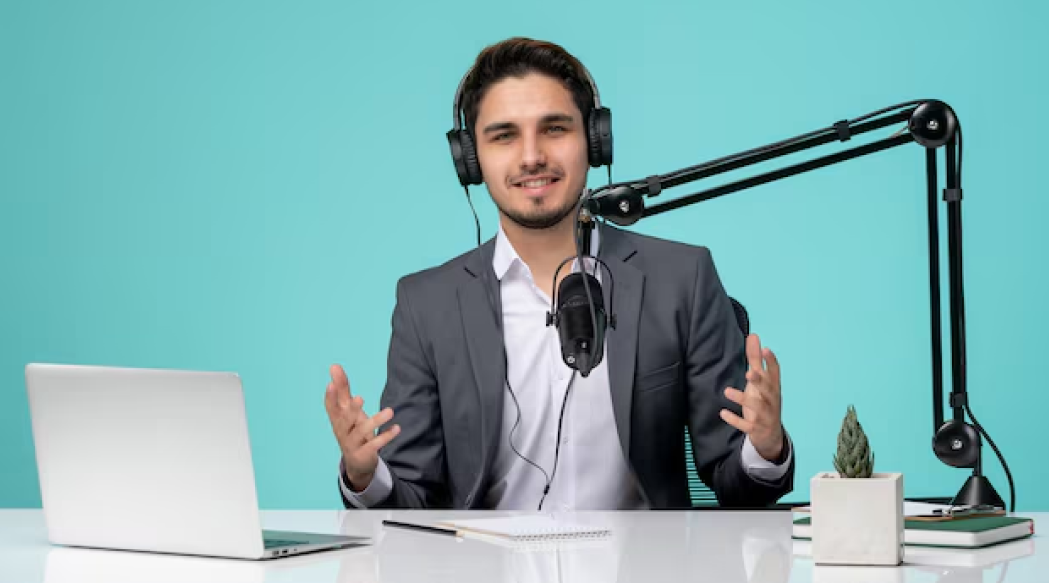
1. High-Quality Audio and Video Equipment to Ensure No One Hits Mute on You
The last thing you want is for your audience to struggle with a fuzzy video or distorted sound. Trust me, I’ve been there, and it’s not fun! A high-quality camera and microphone are your best friends when it comes to creating a professional look and feel.
- Camera: You need a camera that doesn’t make you look like a blur. A DSLR or a high-definition webcam works wonders. I personally use the Logitech Brio 4K camera for crystal-clear video, and it’s been a game-changer for my sessions.
- Microphone: Sound is just as important! I’ve used everything from built-in laptop mics to high-end condenser mics, and the difference is massive. A good mic, like the Blue Yeti or Audio-Technica AT2020, will ensure your voice is smooth and clear—no more “can you repeat that?” moments.
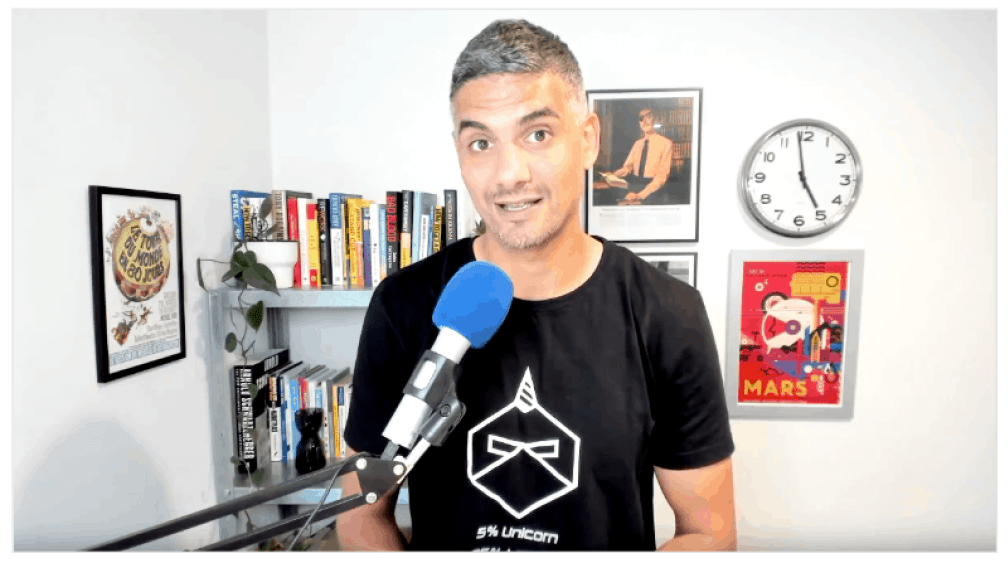
For a better idea on this, watch:
2. Stable Internet Connection to Keep the Buffering Monster at Bay
Ever had your internet cut out during a critical part of your webinar? It’s like your audience suddenly vanishing into thin air. A reliable, fast internet connection is crucial. Aim for at least 20 Mbps upload speed.
- Wired Connection: I learned the hard way that Wi-Fi isn’t always reliable for webinars. I switched to a wired Ethernet connection, and honestly, it’s been smooth sailing since. No more frozen screens or dropped connections in the middle of an important demo.
- Backup Plan: Always have a backup internet plan. I keep a mobile hotspot handy, just in case the primary connection decides to misbehave. 🌐
3. Lighting That Flatter
Lighting makes a huge difference in how you come across on screen. Poor lighting can make you look like a shadow, while good lighting brings out your best side (yes, it’s possible to look good on camera!).
- Natural Light: If you can, position your setup near a window for some natural light. It’s soft and flattering. But if you’re like me and often do webinars in the evening, a ring light can do wonders.
- Artificial Lighting: I use a ring light, and it’s been amazing. It gives me that soft glow, and it’s adjustable for different moods. Plus, it’s easy to set up and doesn’t take up too much space.
4. Reliable Webinar Hosting Platforms to Elevate Your Online Presence
The platform you choose to host your webinar can make or break the experience. Let’s talk about a few I’ve personally tried:
- WebinarNinja: This is my go-to platform for hosting smooth, interactive webinars. The user interface is super intuitive, and I’ve used it for everything from training sessions to product launches. I love the variety of features, especially the ability to customize registration pages and automate follow-ups. It’s saved me so much time and effort.
- Demio: Another platform I’ve used for webinars. Its simplicity and ease of use are great for straightforward webinars. Plus, the live chat and attendee interaction features are fantastic.
- Webex: I’ve also used Webex for larger corporate webinars. While it’s reliable and offers solid features, I’ve found it a bit more cumbersome when compared to WebinarNinja. However, it’s a great choice for bigger teams or organizations that need detailed event management tools.
5. Good Backdrop & Environment to Ensure No “Oops” Moments
The backdrop of your webinar is like the stage for a play—it sets the scene. You don’t want a messy room distracting from your content, right?
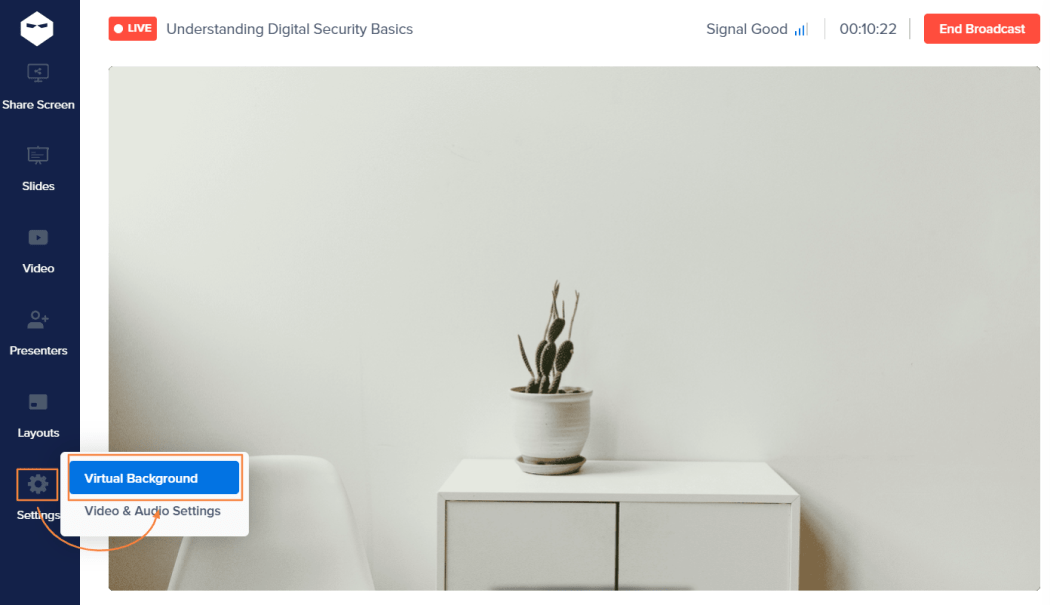
- Virtual Backgrounds: Virtual backgrounds are great if you want to keep things tidy and on-brand. I use one with my company logo during product demos and webinars. Just make sure it’s professional and not too flashy.
Here are some examples of good virtual backgrounds:


- Physical Setup: If you prefer a real background, keep it simple and clean. A neutral-colored wall or a well-organized bookshelf works wonders. I used to have a plain wall behind me, but after getting feedback, I added a few branded elements that made it feel more welcoming and professional.
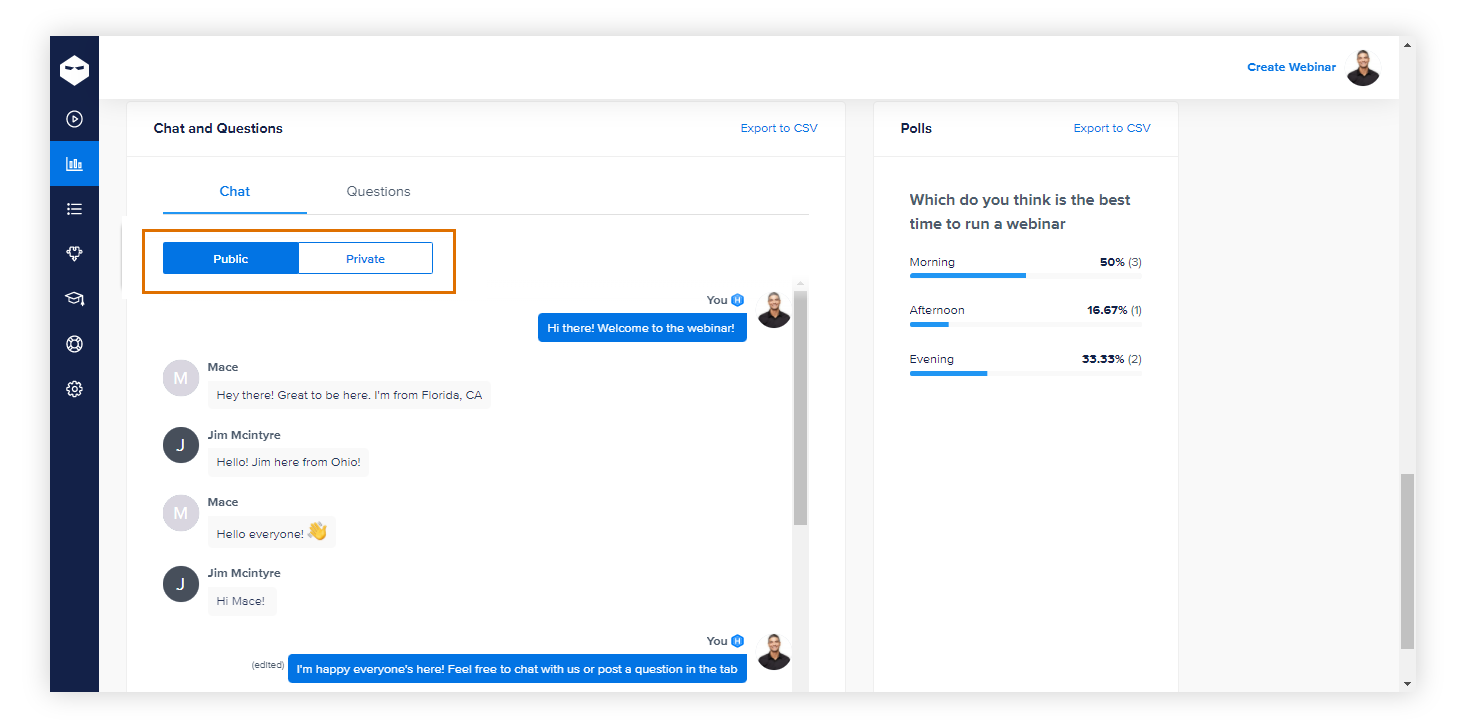
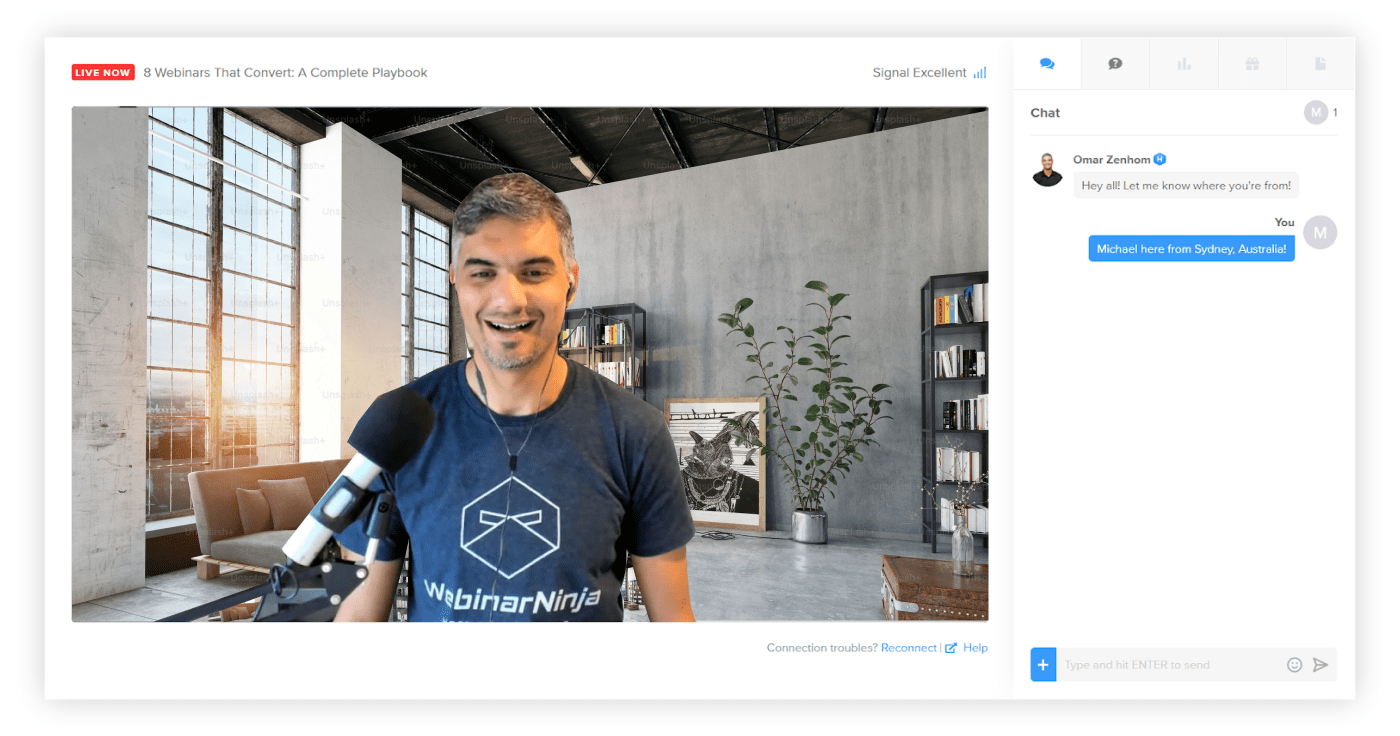
6. Audience Engagement Tools to Keep Them Hooked and Talking
A webinar is not a one-way street—it should be interactive. That’s where tools like live polls, Q&A, and chat come into play. I personally always use these during my webinars to keep the energy flowing and make sure my audience is engaged.
- Polls & Q&A: During my last corporate training session, I asked a few live poll questions, and the responses were so insightful! It really helped me gauge how well the content was being understood, and I adjusted accordingly.
For example, some of the questions I asked in my webinar titled “Quick Tips to Monetize Your Webinars were:
1. What’s your experience level with monetizing webinars?
(Ask this at the beginning to gauge the audience’s familiarity with monetization.)
✅ Poll Responses:
- A. Beginner – I’ve never monetized a webinar
- B. Intermediate – I’ve tried but haven’t had much success
- C. Advanced – I regularly monetize and generate revenue
- D. Expert – I run multiple revenue-generating webinars
💡 Adjustment Insight: If most attendees are beginners, you might spend more time on fundamentals before moving to advanced strategies.
2. What’s your current approach to monetizing webinars?
(Follow up to understand the methods they’re already using or considering.)
✅ Poll Responses:
- A. I offer free webinars and don’t monetize them yet
- B. I charge for access via tickets or subscriptions
- C. I use sponsorships and partnerships
- D. I generate revenue through post-webinar sales (courses, consulting, etc.)
- E. I’m still exploring options
💡 Adjustment Insight: If most responses fall under “A” or “E,” start by covering foundational monetization strategies before moving into advanced techniques.
3. What’s your biggest challenge in monetizing webinars?
(Ask after introducing monetization methods to address key obstacles attendees face.)
✅ Poll Responses:
- A. Getting enough attendees to make it profitable
- B. Pricing my webinars correctly
- C. Finding sponsors or partners
- D. Creating content people are willing to pay for
- E. I don’t know where to start
💡 Adjustment Insight: If pricing is a major concern, dedicate more time to discussing pricing strategies.
4. How do you currently attract webinar attendees?
(Since monetization depends on audience size, this helps diagnose marketing gaps.)
✅ Poll Responses:
- A. Email marketing
- B. Social media promotions
- C. Paid ads
- D. Word-of-mouth referrals
- E. I don’t actively promote yet
💡 Adjustment Insight: If many aren’t actively promoting, emphasize effective audience-building tactics before monetization methods.
5. What type of monetization method interests you the most?
(Ask towards the end to tailor final tips and action steps.)
✅ Poll Responses:
- A. One-time ticket sales
- B. Subscription-based access
- C. Sponsorships & brand deals
- D. Affiliate marketing
- E. A mix of these
💡 Adjustment Insight: Based on responses, you can end with actionable next steps focused on the audience’s preferred methods.
- Chat & Reactions: The live chat feature is perfect for spontaneous feedback or questions. I love being able to chat directly with attendees while presenting—it makes the webinar feel more like a conversation.
Here’s a quick video that can help you:
7. Rehearsal and Testing to Avoid Awkward “Wait, What?” Moments
Don’t hit the “start” button without testing everything first. I always do a full tech check and a dry run of my webinar to make sure everything is working smoothly.
- Tech Check: Test your camera, microphone, and lighting. Make sure everything is ready to go. The last thing you want is to realize mid-webinar that your mic is off!
- Trial Run: I can’t stress enough how important rehearsals are. I’ve done entire run-throughs before my webinars to ensure the flow of the presentation, and it’s saved me from awkward moments on many occasions.
8. Backup Equipment to Be the Tech Boss You Were Born to Be
You never know when something might malfunction. A backup microphone, camera, or even a second laptop can save you from a potential disaster.
Personal Experience: During one of my webinars, my laptop froze unexpectedly. Thankfully, I had a backup laptop ready, and I was able to switch over without the audience even noticing smoothly. It’s always worth having those backups, just in case!
How to Create a Webinar Studio
Whether you’re just getting started or you’re an experienced host, creating a webinar studio that looks and sounds professional doesn’t have to come with a hefty price tag.
In this guide, we’ll break down the steps for both beginners and advanced users, showing you how to create a webinar studio that’s both functional and affordable.
How to Set Up a Webinar Studio at Low Cost for Beginners
Setting up a studio at a low cost is fairly easy with just a few essential pieces of webinar tools & equipment. Here’s how to do it without going over budget:
1. Choose the Right Webcam
As a beginner, a good webcam is essential for clear, high-quality video. While you might be tempted to get the most expensive camera, there are affordable options that still deliver great results.
Recommended: The Logitech C920 is a popular and budget-friendly webcam that offers 1080p HD video. It’s plug-and-play, so you can get started quickly with minimal setup.
Pro Tip: Avoid using your laptop’s built-in webcam if possible; they typically offer lower quality compared to external webcams. I learned this the hard way—my laptop’s camera was grainy, which made me feel a bit unprofessional at the time.
2. Invest in a Decent Microphone
Good audio is just as important as good video. Low-quality sound can be a deal-breaker for your audience. Thankfully, there are affordable microphones that still provide excellent audio quality.
Recommended: The Audio-Technica ATR2100x is an affordable USB microphone that delivers professional-quality sound. It’s easy to set up and perfect for beginners.
Pro Tip: Use a pop filter or foam cover to reduce background noise and ensure your voice sounds clear and crisp. I didn’t use one at first, and I definitely noticed that my voice sounded hollow, so adding a pop filter was a game-changer for me.
3. Lighting Setup for Clear Visibility
Proper lighting can dramatically improve your video quality. You don’t have to spend a lot to get good lighting—just a few inexpensive tools can do the trick.
I remember when I first started and didn’t realize how important lighting was until I saw how dark my face appeared on camera. It wasn’t flattering, to say the least!
Recommended: A ring light like the Neewer 10-inch Ring Light Kit is an affordable way to get soft, even lighting that highlights your face and eliminates shadows.
Pro Tip: Place the ring light at eye level for the best effect. It’ll keep you looking bright and flattering on camera.
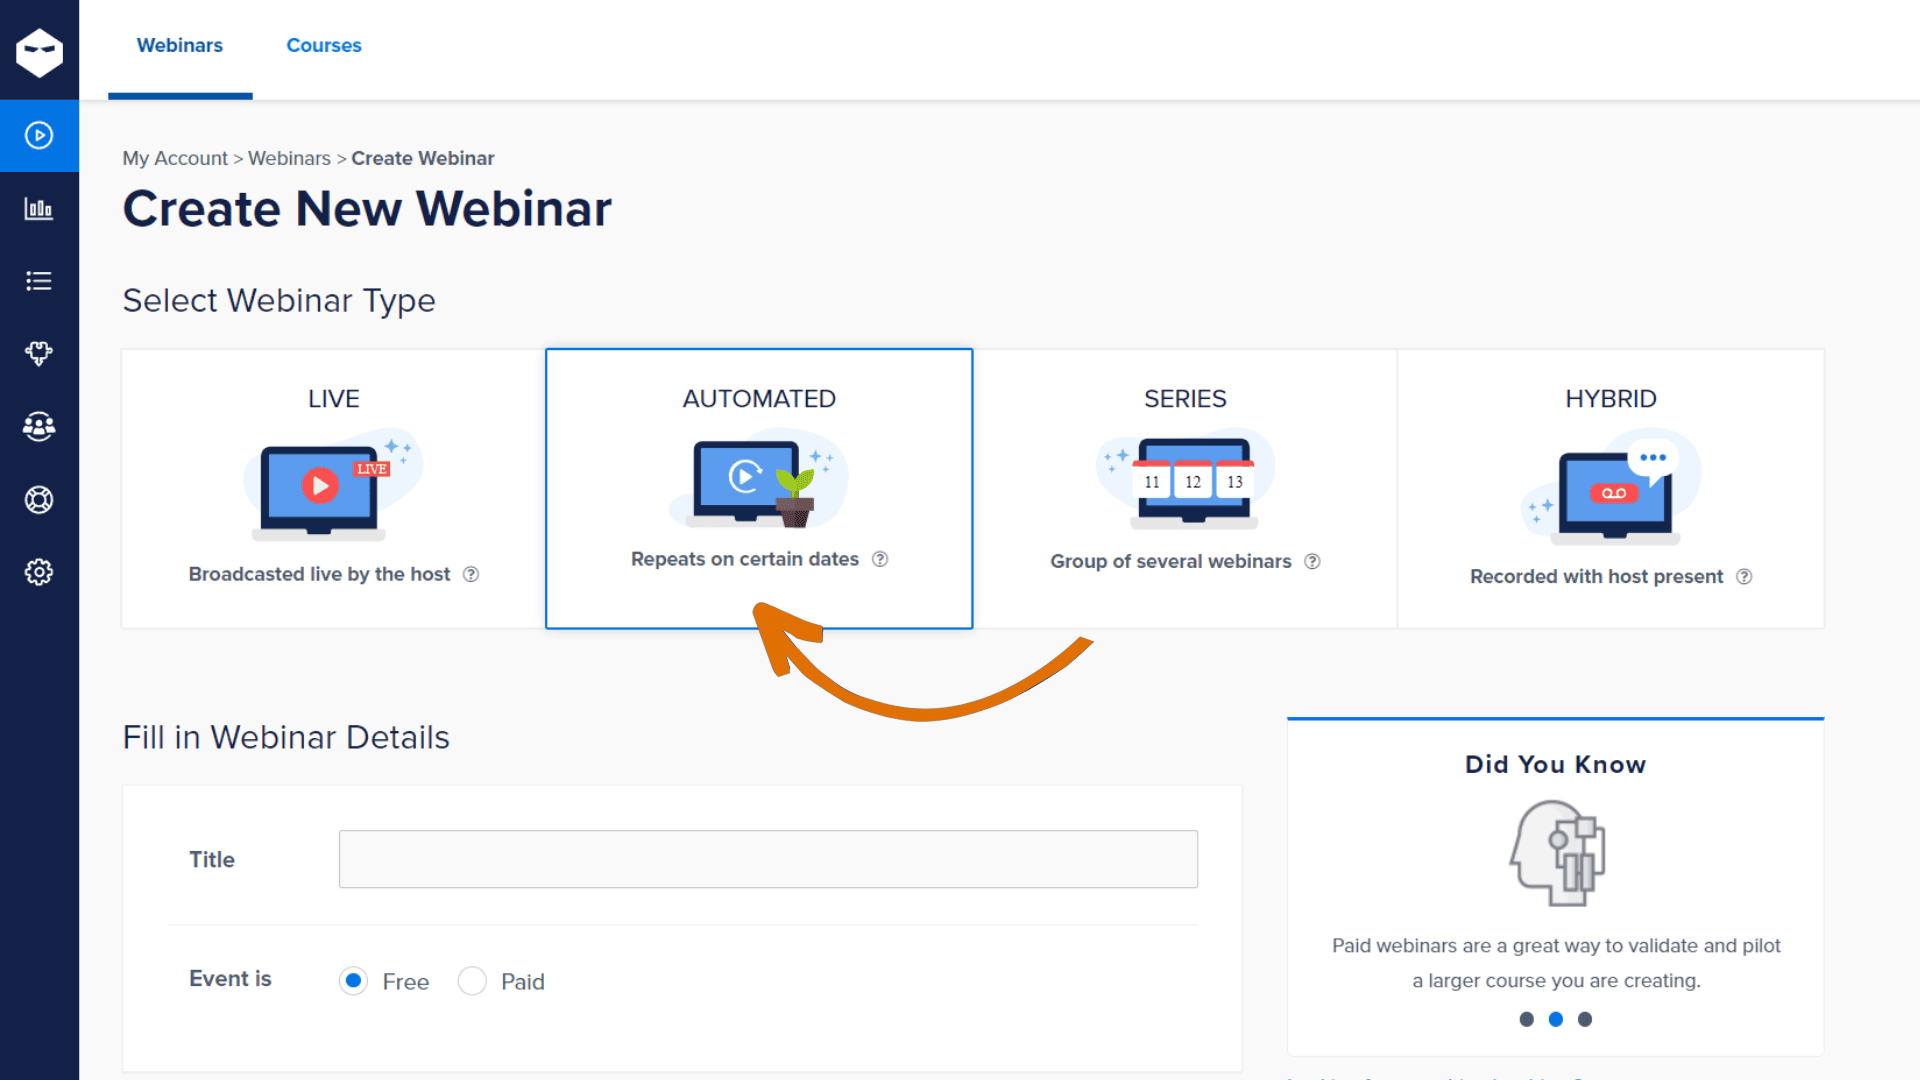
4. Utilize Low-Cost Webinar Software
Many platforms offer low-cost plans with the essential features you need for a basic webinar setup. This is perfect for getting started without a significant investment.
Recommended: WebinarNinja is a great, low-cost option for beginners, offering plans starting from $0.30/attendee/month with a 14-day free trial. With this plan, you can even run CourseNinja for free.
Pro Tip: If your session runs longer, consider upgrading the plan, or check for discounts.
5. Simple Backdrop or Virtual Background
Your background is important for keeping things professional. If you’re in a small space, a simple background will suffice. Alternatively, you can use virtual backgrounds to maintain a neat and polished look.
Recommended: Use a plain wall or a bookshelf as a backdrop, and keep it simple. If you prefer virtual backgrounds, tools like Zoom and WebinarNinja offer free ones that you can use without any extra software.
Pro Tip: Avoid backgrounds that are too busy or distracting. A clean, neutral backdrop is always best. I used to have a bunch of random posters behind me, but when I switched to a plain background, I noticed people paid more attention to what I was saying!
6. Test and Rehearse
Before you go live, always test your camera, microphone, and lighting. This ensures everything works smoothly and reduces the chance of technical issues during your actual webinar.
Pro Tip: Run a trial session with a friend or family member to get feedback on your audio and video quality. Make sure everything is working perfectly before your live event.
How to Set Up a Webinar Studio at Low Cost for Advanced Users
For advanced users, creating a webinar studio involves upgrading your equipment and improving your setup. While you’ll invest in higher-quality tools, you can still keep costs down by making smart choices.
Follow these steps to create a professional webinar studio without breaking the bank:
1. Upgrade Your Camera for Professional Quality
As an advanced user, you’ll want a camera that produces sharp, high-quality video. A DSLR or mirrorless camera gives you superior quality and a more polished look.
Recommended: The Canon EOS M50 is a highly-rated budget DSLR that records in 1080p and is perfect for webinar hosts looking for a professional setup without the high price tag.
Pro Tip: If you’re using a DSLR or mirrorless camera, you’ll need a capture card (such as the Elgato Cam Link 4K) to connect the camera to your computer.
2. Professional-Grade Microphone for Crisp Audio
Investing in a high-quality microphone is essential for clear, professional-grade sound, especially for larger webinars. Audio quality is one area where I didn’t skimp, and it made a noticeable difference.
Recommended: The Shure MV7 is a fantastic USB microphone that offers broadcast-quality audio. It’s perfect for advanced users who need top-notch sound without paying for a studio setup.
Pro Tip: As already recommended, add a pop filter to reduce any unwanted sounds and ensure your voice is clear and crisp.
3. Advanced Lighting Setup for a Studio Look
Good lighting can set your webinar apart and make you look more polished. A professional lighting setup can be done without spending too much money, but it’s essential for achieving that studio-quality look.
Recommended: Invest in softbox lighting kits like the Fovitec StudioPro Lighting Kit. These provide even, diffused lighting that reduces shadows and gives your face a smooth, flattering glow.
Pro Tip: Position your lights at 45-degree angles to the left and right of your face to create even lighting without harsh shadows. It’s the trick I learned from some professional hosts and has been key to looking great on camera.
4. Upgrade to Advanced Webinar Software
As an advanced user, you may need features like branding, custom overlays, and advanced analytics. These tools help you manage and engage a larger audience.
Recommended: WebinarNinja is ideal for advanced users because it allows custom branding, automatic recordings, and integrations with email marketing tools. It’s a full-featured platform that will help you elevate your webinars.
Pro Tip: If you’re looking for specific features, consider alternatives like Demio or Webex, which offer unique functionalities depending on your needs. I’ve used all three, and while WebinarNinja is my go-to, Demio is fantastic for simplicity, and Webex is great for corporate events.
5. Enhanced Backdrop and Studio Design
A professional backdrop can really elevate your webinar’s look. Adding some branded decor, such as a custom banner or a logo, will help reinforce your brand.
Recommended: Use a fabric backdrop or green screen for a clean, customizable background. If you’re in a dedicated space, investing in a branded backdrop or decorative items can create a more professional setting.
Pro Tip: Keep the space minimal and uncluttered to avoid distractions. Small touches like plants or branded elements can make a big difference. I added a plant to my backdrop once, and people started commenting on how welcoming the space looked!
6. Streamline Your Webinar Workflow
As an advanced user, you may need multiple cameras or complex scene switching. A switcher allows you to change between different views without interrupting the flow.
Recommended: The Blackmagic Design ATEM Mini Pro switcher lets you control multiple cameras, adding a dynamic feel to your webinars with easy scene switching.
Pro Tip: If you want more advanced control over your webinar production, use OBS Studio software to create custom scenes, transitions, and overlays.
7. Rehearse, Test, and Have Backups
With a more advanced setup, it’s crucial to test every element before going live. Make sure everything works together seamlessly, and always have backup equipment ready to go.
Pro Tip: Keep spare microphones, cameras, and an extra laptop on hand to be prepared for any tech issues that might pop up.
Bonus: Real-Life Tips for Creating a Professional Webinar Studio at Home
With a little creativity, the right gear, and a few expert tips, you can build a space that elevates your webinars, keeps your audience engaged, and makes you feel like a pro. Here are some fresh, real-life tips for creating your ideal webinar studio at home:
1. Create a Dedicated Webinar Space
One of the best things you can do is designate a specific space in your home for your webinars. This reduces distractions, improves focus, and creates a more professional look. Even if you’re working from a small apartment, you can carve out a corner or a nook that becomes your go-to setup.
Example: Consider using movable partitions or foldable screens to separate your webinar space from other areas in your home. This adds a sense of professionalism without requiring a major renovation.
2. Invest in a Portable Green Screen
A green screen can work wonders for creating a polished, clean backdrop for your webinars. Not only does it give you more flexibility in terms of background (you can choose anything from an office setting to branded graphics), but it’s also a quick way to set up a professional look.
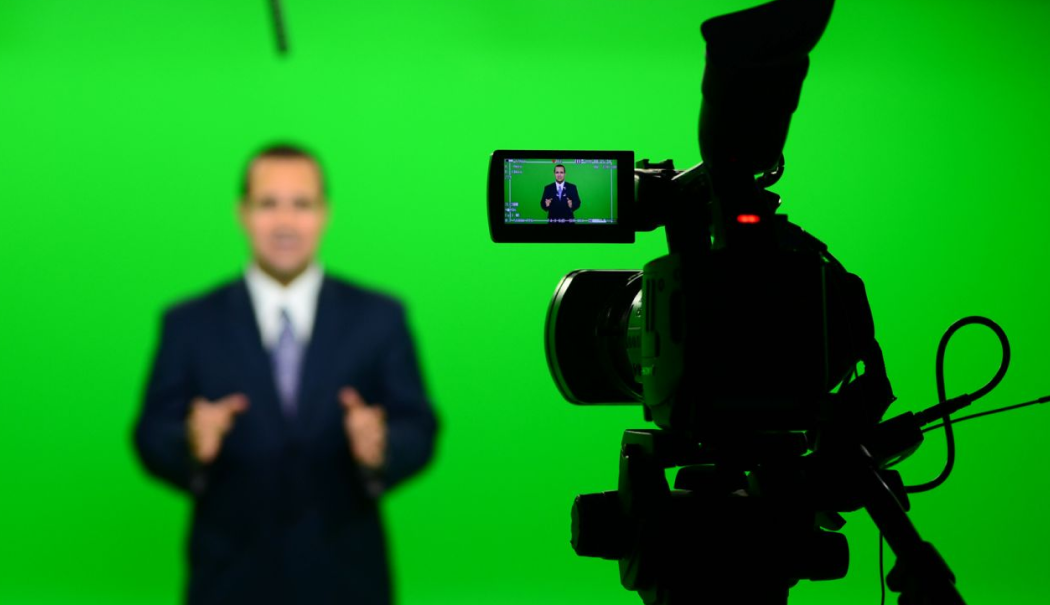
(Image Source: Gearshift)
My Personal Opinion: Invest in a collapsible green screen for easy setup and storage. There are budget-friendly options that you can easily hang or place behind you.
3. Use DIY Soundproofing to Improve Audio
If you’re hosting webinars from home, there’s a good chance your environment isn’t perfectly soundproofed. You don’t need to invest in expensive soundproofing, though. Simple DIY hacks can help reduce echo, background noise, and distractions from outside sounds.
Example: Use foam panels on your walls or even hang thick blankets or curtains to absorb sound. I’ve used moving blankets to cover a wall behind me, and it made a huge difference in eliminating reverb and external noise.
4. Optimize Your Webcam Placement
Webcam placement is crucial for delivering a professional look during your webinars. A common mistake is positioning the camera too low or too high, making you appear disoriented or unengaged.
For best results, position your webcam at eye level or slightly above. This creates a natural, flattering angle and helps maintain better eye contact with your audience.
5. Use a Multi-Device Setup for a Dynamic Presentation
Instead of relying on just one device to run your webinar, use a second laptop, tablet, or phone for managing your audience interactions, chat, and slides. This keeps your primary screen focused on the presentation, while you can manage all the technical details on the second device.
I started using a second tablet to monitor chats and manage polls during my sessions, and it allowed me to stay focused on presenting while handling audience engagement seamlessly.
6. Maintain a Tidy Workspace
A cluttered workspace can distract both you and your audience. Keep your webinar studio clean and organized to maintain a professional appearance.
Pro Tip: Keep only the essentials on your desk—your microphone, camera, and any other tools you’re actively using. Hide away cables or equipment you don’t need on camera.
7. Invest in Wireless Gear for Flexibility
As a home-based webinar host, being tethered to your desk with wires can limit your flexibility, especially if you want to move around or change your setup during the session. Wireless gear allows you to move freely and adjust your environment without worrying about tangled cables.
Pro Tip: Invest in a wireless microphone or Bluetooth headset to avoid cable mess and give you more freedom to move while presenting.
8. Ensure Proper Temperature and Comfort
One often overlooked aspect of hosting webinars at home is comfort. If you’re sitting in front of a camera for an extended period, you need to ensure your environment is comfortable.
Pro Tip: Make sure your room is well-ventilated and the temperature is set to your liking. Being too hot or cold can be distracting, and it’s tough to concentrate if you’re uncomfortable.
I set up a small fan during the warmer months, and it helps keep me cool during long sessions. A comfy chair that supports your posture is also a must for those long webinar marathons.
9. Use Branding and Overlays to Enhance Your Webinar
Branding is everything, especially when you’re trying to project a professional image. Adding logos, lower thirds, and overlays can help reinforce your brand and keep your content looking slick.
My Personal Opinion: Use simple tools like Canva or OBS Studio to create custom graphics for your webinars. These don’t have to be expensive or complicated, but they add a nice touch to your presentation.
What’s the Cost of Setting Up a Webinar Studio?
Setting up a professional webinar studio at home can be tailored to your specific needs and budget. Here’s a breakdown of potential costs:
1. Equipment Costs
- Camera: A basic webcam like the Logitech C920, which offers 1080p HD video, typically costs around $50. However, if it’s high-quality, you can use your laptop’s built-in webcam for free.
- Microphone: A budget-friendly USB microphone such as the Audio-Technica ATR2100x, which offers great sound quality, costs approximately $60. If you already have a decent pair of earphones with a built-in mic, that can work as a cost-free solution as well.
- Lighting: For minimal lighting, a ring light like the Neewer 10-inch Ring Light Kit, which costs about $30, will provide a soft, even glow. Alternatively, you can use natural light.
- Backdrop: You can use a clean, simple background, such as a plain wall, or make a DIY backdrop with items you already own. A green screen setup, if desired, can be purchased for around $100, though it’s not necessary for a basic setup. Also, if your webinar software supports free virtual backgrounds, it’s a win-win.
2. Software Costs
- Webinar Platform: You can opt for low-cost webinar software such as WebinarNinja. Other free platforms like Google Meet or Microsoft Teams can also serve the purpose of smaller, less formal webinars, but you may not get the desired quality.
- Presentation Tools: Free tools like Canva can be used for slides and visuals, though premium plans are available for additional features.
3. Additional Costs
- Internet Connection: A reliable internet connection, preferably wired, is essential. The cost of your internet service is a recurring cost that you’re likely already paying for, so no additional cost will be added specifically for webinars.
- Acoustic Treatment: For a basic setup, you can use household items like blankets, pillows, or even a closet for sound dampening. This eliminates the need for any extra spending.
Estimated Total Costs
- Basic Setup: Approximately $100–$200, depending on whether you already have some equipment (like a laptop’s webcam and headphones). This cost assumes you’re using free software and minimal equipment for a home-based setup.
- Intermediate Setup: Around $300–$500, where you would be upgrading to a basic microphone, webcam, and some lighting for better quality.
- Advanced Setup: $1,000–$2,000, if you’re aiming for professional-grade equipment like a DSLR camera, high-end microphone, advanced lighting, and software.
Start Your Webinar Journey—Affordable, Professional, and Engaging
Setting up a webinar studio at home doesn’t need to be expensive. With the right tools, thoughtful planning, and a bit of creativity, you can create a professional-quality setup on a budget. Whether you’re just starting out or looking to upgrade, affordable options are available for every stage.
Focus on essentials like a good webcam, microphone, and lighting while leveraging good webinar platforms to get started.
For instance, software like WebinarNinja can simplify your setup by offering customizable branding, automated registration, real-time audience engagement, and seamless integrations, making your webinars look and run professionally.
You can try such platforms and equipment to create a webinar studio that connects with your audience.
Want to host a webinar for free?
Use WebinarNinja to teach, improve marketing, and grow your sales.